Step 6 (continued):
•
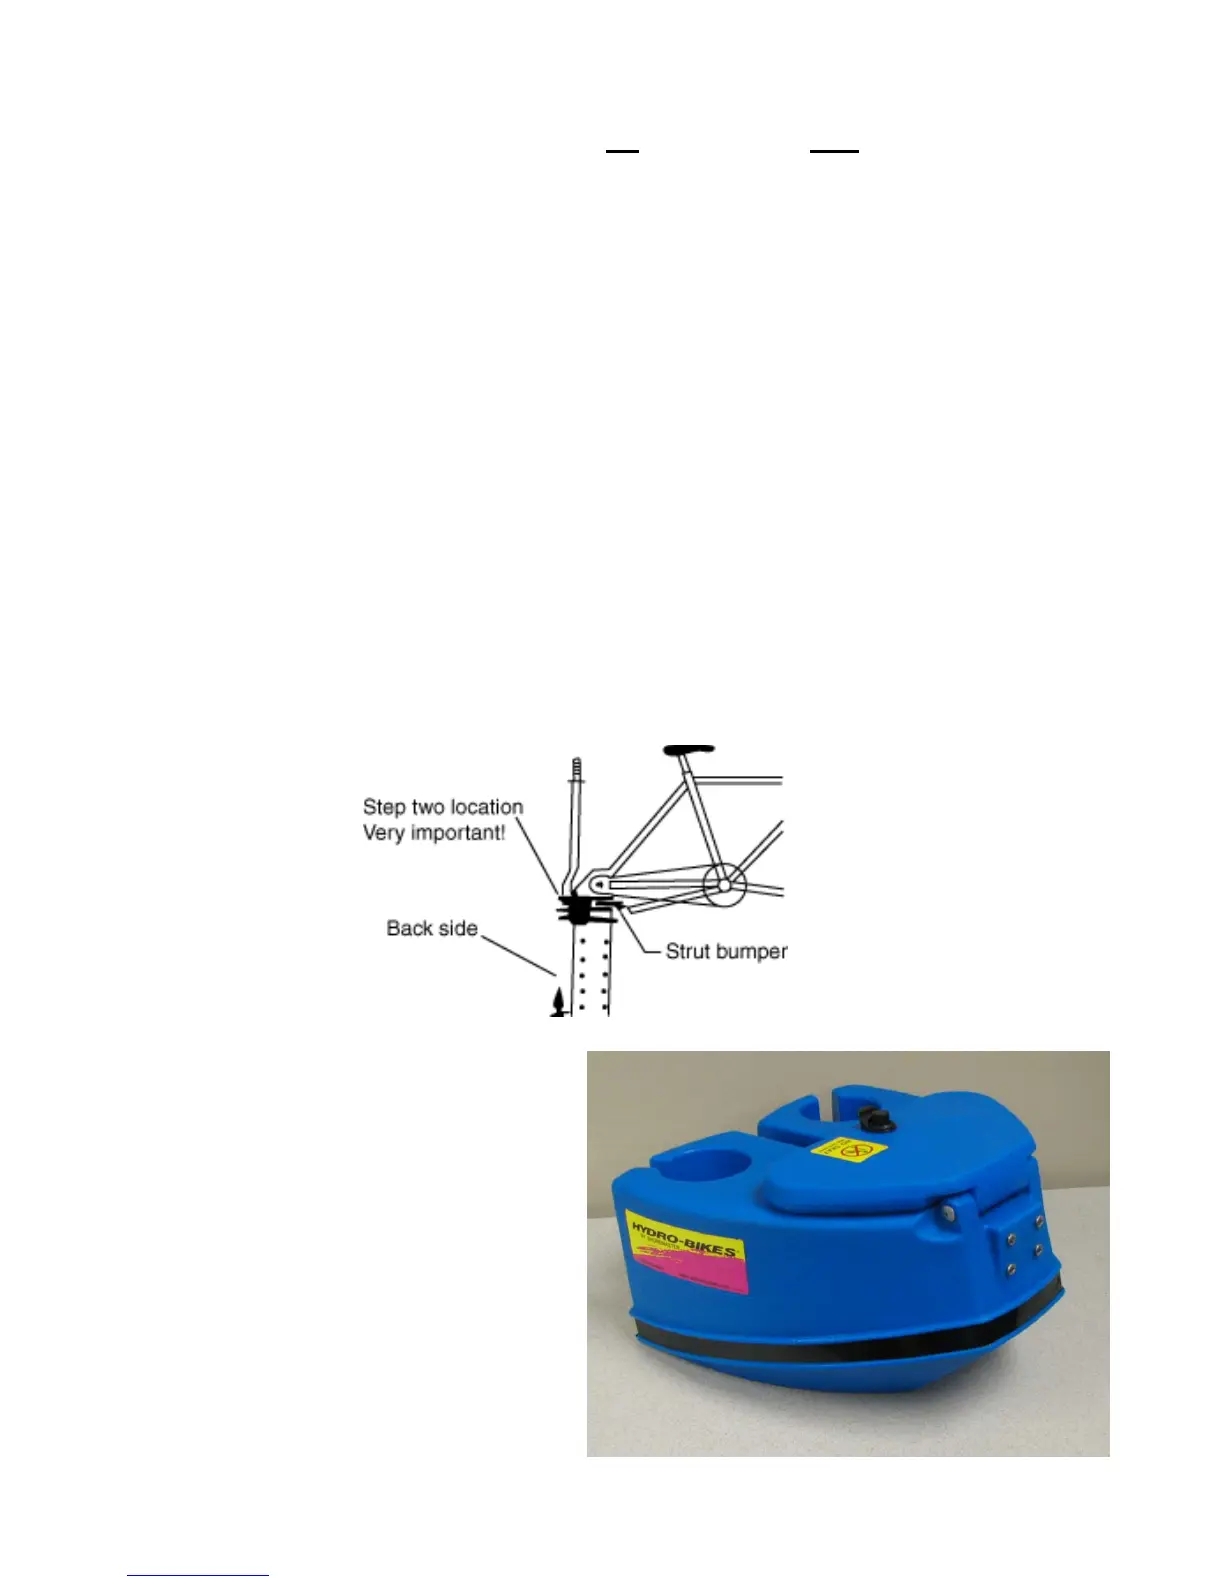
(2) Position the top of mount just below the 2
nd
screw from the TOP on the backside of the
Drive Train (just above the drive train strut bumper). When installation of the drive train lever is
complete, the DT lever Clamps will straddle the strut bumper. Failure to do this will impair
lifting of the drive train. Very Important!
•
(3) Place the lever onto the mount allowing the mounting key to fit into the lever slot. The
bottom of the lever should be flush with the bottom of the mount.
•
(4) Slide the first clamp up to the TOP of the mount and lightly tighten
•
(5) Position the second clamp just above the BOTTOM of the mount and tighten securely,
making sure the key fits into the lever slot. Tighten the top clamp securely. The third clamp
should be positioned between 1
st
and 2
nd
clamps. Installation is now complete. The lever
should fit between the frame and the side-deck when the Drive Train is in the up position.
•
(6) Recheck and re-tighten clamps after first use and then periodically thereafter.
•
(7) If the Drive Train becomes hard to rotate DO NOT use the DTL to force the Drive Train up.
(This may cause the DTL and mount to fail). If the Drive Train is hard to rotate, place 1 or 2
drops of oil at the top of the friction lock and rotate the Drive Train 3 or 4 times to allow the oil
to seep in between the friction lock and frame. DO NOT OVER OIL!!
Step 7: Installation of Console.