3
INSTALLING THE PX2
1. Securely wall mount the PX2 using the
provided screws and mounng holes.
2. Plug the power adapter into an outlet and
connect the other end to the PX2 power port
on the boom panel (see image above).
3. Plug the temperature and signal probes into
the corresponding ports on the boom panel
and run your probe cables their full length up
to and across the ceiling if possible, toward the
center of the grow space. Ideally, suspend the
probes down into the space above the plant
canopy if possible. Take care not to stress or
damage the probe cables when securing them
to walls and ceilings.
IMPORTANT: A bare probe receiving direct light from a xture can cause premature dimming
and/or inaccurate temperature readings. When seng up the temperature probes, shield them
from exposure to direct light. Download a probe shield on the PX2 product page at Hydrofarm.
com, or make a shield from an upside down paper or plasc cup.
INSTALLATION
4" (99.8 mm)
1
3
2
4 5 6
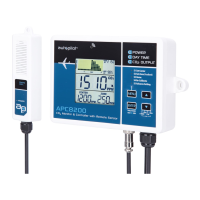
1 SET buon
2 Turn the page
3 Cursor Right
4 Increase
5 Decrease
6 Menu/
Conrm/Save
A
Power supply port
B
Temperature probe
port Zone A
C
Signal port Zone A
D
Temperature probe
port Zone B
E
Signal port Zone B
C EDB
A
1" (27.1 mm)
5" (127.5 mm)
OVERVIEW
Mounng holes
 Loading...