SYSTEM OPERATIONASSEMBLE THE SYSTEM
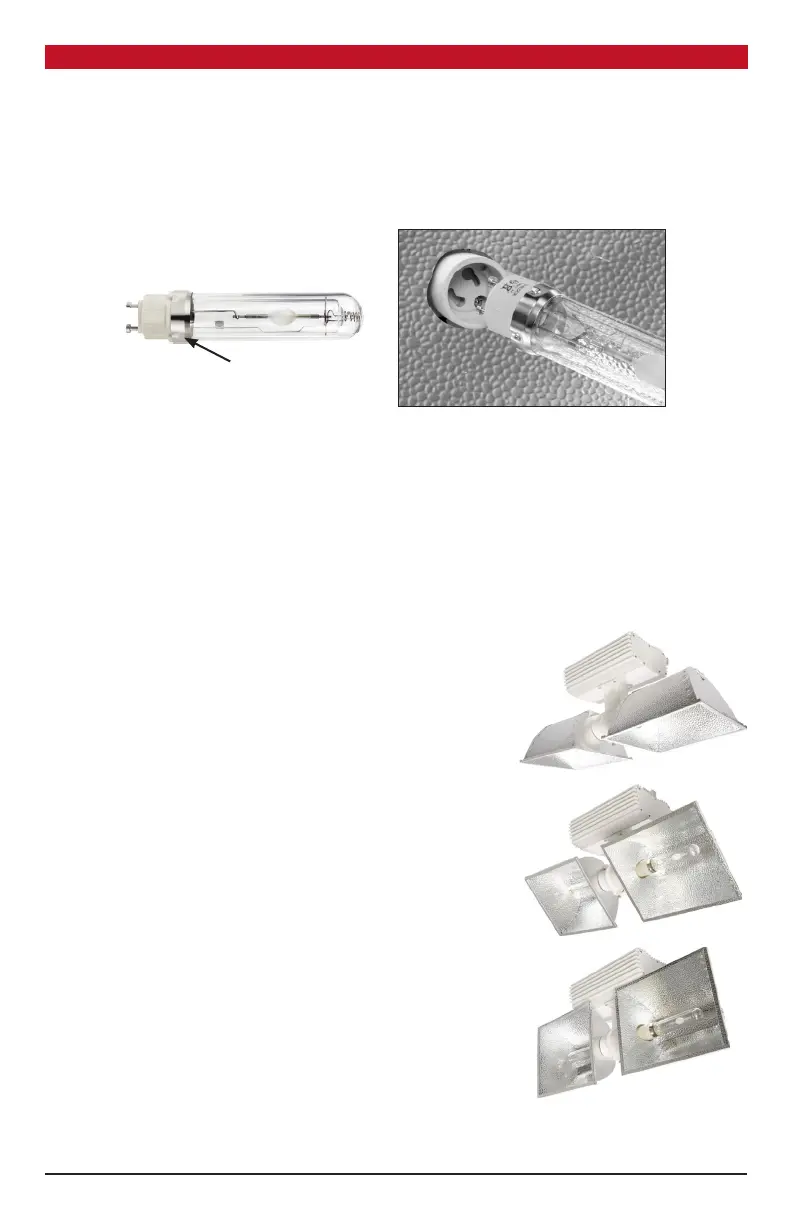
INSTALLING THE LAMPS
Power must be turned off and lamp allowed to cool prior to inserting or removing the lamp.
1. Install the lamps firmly into the lamp sockets.
• Hold onto the metal band at the base of the lamp to install or remove the lamp.
• Insert the bi-pins in the lamp base into the matching holes in the lamp socket.
• Twist the lamp base a quarter turn in a clockwise rotation to securely seat it into the socket.
When the lamp is properly installed, the base will stop turning and the lamp will feel firmly
seated.
Periodically inspect the lamp’s outer protective envelope. Replace any lamp that shows scratches,
cracks or damage. Failure to replace a damaged lamp could lead to damage to other components or
cause a fire if the lamp experiences a catastrophic failure.
NOTE: For proper break-in on new lamps, we recommend that you run the ballast and lamp for at
least 12 straight hours after initial startup. This will improve lamp life and performance.
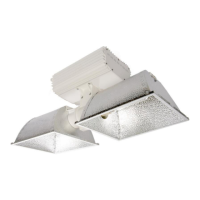
DETERMINE REFLECTOR POSITION
The Dual CMh System can be set in four different configurations.
Depending on the amount of space in your grow area, the
system can be configured to hang with the ballast positioned
vertically or horizontally. The vertical configuration shown at
right is designed for overhead hanging, when you have ample
headroom above the canopy; while the horizontal configuration
(see fig. 2 on opposite page) is designed for low-profile situations
with less vertical space above the fixture.
In addition to those two main configurations, two additional
angles are available. The reflector pair can be locked into two
angles between the vertical and horizontal configurations (see
images at right and below right). These are useful for aisle-end
and side lighting situations where you need the system’s output
directed in one direction rather than spreading out.
The angle of the reflectors can be selected by pulling up on the
release pin located near the integrated hanger on the armature.
When setting a reflector angle, be sure the release pin clicks back
down into place to secure the reflectors in that position.
METAL BAND
6
 Loading...