Hypnocube 4Cube Instructions v 6.5, December 2013
- 17 -
Make 8 equally spaced marks on the jig, and then make 8 holes of LED diameter. A pen punches holes fine in
cardboard, and a drill works for the wood jig shown above.
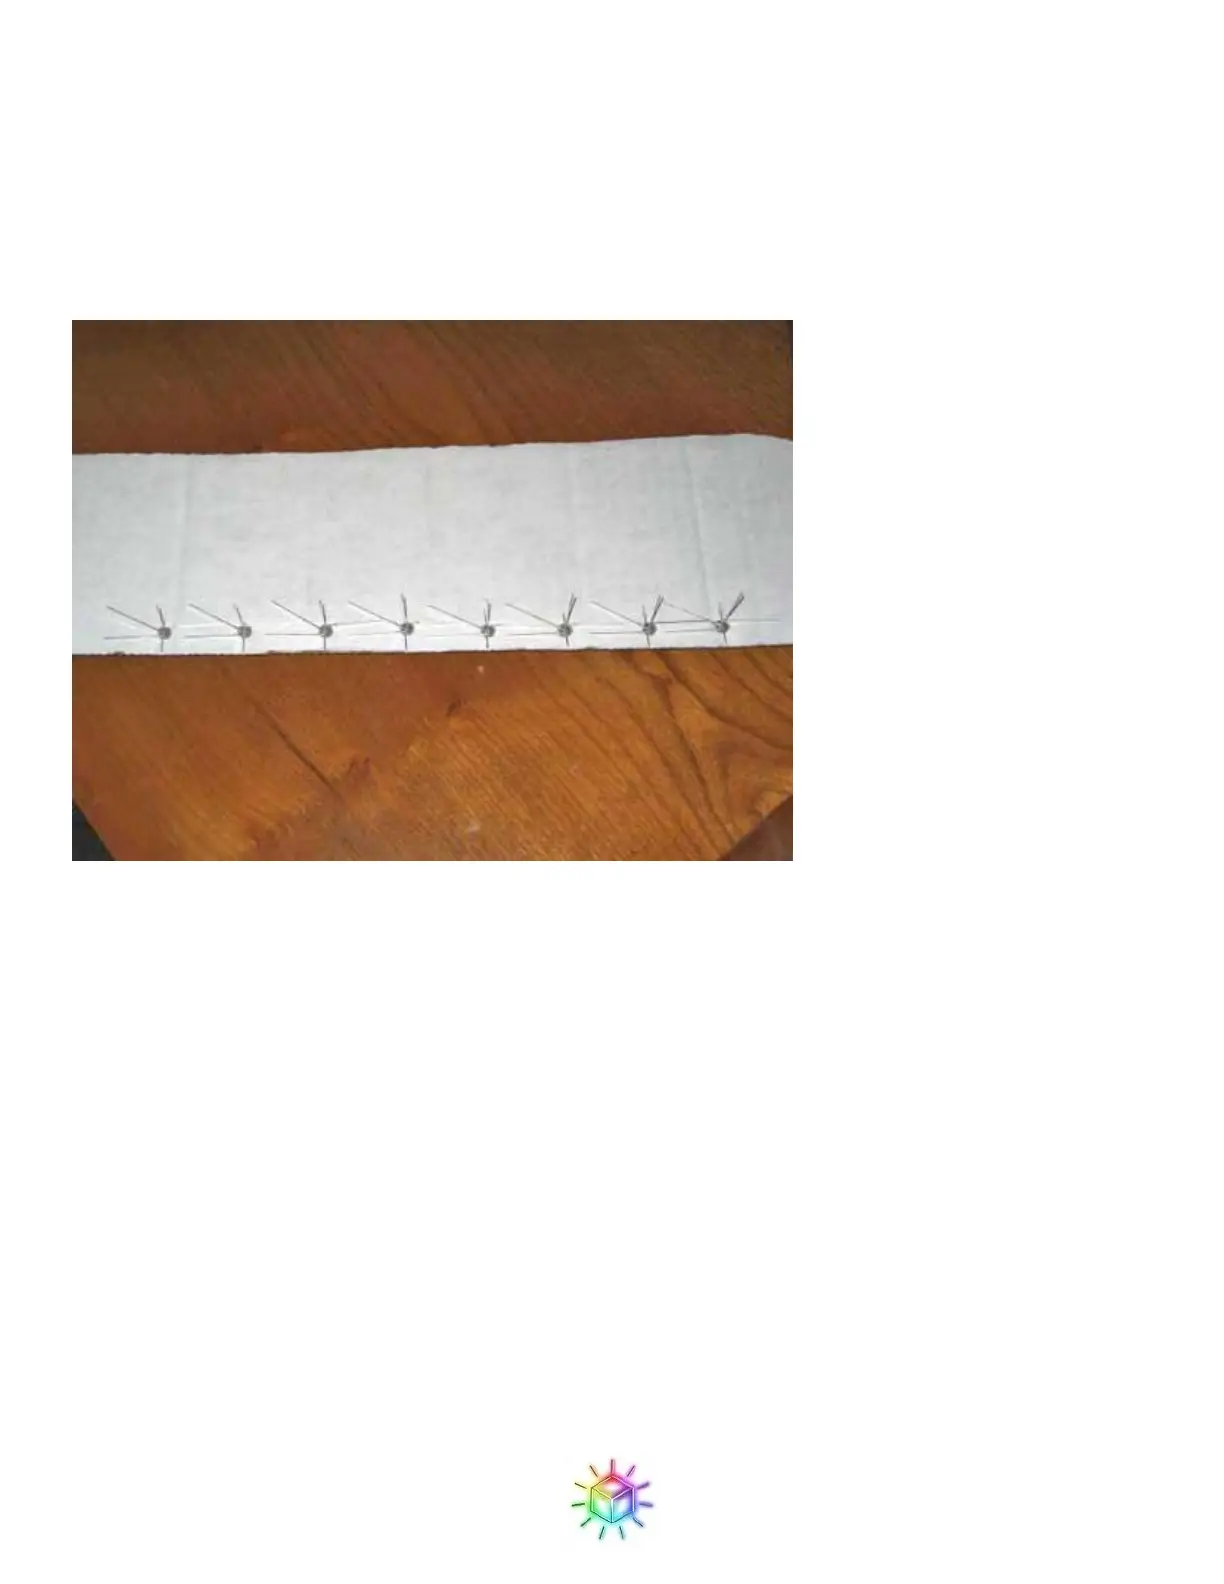
Next place 8 LEDs in the jig, as in Figure 33 and Figure 36. The LEDs must all be rotated in the same
orientation, with the red and green leads pointing parallel to the axis of the jig holes. On the cardboard jig, the
green wires should be on the edge with the blue (angled) wire pointing towards the center.
Figure 33: A cardboard jig with LEDs.
Next we will be soldering a wire across the LEDs.
First, a note on solder. We’re about to solder to galvanized steel, which some people will tell you is insane.
Well, it’s a bit loopy, but works well given the right solder. I use 63/37 Sn/Pb solder, which works quite well. I
believe 60/40 works as well. 50/50 may not work, and I know the lead-free solders I’ve tried were miserable.
Before attaching the cross wires, note there is a correct and incorrect side for the cross wire as shown below.
The reason to lay them on this side is to provide more room to connect the red drop wires later. Note in these
computer rendered images exaggerate the proximity of the LEDs, and show the red and blue leads intersecting;
in real life they may be just touching, but this is not a concern as they will be trimmed down at a later step.
All that we will be soldering in this step the yellow cross wires to each gray ground wire, connecting 8 LEDs
into a single strip.
 Loading...