6
DO-IT-YOURSELF MAINTENANCE
36
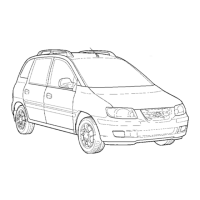
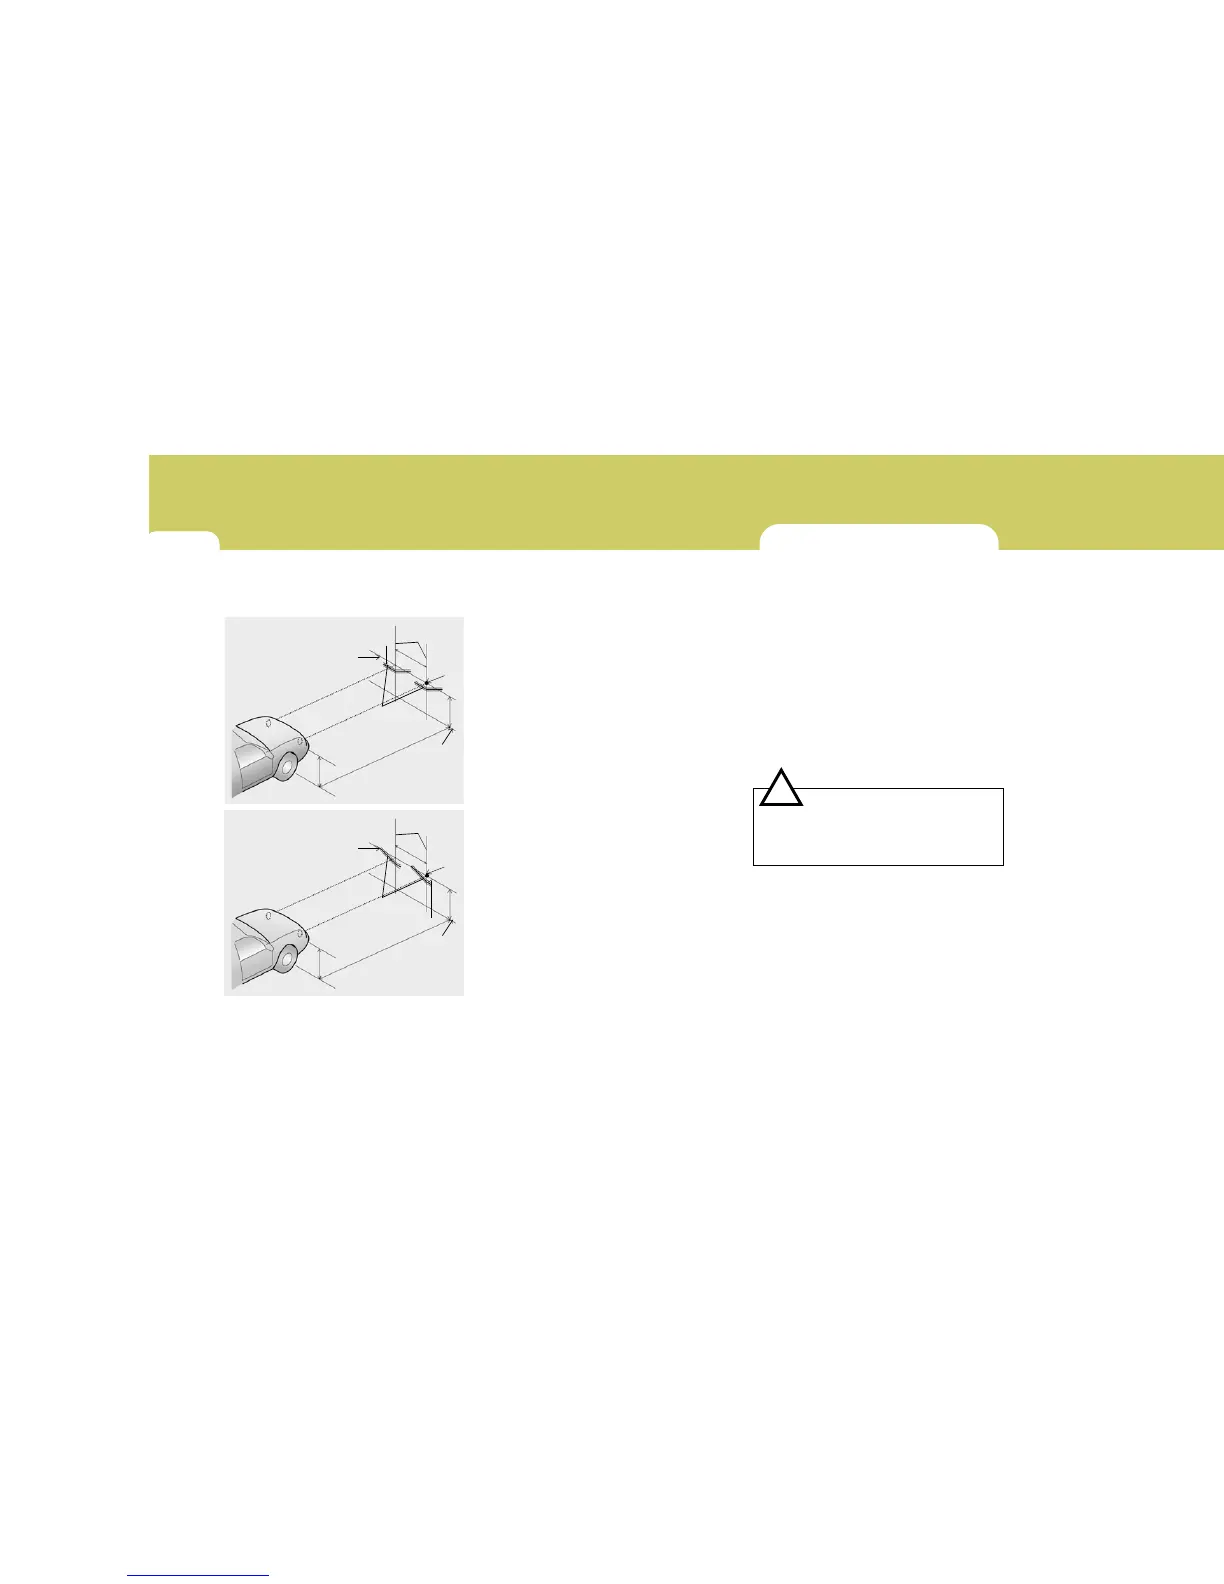
be checked using an aiming screen as
shown in the illustration. Turn on the
headlight switch. (Low Beam Position)
1. Adjust headlights so that main axis
of light is parallel to the center line
of the body and is aligned with point
"P" shown in the illustration.
2. Dotted lines in the illustration show
the center of the headlights.
Specifications:
"H"
Horizontal center line of headlights
from ground
: 675 mm (26.5 in.)
"W"
Distance between each headlight
center
: 1,177 mm (46.3 in.)
"L"
Distance between the headlights and
the wall that the lights are tested
against
: 3,000 mm (118 in.).
REPLACING HEADLIGHT
BULBS
G260A03A-GAT
Before attempting to replace a head-
light bulb, be sure the switch is turned
to the "OFF" position.
The next paragraph shows how to
reach the headlight bulbs so they
may be changed. Be sure to replace
the burned-out bulb with one of the
same number and wattage rating.
See page 6-38 for the wattage descrip-
tions.
CAUTION:
Keep the lamps out of contact with
petroleum products, such as oil,
gasoline, etc.
!
G290B02FC-GAT
Adjustment After Headlight
Assembly Replacement
If the vehicle has had front body repair
and the headlight assembly has been
replaced, the headlight aiming should
G290B01L
L
W
H
H
Cut-off line
"P"
30mm (1.18 in.)
Vertical line
Horizontal line
Ground
line
LHD
G290B01L-D
L
W
H
H
Cut-off line
"P"
30mm (1.18 in.)
Vertical line
Horizontal line
Ground
line
RHD
 Loading...