06 | Blinky
Powering your Alarm Clock
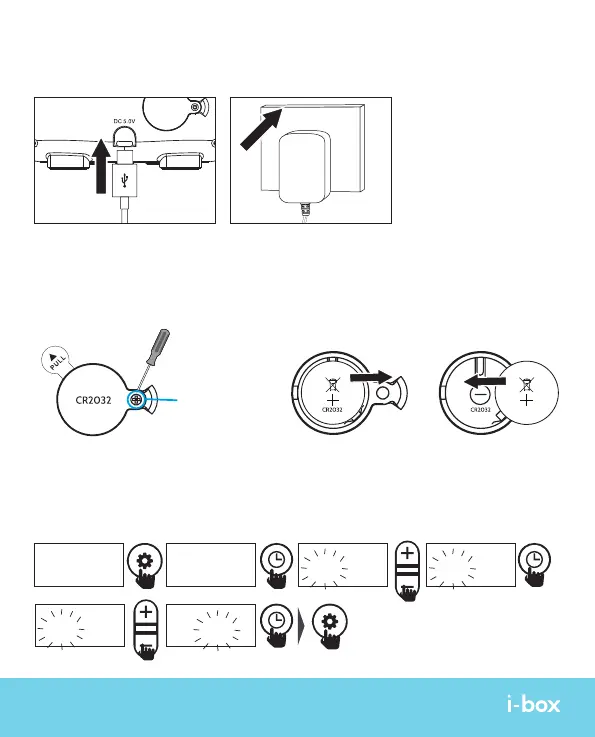
To power the i-box Blinky alarm clock, plug the USB C adaptor (supplied) into a powered USB
socket and the USB C connector into the Power Supply Socket (6) on the back of the Blinky.
Battery Backup Installation
1 x CR-2032 battery is installed in the battery compartment (5) to provide a backup
power supply. If the mains supply is disconnected or interrupted this backup power
supply ensures that the time and alarm settings are saved but does not power any other
functions. Remove the plastic tab as shown below to activate the battery.
Replacing the battery
Remove screw first
to remove battery
compartment cover
Setting the Clock
To set any setting on the Blinky, first check that the lock is in the off position, then press the
Set Key (11) to enter set mode; the word SET will appear on screen. Then short press the Clock
key (7) to start setting the time. Use the UP and DOWN keys to change the setting and Clock
key to set it and move on to the next setting. Press Set Key (11) to exit setup mode.
12
:
00
12
:
00 12
:
00 3
:
00
3
:
00 3
:
27
SET
SET SET
SET
SET
AM
AM AM
PM
PM PM
C
R
2
0
3
2
3
V
O
L
T
S
L
I
T
H
I
U
M
B
A
T
T
E
R
Y
C
R
2
0
3
2
3
V
O
L
T
S
L
I
T
H
I
U
M
B
A
T
T
E
R
Y