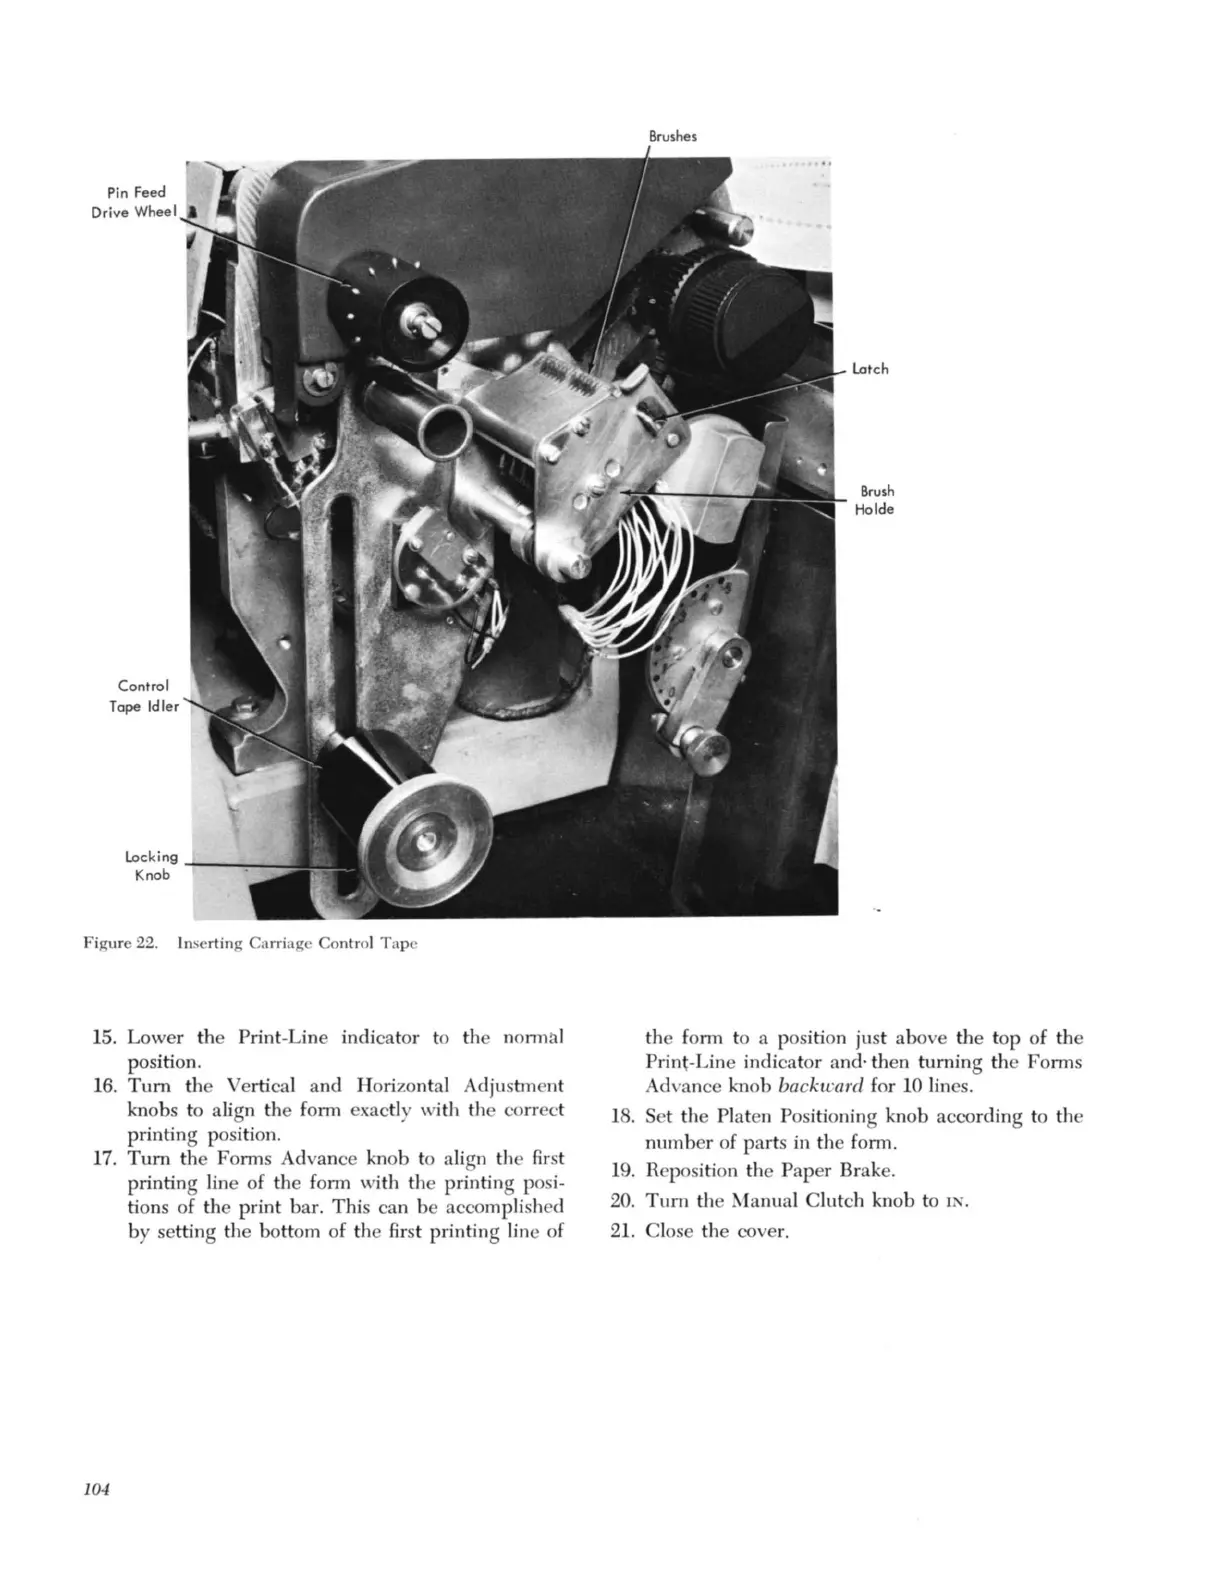
Pin Feed
Drive
Wheel
Control
Tape Idler
Locking + _--.,..._.....1
Knob
Figure
22
. Inserting Carriage Control Tape
15. Lower the Print-Line indicator to the
nOl1l1al
position.
16.
Tum
the Vertical and Horizontal Adjust
ment
knobs to align
the
form exactly with the correct
printing position.
17.
Tum
the Forms Advance
l..
'
l1ob
to align the first
printing line of the form
wi
th the printing pos
i-
tions of the print bar. This can be accomplished
by
setting the bottom of the first printing line of
104
Brushes
Lotch
Brush
Holde
the form to a position just above the top of the
Print-Line indicator and· then turning the Forms
Advance knob backward for
10 lines.
18.
Set the Platen Positioning knob according to the
number of parts in the form.
19. Reposition the Paper Brake.
20.
Tum
the Manual Clutch knob to
IN.
21.
Close the cover.
 Loading...