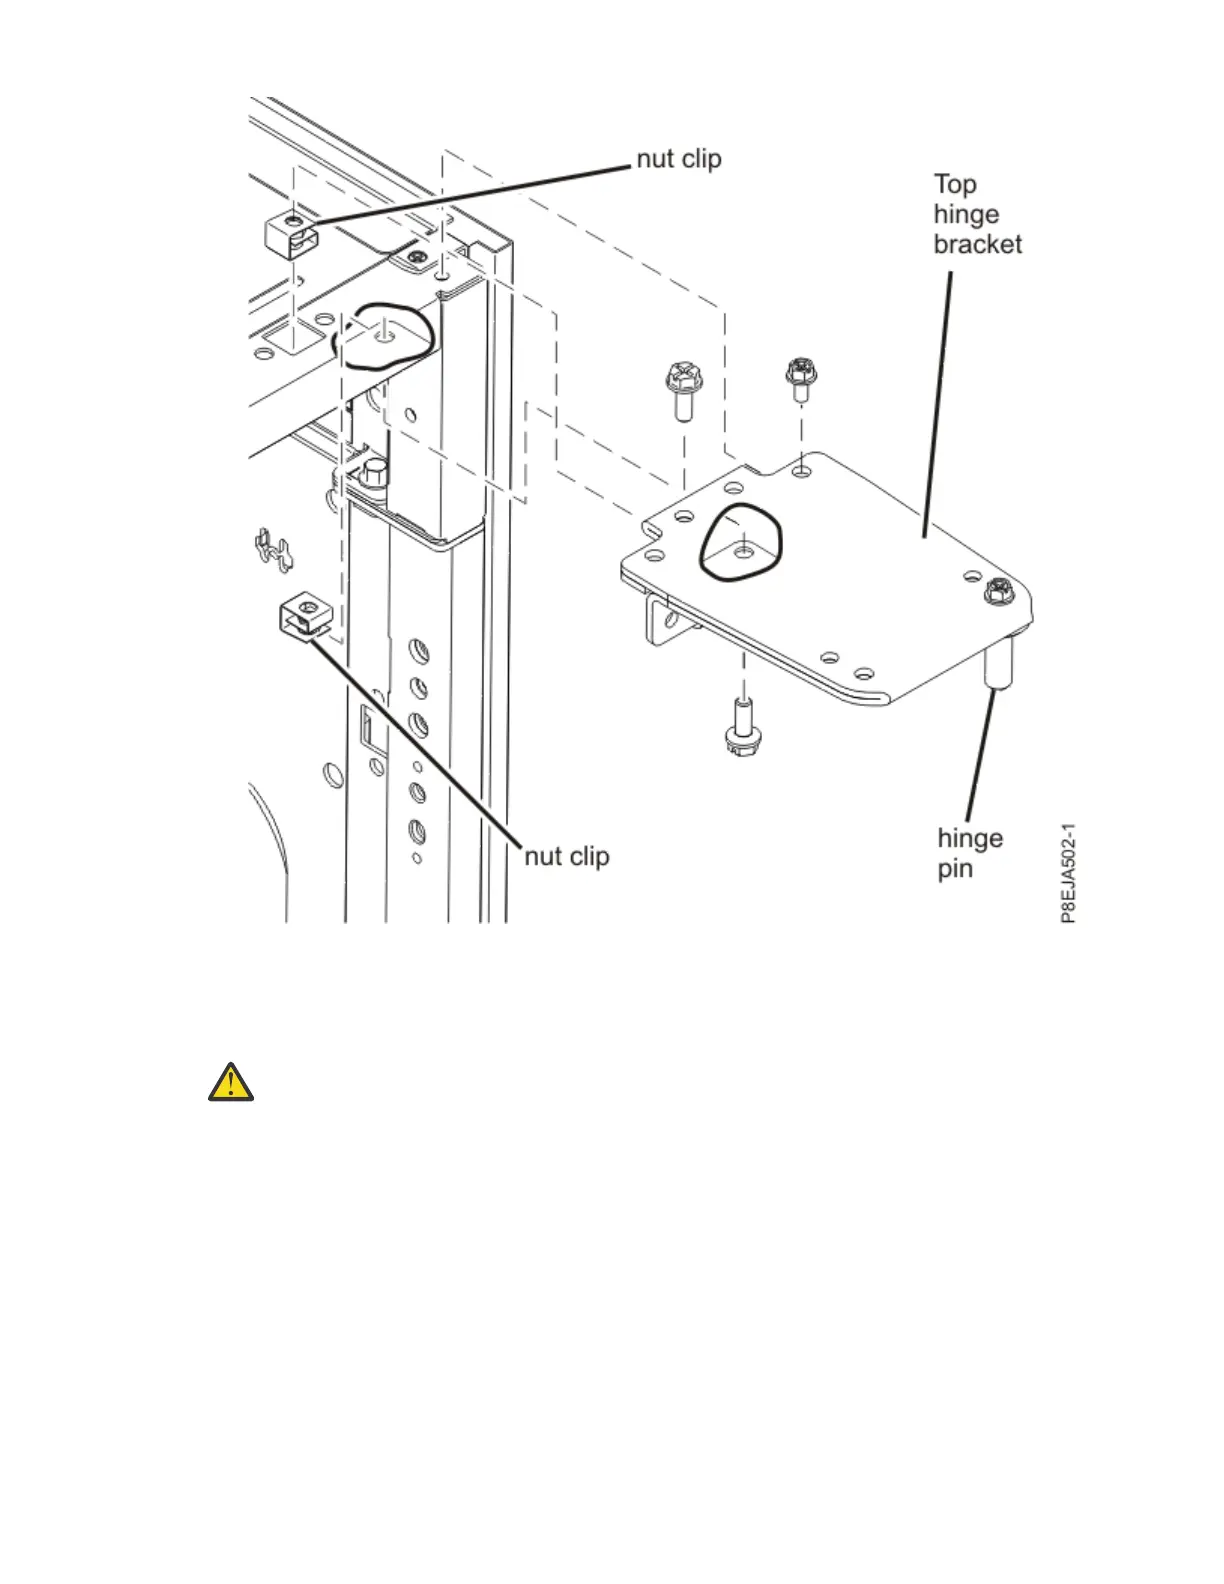
Figure 106. Partially installing the top hinge bracket
11. Using a utility knife or similar cutting tool, slit the heat exchanger carton vertically on each end of one
of the long sides of the carton. Fold down the carton to cover the floor surface.
12. Place three of the rectangular cardboard packing inserts evenly on the unfolded cardboard.
Attention:
a. Because of the size and weight of the heat exchanger, three trained persons are required
to install or remove the heat exchanger.
b. You must remove the power from the rack and all components before you connect or
disconnect the water supply lines and drain or ll the heat exchanger.
13. With the three required people (one person on each end and one person in the middle), rotate the
heat exchanger 90° and up onto the three rectangular packing inserts.
14. With one person holding the heat exchanger steady on the package inserts, have another person
remove the inner and outer hose access panels. Push the panels up and out to remove them. Set the
hose access panels aside.
15. Position one person on each end of the heat exchanger. Have each person grasp and hold the under
side of the heat exchanger with one hand and hold the top of the heat exchanger with the other hand.
Position the third person in the middle of the heat exchanger and grasp the heat exchanger by the
handles. Have all three people carefully lift the heat exchanger and carry it to the rear of the rack.
Racks and rack features
149
 Loading...