16. When the heat exchanger is in position at the rear of the rack, carefully rest one corner of the heat
exchanger on the floor. Stand the heat exchanger in an upright position.
17. Using the lift handles and the required three people, tilt and hold the heat exchanger close to the rear
door opening and align the hole in the bottom of the heat exchanger with the hinge pin on the bottom
hinge bracket. You might have to move the heat exchanger around until the pin slides into the hole in
the bottom of the heat exchanger.
Note: There are two holes on the bottom hinge side of the heat exchanger. Make sure that the hinge
pin goes into the hole that is closest to the rear of the heat exchanger.
18. While two people hold the heat exchanger steady, have a third person climb the platform ladder, and
add put the hinge pin that you set aside into the hole on the top of the heat exchanger.
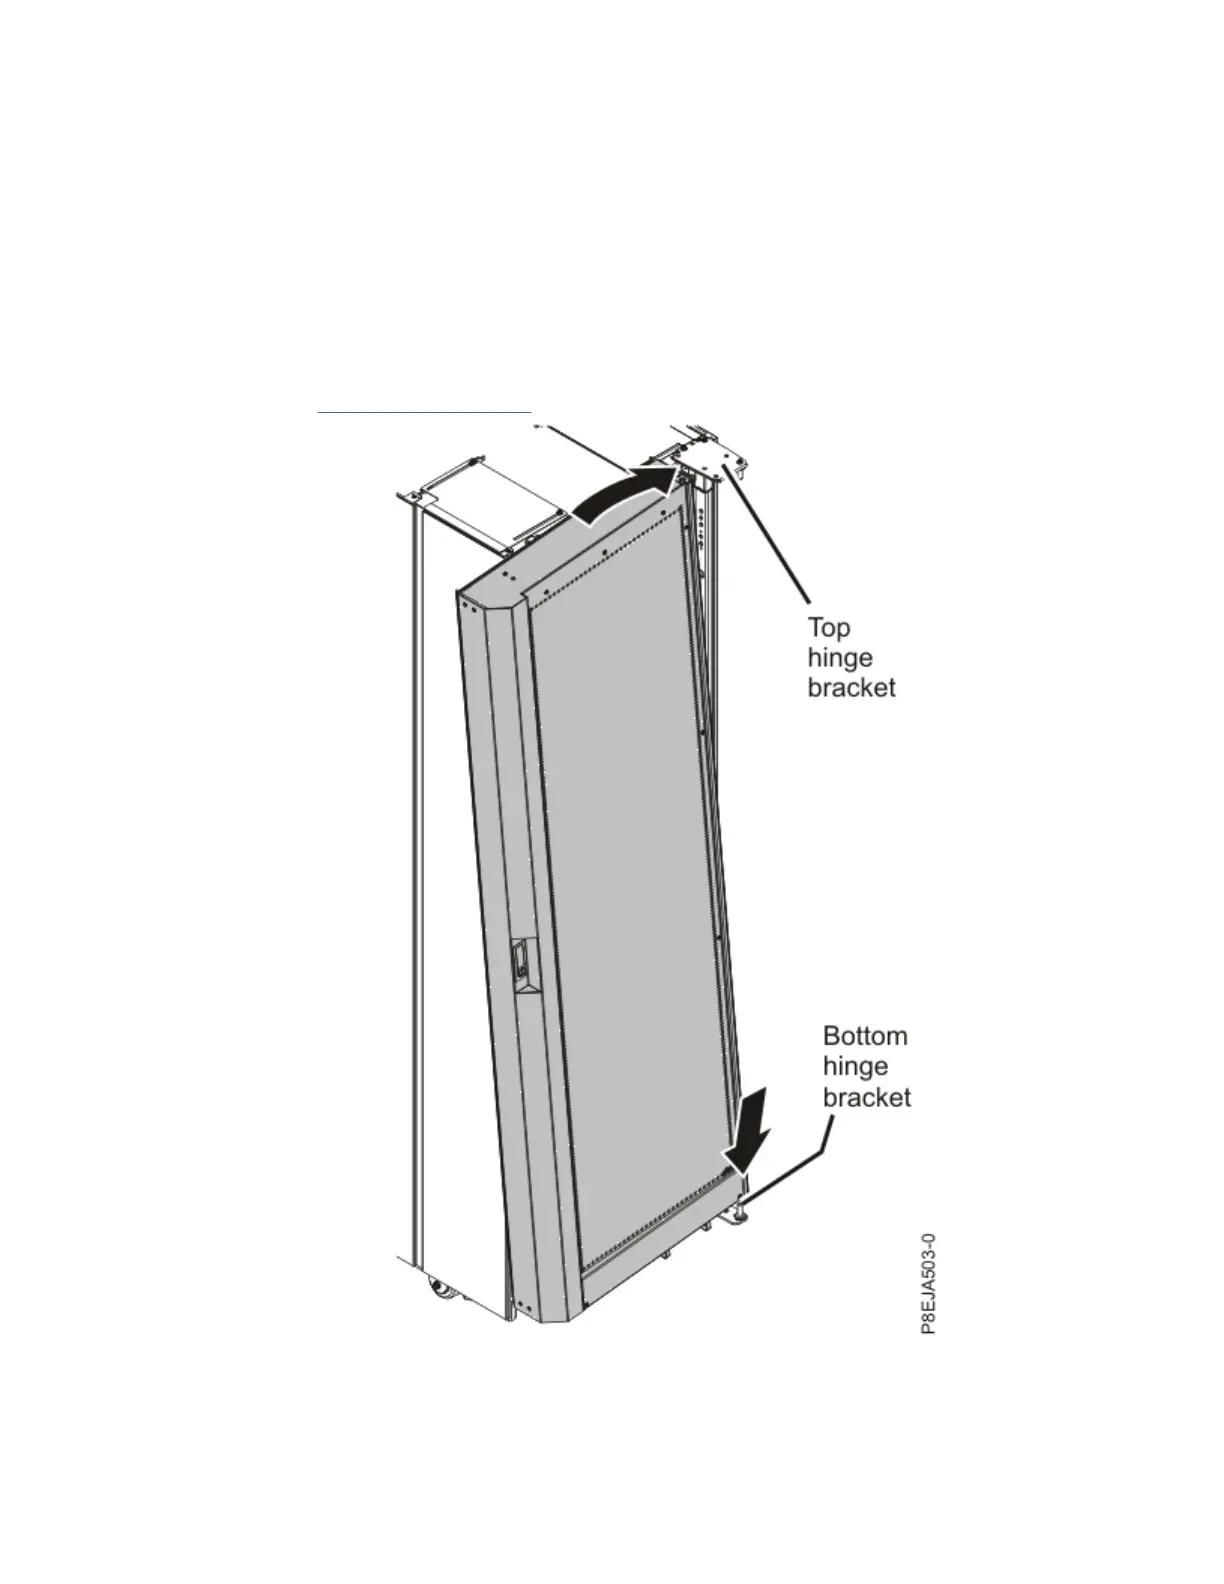
19. Push up on the upper hinge bracket. Align the top of the hinge pin with the hole in the hinge bracket,
as shown in Figure 107 on page 150.
Figure 107. Aligning the bottom hole with the hinge pin
20. Secure the top hinge bracket to the rack with three screws. Do not fully tighten the screws.
21. Center the top of the rear-door heat exchanger with the rack, and then tighten the upper two hinge
screws so that they attach to the rack top hat. Open the door and tighten the third screw that
150
Power Systems: Racks and rack features
 Loading...