3 Two locked/unlocked stickers
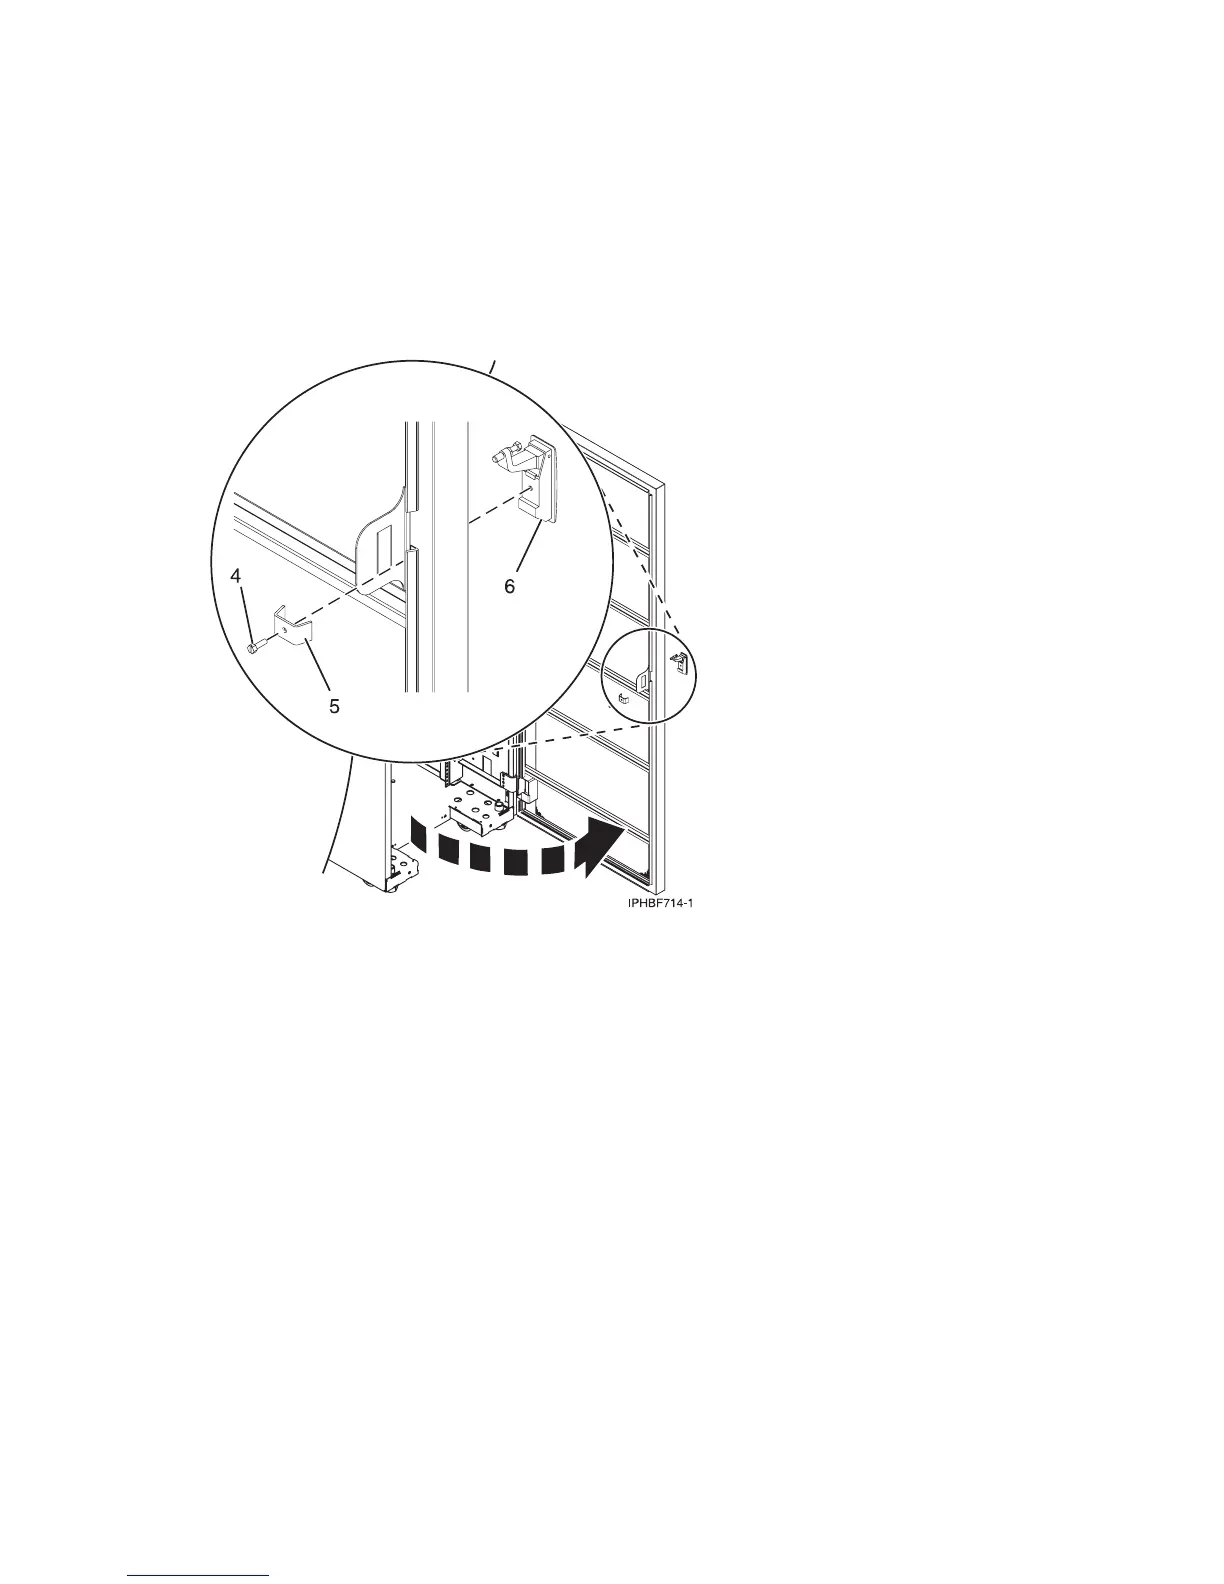
3. Remove the existing door latch.
a. Open the front rack door.
b. On the inside of the door, remove the screw (4) in Figure 26 that secures the lock to the rack door.
c. Remove the bracket (5).
d. From the outside of the door, remove the door latch (6).
Note: If the rack is equipped with the ruggedized kit, remove the jam nut and hex nut from the
existing door latch and reinstall both nuts on the new door lock latch.
4. Install the locking latch.
a. Insert the keyed rack lock into the latch slot on the front of the door (6) in Figure 26.
b. Secure the lock by attaching the lock bracket (5) with the screw (4), on the inside of the door.
5. Repeat steps 3 and 4 to install the second lock on the back rack door.
6. Install a security slide bar on the right side of the rack.
Note: Each slide bar rail has two long tabs on the bottom of the rail. The slide bar rails are identical
and can be installed on either the right or left side cover panel.
a. Unlatch right-side cover panel and lean the panel back so that you can access the top of the panel.
b. With the flat side of the slide bar rail (7) in Figure 27 on page 30, facing the inside of the cover
panel (8), insert the two tabs (9), on the slide bar rail into the two vertical support channels (10)
on the side cover panel.
Figure 25. Rack security kit inventory
Figure 26. Removing the existing door latch
Racks and rack features 29
 Loading...