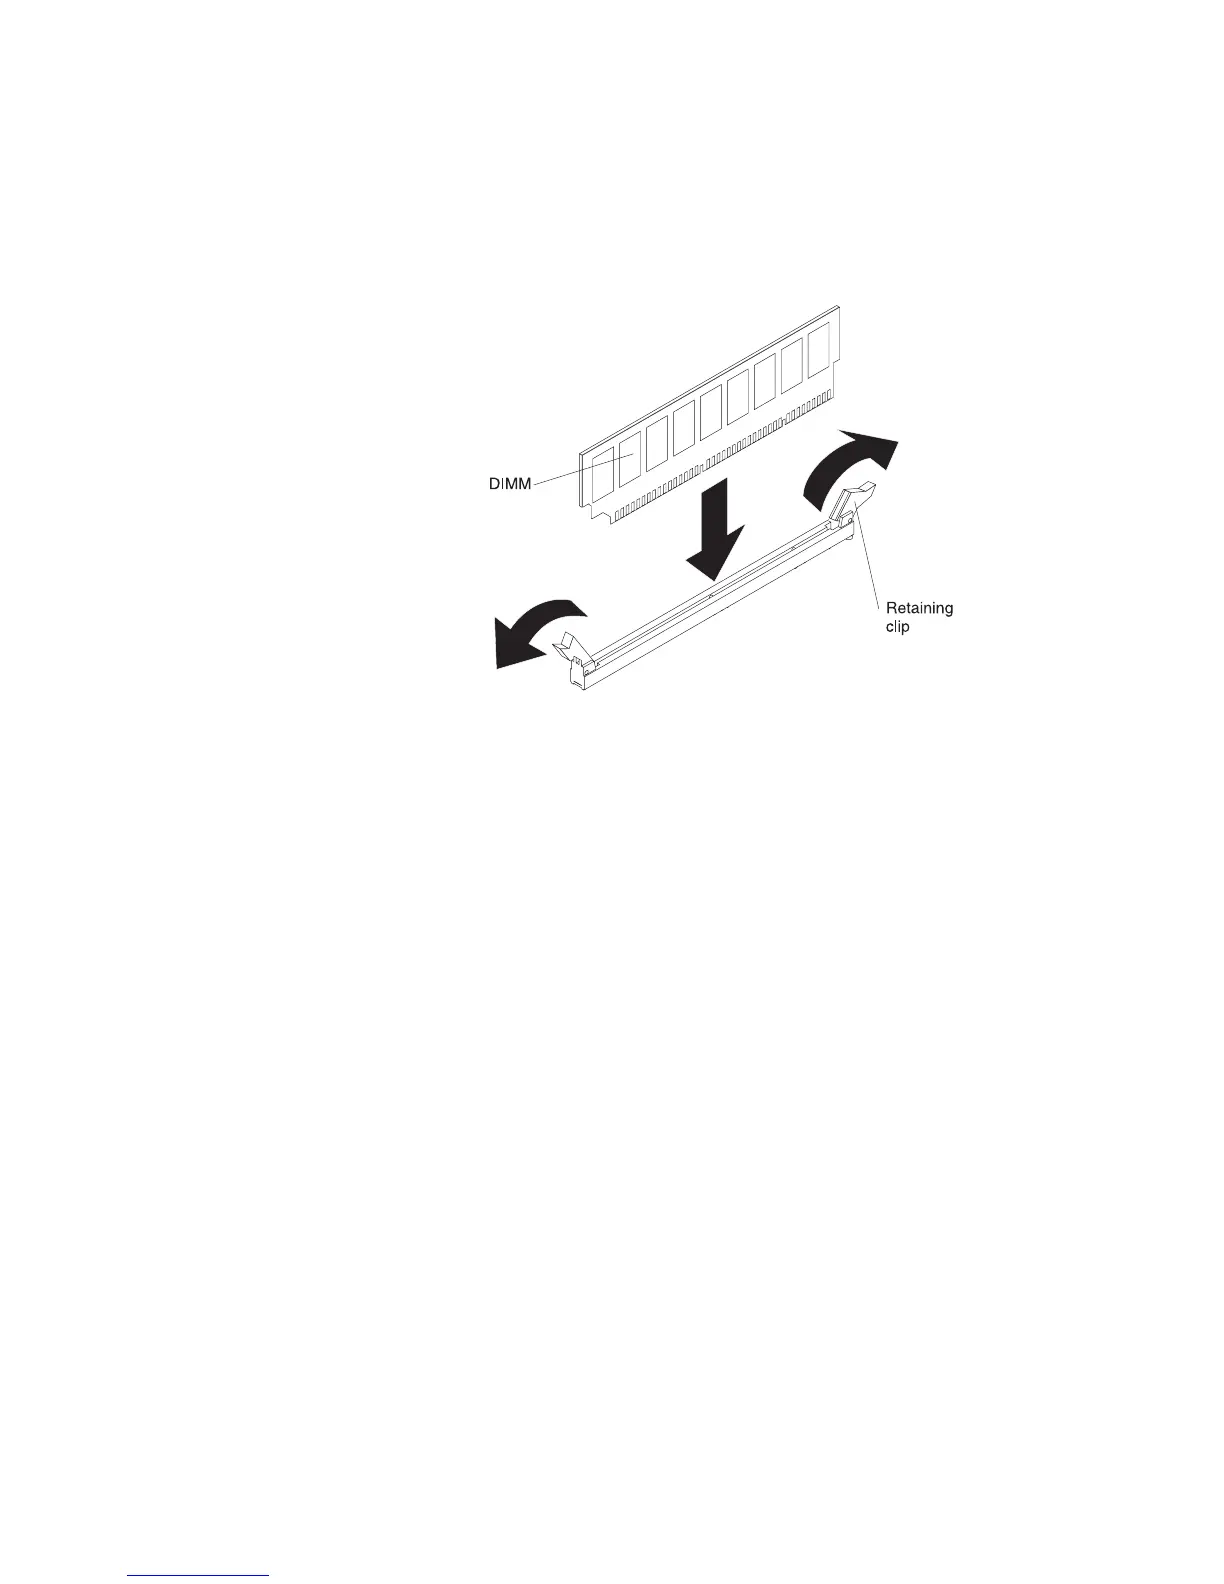
7. Carefully open both retaining clips on each end of the DIMM connector.
Attention: To avoid breaking the retaining clips or damaging the DIMM
connectors, open and close the clips gently.
8. Turn the DIMM so that the DIMM keys align correctly with the connector.
9. Insert the DIMM into the connector by aligning the edges of the DIMM with
the slots at the ends of the DIMM connector.
10. Firmly press the DIMM straight down into the connector by applying pressure
on both ends of the DIMM simultaneously. The retaining clips snap into the
locked position when the DIMM is firmly seated in the connector.
Note: If there is a gap between the DIMM and the retaining clips, the DIMM
has not been correctly inserted; open the retaining clips, remove the DIMM,
and then reinsert it.
11. Replace the system-board tray (see “Replacing the memory expansion module
system-board tray” on page 91). Grasp the system-board tray on both sides
(near the stop-tabs) and align the system-board tray with the chassis.
12. Slide the system-board tray forward until the tabs on the bottom of the
handles touch the chassis; then, close the handles and press firmly on the
release latches to snap them into the locked position.
If you have other devices to install or remove, do so now. Otherwise, go to
“Completing the memory expansion module installation” on page 90.
Installing a memory expansion module hot-swap power
supply
The following notes describe the type of power supply that the memory expansion
module supports and other information that you must consider when you install a
power supply:
v To confirm that the memory expansion module supports the power supply you
are installing, see http://www.ibm.com/systems/info/x86servers/
serverproven/compat/us/.
v The IBM MAX5 for System x memory expansion module comes with one
675-watt hot-swap 12-volt output power supply. The input voltage is 110 V ac or
220 V ac auto-sensing. Two power supplies must be installed for redundancy
support.
88 IBM System x3850 X5 and x3950 X5 Types 7145, 7146, 7143, and 7191: Installation and User's Guide

 Loading...


