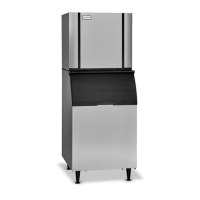
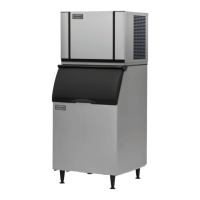
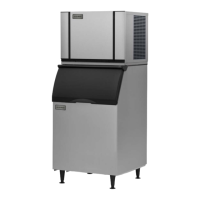
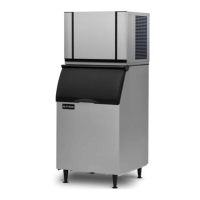
This document is an Installation Guide and Owner's Manual for the Ice-O-Matic Elevation Series Cube Ice Makers, specifically covering CIM 300 lb through 2000 lb Cubers.
Function Description:
The Ice-O-Matic Elevation Series Cube Ice Makers are designed to produce cube ice. These machines are available in various capacities, ranging from 300 lb to 2000 lb cubers. They are engineered for energy efficiency, with Ice-O-Matic having partnered with ENERGY STAR since 2004 to ensure efficient operation. The ice makers utilize a freeze cycle where water flows across an evaporator, forming a slab of ice. Once a full slab is formed, the unit transitions to a harvest cycle, where the ice is released into a storage bin. The machines incorporate SafeIce technology, which complies with Part 15 of the FCC Rules and aids in disinfection of environmental air. Models are available in air-cooled, water-cooled, and remote-cooled configurations. Remote condenser models feature a Mixing Valve in the condenser, allowing for longer line set runs.
Important Technical Specifications:
- Refrigerant: Hermetically sealed units contain fluorinated greenhouse gas R404A (GWP 3922) or R449A (GWP 1282). Models with R449A are designated with the suffix "-49" (e.g., CIM1135HA4-49).
- Ambient Operating Temperature:
- Minimum: 50°F (10°C)
- Maximum: 100°F (38°C) (60 Hz.), 110°F (43°C) (50 Hz.)
- Incoming Water Supply:
- Minimum Temperature: 40°F (4.5°C)
- Maximum Temperature: 100°F (38°C)
- Minimum Pressure: 20 psi (1.4 bar, 0.138MPa)
- Maximum Pressure: 80 psi (5.5 bar, 0.552MPa) (a water pressure regulator must be installed if pressure exceeds 80 psi)
- Water Supply Line Size: 3/8 inch O.D. minimum for air-cooled machines. For water-cooled machines, 3/8 inch O.D. minimum tubing to the condenser, with the machine's water supply able to "T" off this line.
- Drain Lines: All drain lines must be installed per local codes. Purge drain: minimum 3/4 inch O.D. tubing. Water-cooled condenser drain: minimum 1/2 inch O.D. minimum. Bin drain fittings: 3/4 FPT. Bin drain: minimum 3/4 inch O.D. Cold water drains should be insulated. Flexible tubing is not recommended for drains. The purge drain fitting is plastic; no heat or over-tightening.
- Clearance Requirements (Self-contained air-cooled):
- Minimum 6 inches (15cm) at the rear, top, and sides for proper air circulation and serviceability.
- SMART HARNESS™ technology offers two exhaust options:
- Option A (top exhaust bias): Minimum 6 inches (15cm) clearance at rear and top.
- Option B (side exhaust bias): Minimum 6 inches (15cm) clearance at rear and right side, with minimum 3 inches (7.5cm) at the top.
- Remote Condenser Location Limits:
- Maximum rise from ice machine to condenser: 35 physical feet.
- Maximum drop from ice machine to condenser: 10 physical feet.
- Physical line set maximum length: 75 ft.
- Calculated line set maximum length: 100 ft.
- Ambient operating temperatures for remote condenser: -20°F (-28.9°C) to 120°F (48.9°C).
- Pre-charged Line Sets: Available in 25, 40, or 75-foot lengths. The 75-foot line set requires 28 ounces of additional refrigerant.
- Ice Bridge Thickness: Approximately 3/16" thick for units less than 400 lbs., and 1/8" for 400 lbs. and above, measured at the middle of the slab.
- Electrical: Machines are designed for permanent connection and do not include an electrical cord set. Not approved for GFI outlets. European installations require a disconnect means with at least 3mm separation in all poles.
Usage Features:
- Start-Up: A quick press and release of the ON/OFF button initiates operation. The indicator light changes from solid red to solid blue.
- Ice Bridge Thickness Adjustment: Adjustable on the Float Housing by turning an adjustment arm clockwise (decreases thickness) or counter-clockwise (increases thickness). Each "click" represents an adjustment. For substantial adjustments, the high float can be moved between fixed positions by pulling the assembly, opening it, and snapping out a thin plastic feature in the housing.
- Water Filtration/Treatment: A water filter system is recommended. Poor water quality can impact performance and may void the warranty. Reverse Osmosis (RO) water can be used, but pH should be verified to be a neutral 7.0 to minimize corrosive effects.
- Dispenser Application: A thermostatic bin control kit should be installed if the ice machine is placed on a dispenser.
- Condensate Drain: A condensate drain connection is available in the base of 22" and 30" ice makers for high humidity environments.
Maintenance Features:
- General Maintenance (Recommended every 6 months):
- Clean the ice-making section (minimum every 6 months, more often with local water conditions).
- Check ice bridge thickness.
- Check water level in Sump.
- Clean the condenser (air-cooled machines) for unobstructed airflow.
- Check for leaks (water, refrigerant, oil).
- Check bin control switch adjustment.
- Check Water Regulating Valve adjustment (water-cooled machines) to maintain 250 psi discharge pressure and 100-110°F condenser exit water temperature.
- Check all electrical connections.
- Oil fan motor (if applicable, self-contained air-cooled models only).
- Check and replace water filter (if applicable).
- Inspect evaporator water distribution tube.
- Clean Remote Condenser (if applicable).
- Cleaning/Sanitizing:
- Requires two parts: descaling and sanitizing.
- Descaling: Minimum twice per year, maximum once per month. Use "nickel-safe" cleaners like Nu-Calgon Nickel-Safe Ice Machine Cleaner or KAY® Delimer (for CIM models revision 4 and higher).
- Sanitizing: Performed after each descaling, maximum once per month. Use "nickel-safe" sanitizers like Nu-Calgon IMS-III or KAY-5® Sanitizer (for CIM models revision 4 and higher).
- Procedure: Remove all ice, remove front panel, press and hold POWER button for 3 seconds to initiate manual harvest, remove upper evaporator cover, pour descaler into sump (using lower curtain to direct), run WASH cycle (15 minutes), PURGE/FILL/RINSE multiple times, wipe down components, re-assemble, then repeat with sanitizer.
- Chemicals: Do not mix cleaner and sanitizer. Wear protective eyewear and rubber gloves. Do not use solutions containing Nitric Acid, Sulfuric Acid, Hydrochloric Acid, Carbolic Acid, Acetic Acid (diluted or non-food-grade vinegar), bleach, chlorine dioxide, or salts (potassium chloride, sodium chloride) as these can cause corrosion.
- Cleaning Stainless Steel and Aluminum: Clean thoroughly once a week with a nonabrasive cloth or sponge, working with the grain. Use mild dish soap, ammonia, glass cleaner, or mild detergent for routine cleaning. Oven cleaners for grease/fatty acids. Vinegar for hard water spots/scale. Rinse with clean water and wipe dry immediately. Do not use abrasive tools or cleaners with chlorine/chlorides.
- Sump Removal: Lift the front of the sump and pull forward to clear retaining features, then let the back fall downward. Lift the front again, push backward, push down towards the back, and remove sideways through the ice drop zone. Re-install in reverse, tucking the water pump tube into the sump.
- Winterizing Procedures:
- Turn off water.
- Ensure evaporator(s) are clear of ice (initiate harvest if needed).
- Disconnect and drain water pump discharge and distribution tube.
- On water-cooled machines, hold the water regulating valve open and blow water out of the condenser with compressed air.
- Remove all ice from the storage bin.
- SafeIce Maintenance:
- Bulb cleaning: Every three months in dusty/smoke-filled areas.
- Bulb replacement: Every twelve months.
- Bulb Removal: Disconnect power. Remove front, top, and side cover panels. Disconnect lampholder from bulb (do not grip by wires due to high voltage). Push bulb through "flat-end" of end cap until 1 inch protrudes from "pin-end," then pull remainder.
- Bulb Cleaning: Ensure bulb has cooled. Avoid touching glass element with bare fingers. Clean with a soft cloth and appropriate cleansing solvent (e.g., rubbing alcohol).
- Bulb Installation: Insert "flat-end" into end cap. Reconnect lampholder to "pin-end." Replace access panels. Reconnect power.
- Disposal: Dispose of old bulbs (containing small traces of mercury) according to regulations. Refer to lamprecycle.org or epa.gov/cfl for cleanup instructions if a bulb breaks.