EasyManua.ls Logo

Ice-O-Matic CIM1136 - User Manual

Ice-O-Matic CIM1136
17 pages
Print Icon
To Next Page IconTo Next Page
Loading...
Ice-O-Matic
11100 East 45th Avenue
Denver, Colorado 80239
1-800-423-3367
9081484-01 REV. M
02/2020
ELEVATION SERIES CUBE ICE MAKER
CIM 300 lb through 2000 lb Cubers
Installation Guide and Owner’s Manual

Other manuals for Ice-O-Matic CIM1136

Question and Answer IconNeed help?

Do you have a question about the Ice-O-Matic CIM1136 and is the answer not in the manual?

Summary

Energy Efficiency and Manual Usage

Important Safety Warnings and Cautions

Highlights critical safety precautions, including disconnecting power and wearing protective eyewear.

Installation Guidelines

Incoming Water Supply Requirements

Details the required potable water supply specifications, including temperature and pressure.

Drain Line Installation Requirements

Provides instructions and recommendations for proper drain line installation, including material and routing.

Installation Clearances and Electrical Setup

Clearance Requirements for Airflow and Service

Specifies minimum clearances required around the unit for proper air circulation and service access.

Electrical Specifications and Safety

Details electrical requirements and emphasizes that connections must be made by a qualified electrician.

Remote Condenser Installation Guidelines

Pre-charged Line Set Routing and Safety

Details routing of pre-charged refrigerant lines and cautions against kinking or crimping.

General Maintenance Procedure

Regular Cleaning and Leak Checks

Covers cleaning ice-making sections, condensers, and inspecting for leaks.

Component Checks and Electrical Inspection

Details checking ice bridge thickness, water level, bin control, and electrical connections.

Cleaning Instruction for Ice-O-Matic CIM Series

Descaling and Sanitizing Overview

Explains the two-part cleaning process, recommended chemicals, and frequency.

Safety Precautions for Cleaning

Highlights essential safety measures, including eye and hand protection during cleaning.

Initial Cleaning Steps

Details the initial steps of the cleaning process, including panel removal and initiating harvest.

Detailed Cleaning Steps and Chemical Ratios

Chemicals for Descaling and Cabinet Care

Approved Cleaning Agents

Lists chemicals to avoid and provides guidance on approved cleaning and sanitizing solutions.

Winterizing Procedures

Overview

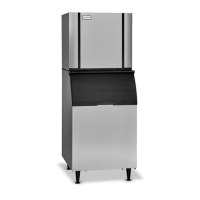
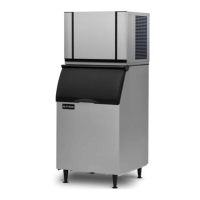
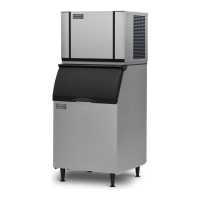
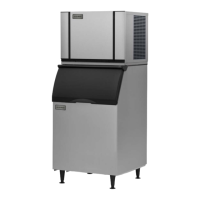
This document is an Installation Guide and Owner's Manual for the Ice-O-Matic Elevation Series Cube Ice Maker, specifically covering CIM 300 lb through 2000 lb Cubers.

The Ice-O-Matic Elevation Series Cube Ice Maker is designed to produce ice efficiently and reliably. The manufacturer emphasizes its partnership with ENERGY STAR since 2004, highlighting a commitment to energy efficiency and productivity. The ice makers are hermetically sealed and contain fluorinated greenhouse gases R404A (GWP 3922) or R449A (GWP 1282), with R449A models designated by a "-49" suffix (e.g., CIM1135HA4-49).

Important Technical Specifications:

  • Ambient Operating Temperature:
    • Minimum: 50°F (10°C)
    • Maximum: 100°F (38°C) (60 Hz.), 110°F (43°C) (50 Hz.)
  • Incoming Water Supply:
    • Minimum Temperature: 40°F (4.5°C)
    • Maximum Temperature: 100°F (38°C)
    • Minimum Pressure: 20 psi (1.4 bar, 0.138MPa)
    • Maximum Pressure: 80 psi (5.5 bar, 0.552MPa) (A water pressure regulator is required if pressure exceeds 80 psi).
  • Water Supply Lines: 3/8 inch O.D. minimum for both air and water-cooled machines. For water-cooled machines, a 3/8 inch O.D. minimum line must run to the condenser.
  • Drain Lines: All drain lines must be installed per local codes. Flexible tubing is not recommended. The purge drain should be a minimum of 3/4 inch O.D. tubing. The condenser drain on water-cooled units should be 1/2 inch O.D. minimum. Bin drain fittings are 3/4 FPT, and the bin drain should be a minimum of 3/4 inch O.D. Cold water drains should be insulated.
  • Clearance Requirements (Self-contained air-cooled units):
    • Minimum 6 inches (15cm) at the rear, top, and sides for proper air circulation and serviceability.
    • With SMART HARNESST™ technology, two air exhaust options exist:
      • Option A (top exhaust bias): Minimum 6 inches (15cm) clearance at the rear and top.
      • Option B (side exhaust bias): Minimum 6 inches (15cm) clearance at the rear and right side, with a minimum 3 inches (7.5cm) at the top.
  • Electrical Specifications: Refer to the serial plate for proper voltage and circuit breaker size. The machine requires a dedicated circuit. European installations require a disconnect means with at least 3mm separation in all poles. Units are designed for permanent connection and are not approved for GFI outlets.
  • Remote Condenser Location Limits:
    • Maximum rise from ice machine to remote condenser: 35 physical feet.
    • Maximum drop from ice machine to remote condenser: 10 physical feet.
    • Physical line set maximum length: 75 ft.
    • Calculated line set maximum length: 100 ft.
    • Ambient operating temperatures: -20°F (-28.9°C) to 120°F (48.9°C).
    • Pre-charged line sets are available in 25, 40, or 75-foot lengths.
    • Each set of pre-charged tubing consists of a 3/8 diameter liquid line and 1/2 inch diameter discharge line, both with quick connect couplings.
  • Ice Bridge Thickness: Approximately 3/16" thick for units less than 400 lbs., and 1/8" for 400 lbs. and above.
  • Batch Weight (Examples):
    • CIM0320/0330: Half Cube 2.9-3.15, Full Cube 3.25-3.5
    • CIM0430/0520/0530/0630: Half Cube 4.9-5.15, Full Cube 5.5-5.8
    • CIM0820/0830/1120/1130: Half Cube 6.9-7.4, Full Cube 7.9-8.3, Grande Cube 8.4-8.8
    • CIM1440/1540/1840/2040: Half Cube 13.8-14.8, Full Cube 15.8-16.6

Usage Features:

  • Installation: Must be performed by a qualified refrigeration technician. The machine should be leveled within 1/8 inch in all directions. A water filter system is recommended. Reverse Osmosis (RO) water can be used, but the pH should be verified to be a neutral 7.0 to avoid corrosive effects and potential warranty voidance.
  • Dispenser Application: A thermostatic bin control kit should be installed if the ice machine is placed on a dispenser.
  • Operation (Freeze Cycle):
    1. Press and release the ON/OFF button.
    2. Water Inlet Valve energizes until the HI Water Float opens.
    3. Hot Gas Valve opens for 5 seconds, then closes.
    4. Compressor energizes, followed by Fan Motor (if applicable) once Fan Control closes.
    5. Pre-chill ends, Water Pump energizes, and water flows across the Evaporator.
    6. At a predetermined water temperature (near freezing), the Water Pump shuts down for 20 seconds (Anti-Slush).
    7. Freezing continues until the Low Water Float closes, indicating a full slab of ice.
  • Operation (Harvest Cycle):
    1. Fan Motor shuts down.
    2. Hot Gas Valve, Purge Valve, and Water Inlet Valve energize.
    3. Water Inlet Valve remains energized after Purge Valve closes to partially fill the Water Sump.
    4. Harvest Assist Assembly pushes the ice slab from the plate.
    5. Curtain Switch contacts open as the slab drops into the bin.
    6. If the Curtain Switch remains open for a preset time, the unit shuts down (full bin).
    7. If the Curtain opens and closes, the unit restarts the next freeze cycle.
  • Bridge Thickness Adjustment: Located on the Float Housing. Turning clockwise decreases thickness, counter-clockwise increases thickness. Adjustments are made in "clicks," one or two at a time.

Maintenance Features:

  • General Maintenance (Recommended every 6 months):
    1. Clean the ice-making section (minimum every 6 months, more often with local water conditions).
    2. Check ice bridge thickness and adjust if necessary.
    3. Check water level in Sump and adjust if necessary.
    4. Clean the condenser (air-cooled machines) for unobstructed airflow.
    5. Check for leaks (water, refrigerant, oil).
    6. Check bin control switch adjustment (if applicable).
    7. Check Water Regulating Valve adjustment (water-cooled machines) to maintain 250 psi discharge pressure and water exiting the condenser between 100°F (38°C) and 110°F (43°C).
    8. Check all electrical connections.
    9. Oil the fan motor if it has an oil fitting (self-contained air-cooled models only).
    10. Check and replace water filter (if applicable).
    11. Inspect the evaporator water distribution tube for even water distribution.
    12. Clean Remote Condenser (if applicable).
  • Cleaning Instruction (Descaling and Sanitizing):
    • Descaling: Minimum twice per year, no more than once per month. Uses "nickel-safe" cleaner (e.g., Nu-Calgon Nickel-Safe Ice Machine Cleaner).
    • Sanitizing: Performed after each descaling, no more than once per month. Uses "nickel-safe" sanitizer (e.g., Nu-Calgon IMS-III).
    • Procedure:
      1. Remove all ice from storage.
      2. Remove front panel.
      3. Press and hold POWER button for 3 seconds to initiate a harvest cycle (blue light flashes for Manual Harvest mode) to empty the sump.
      4. Once harvest is complete, POWER light turns solid red (OFF mode).
      5. Remove upper evaporator cover.
      6. Quick press CLEAN button (solid red and flashing yellow light during cycle).
      7. Machine verifies empty sump, then fills it.
      8. Pump turns ON. Measure and pour appropriate descaler into the sump (using the lower curtain to prevent splash). Replace upper evaporator cover.
      9. Machine remains in WASH cycle for 15 minutes.
      10. After WASH, machine PURGES, re-fills, and rinses multiple times.
      11. Cycle ends with a mostly empty sump and solid red/yellow light.
      12. Quick press CLEAN button to return to OFF mode.
      13. Remove upper evaporator cover and lower evaporator curtain. Wipe down evaporator, water spillway, water distributor, covers, and splash surfaces with a cleaner solution.
      14. Re-assemble water system components.
      15. Repeat the process with sanitizer at the correct ratio.
      16. Clean (descale and sanitize) the storage means.
      17. Quick press POWER button to return to ice making cycle.
      18. Replace front panel.
    • Chemicals: Do not mix cleaner and sanitizer. Eye protection and rubber gloves are recommended. Do not use solutions containing Nitric Acid, Sulfuric Acid, Hydrochloric Acid, Carbolic Acid, Acetic Acid (greater than 6%), non-food-grade vinegar, bleach, chlorine dioxide, or potassium/sodium chloride, as these can cause corrosion and void warranty.
  • Cleaning Stainless Steel and Aluminum (Recommended weekly):
    • Clean thoroughly with a nonabrasive cloth or sponge, working with the grain.
    • Do not use abrasive tools (steel wool, abrasive sponge pads, wire brushes, scrapers).
    • Do not use chlorine or chloride-based cleaners.
    • Rinse with clean water and wipe dry immediately if chlorinated cleansers are used.
    • Recommended cleaning agents: Mild dish soap, ammonia, glass cleaner, or mild detergent for routine cleaning; oven cleaners for grease/fatty acids; vinegar for hard water spots/scale.
  • Winterizing Procedures:
    1. Turn off water to machine.
    2. Ensure all ice is off the evaporator(s) (initiate harvest by pressing Power Button for 3 seconds).
    3. Disconnect and drain tubing between water pump discharge and water distribution tube.
    4. On water-cooled machines, hold the water regulating valve open and use compressed air to blow water out of the condenser.
    5. Remove and discard all ice in the storage bin. Failure to perform this procedure will void all warranties.

Ice-O-Matic CIM1136 Specifications

General IconGeneral
Ice TypeCube
Condenser TypeAir-Cooled
TypeModular
Daily Ice Production1136 lbs
Ice Production1136 lbs per day
RefrigerantR404A

Related product manuals