9
SERVICE
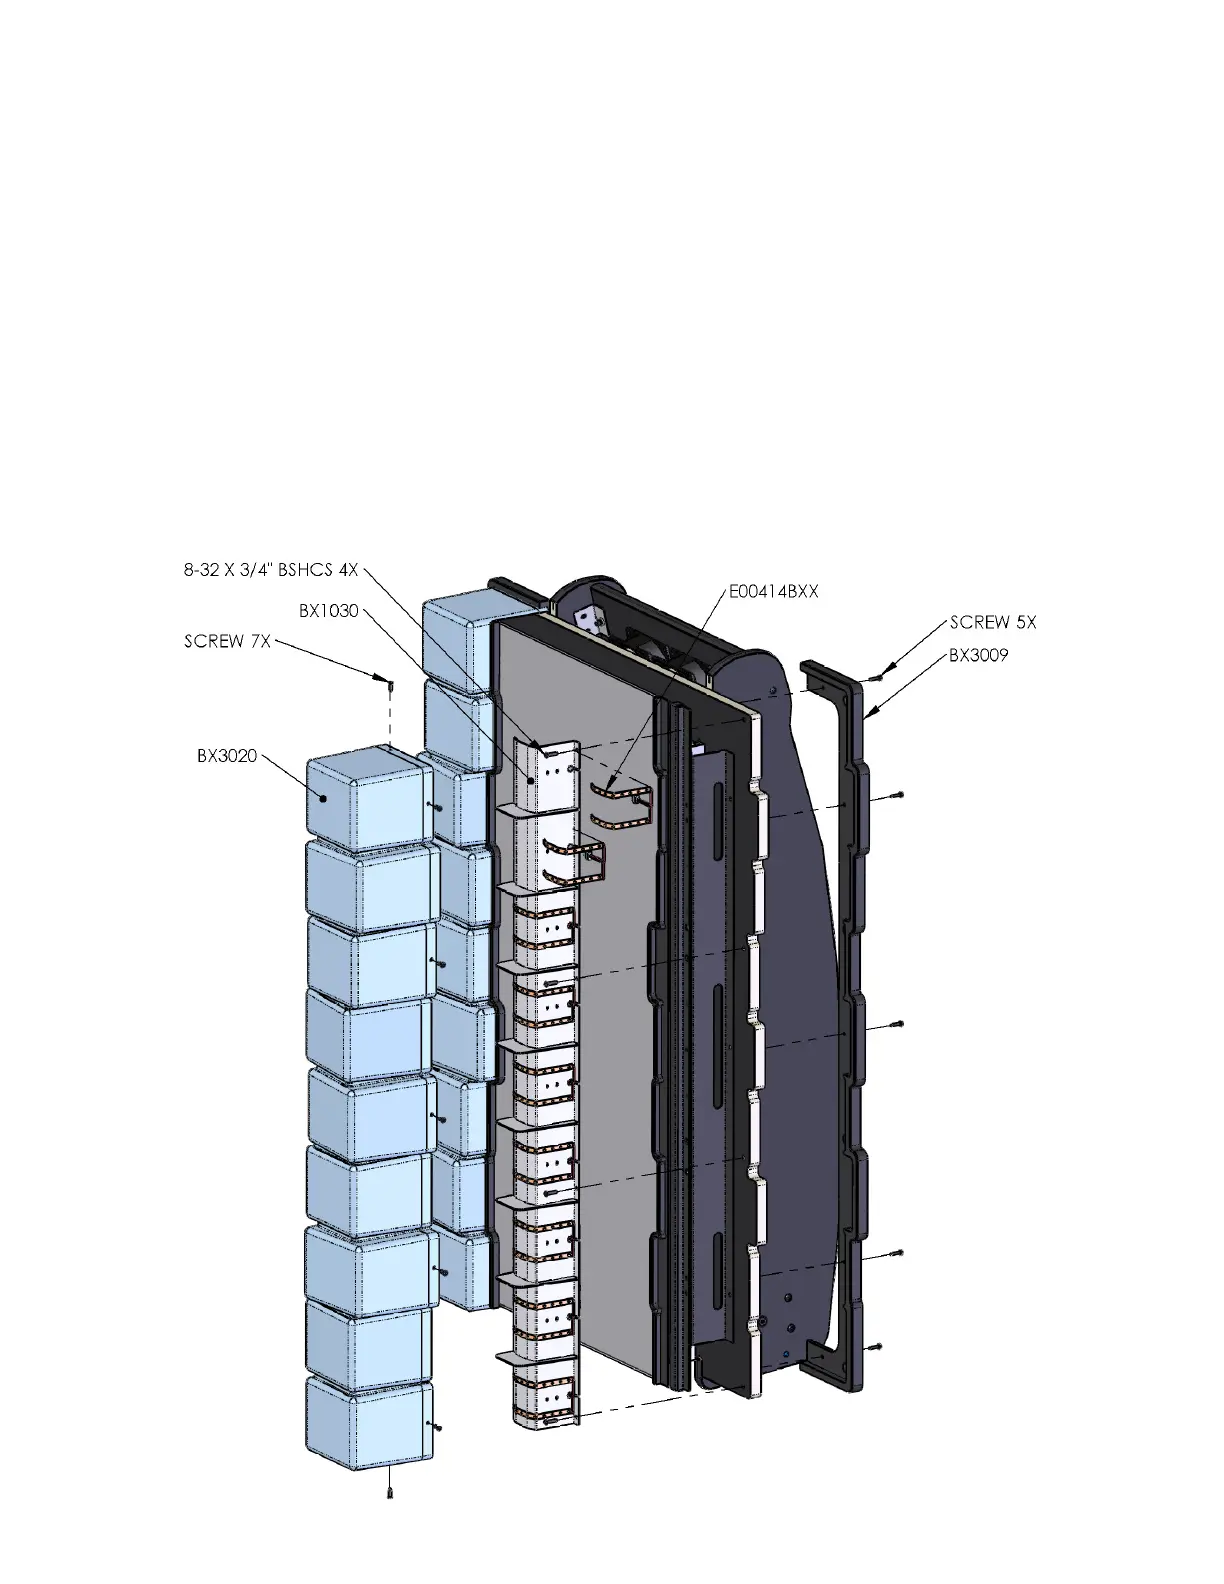
UPPER ILLUMINATION REPLACEMENT
LED strips provide the lighting in each of the front BLOKSs and are very reliable. Before replacing
strips, test for 12 volts DC to eliminate wiring or logical board failures. To access these strips you will
need to remove the seven screws that hold the plastic bloks assembly to the front of the cabinet.
There is one on each side of the cabinet. The metal housing is held on by two 8-32 screws. You will
need to gain access to the back of the metal housing to disconnect each LED Strip Assembly.Each
strip assembly is attached to the metal housing by double sided tape. This tape is found on the back
of the new strip assembly and to remove the old assembly, you will need to scrape the strip clean off
the metal. Be careful not to take any of the white paint off the metal work. Be sure to clean the
surface before applying the new strip assembly. There is two strips per blok. The right side is
shown below.
 Loading...