English
14
71503816/0 - REV.04 01/2013
6. SERVICE INFORMATION
LL= flashing slowly
LV= flashing quickly
LA= alternate flashing
ON = steady light
1. Verify that the water supply valve is open, then plug in the
machine and switch on the main switch; the appliance starts-
up in automatic mode (fig.
g
) after having pressed the
ON/OFF start button (fig.
2@
).
2. Verify that the water reaches the tray, the float stops the
water before the overflow and that there are no leaks in the
system and in the water channels. The normal level of water
inside the tray is about 5/10 mm from the upper edge (fig.
k
).
The level of water can be adjusted by rotating the microfloat
or the water sensor on the slot on the relative support after
having loosened fastening screw 1 (fig.
k
). This adjustment
must be implemented after having disconnected the power
supply.
3. Verify that there is no abnormal vibration due to loose screws.
4.
Always stop the appliance before implementing any operations
to resolve water leaks, tighten screws, etc.
5. Verify an ice production cycle ensuring that the cubes are
conveyed into the container.
6. Verify that the container sensor functions properly: place an
ice cube on the bulb inside the container; the appliance
should stop within 1 minute and restart automatically shortly
after removing it.
7. Replace the cover previously removed.
THE FOLLOWING OPERATIONS MUST BE
IMPLEMENTED SOLELY BY OUR
QUALIFIED PERSONNEL
4. SIGNALS
5.
OPERATING PROBLEMS
• If the condenser overheats
The machine stops and only the air/water condensation remains in operation. The machine automatically restarts when the tem-
perature returns to below the limits set. Only after three consecutive alarms within a period of 5 hours, the machine turns off and
stays off.
• Freezing cycle too long
In the case of three consecutive alarms within 5 hours, the machine stops.
Calculation of the maximum time of the freezing cycle:
1
st
cycle = 50'
2
nd
cycle = duration of 1 cycle x 1.5.
If the 1st cycle lasted less than 7' the maximum time of the next cycle will be 50'.
• Defrosting too long
If the defrosting time is greater than 2 minutes and there are 2 consecutive failures within 5 hours, the machine stops.
• Freezing cycle less than 7 minutes
The electronics calculate the cycle time as too long at 50 minutes.
• Water loading too long
If the load time for the water is greater than 5' the machine stops in alarm. After a break of 120' the machine restarts automatically.
If water shortage is ongoing, the machine will attempt to restart every 120'.
Function Status
Led 1
Green
Led 2
Red
Notes
Machine ON ON OFF
Applicable to all
conditions that are
not in alarm/error
B
in temperature
sensor error
OFF LL
Temperature sensor
out of range.
Machine OFF
Condenser
temperature
sensor error
OFF LL
Temperature sensor
out of range.
The machine
continuous to run
Error cold cycle too
long or defrosting
too long
ON ON Machine OFF
Condenser
overheating error
OFF ON Machine OFF
No water error LL ON
The signal is triggered
after attempting to restart
Maintenance
warning
LA LA
The pre-set number of
operating
hours has been
reached. The machines
continous to run
Wash / clean LV LV
Signalled during the wash
routine
Start stand-by LV OFF
Waits to start after
switch-o
English
15
71503816/0 - REV.0401/2013
7. CLEANING AND MAINTENANCE
• Use a cloth dampened with a specific chlorine-free product
for stainless steel to clean the structure.
Note: Disconnect the electrical power supply from the appliance
to perform maintenance and cleaning operations.
6.1 CLEANING THE AIR CONDENSER
• To make the most of your appliance in terms of efficiency
and durability, the air filter at the front of the machine must
be cleaned every week (fig.
2#
).
• The filter is removed by simply extracting it. Simply wash the
filter with a water jet of warm water and dry it before setting
it back in place.
Do not use brushes or blunt objects to clean the filter.
It is absolutely forbidden to operate the producer without
the air filter to prevent malfunctioning.
6.2 CLEANING THE WATER INLET FILTER
• Close the water shut-off valve of the appliance, disconnect
the water inlet pipe and remove the filter screen that is on
the water inlet electrovalve with a pair of pliers.
• Clean the screen with a water jet and reassemble it into its
place.
6.3 CLEANING THE CONTAINER
• Remove the ice from the container. Clean inside the con-
tainer with a sponge dampened with warm water and a lit-
tle sodium bicarbonate;
• rinse with clean water and dry carefully.
6.4 THE WASH AND SANITATION CYCLE
• The machine has been equipped with a “Self Cleaning” func-
tion in order to remedy the problems deriving from the hard-
ness of the supply water and therefore, the formation of
impurities on the components and parts that are in contact
with the water.
Thanks to the cleaning action of a specific product, which
comes in the form of powder in a sachet and a dosing bot-
tle, this function keeps the machine clean and sanitised from
limescale and deposits.
• To guarantee proper cleaning of the ice maker one recom-
mends carrying out the wash cycle at least 3-4 times a year,
according to the hardness of the water supply.
Cleaning kit (optional)
The kit is composed of a plas
tic bottle with rubber pipe,
one confection of acid citric 1
kg., and instructions for the
cleaning proc
edure.
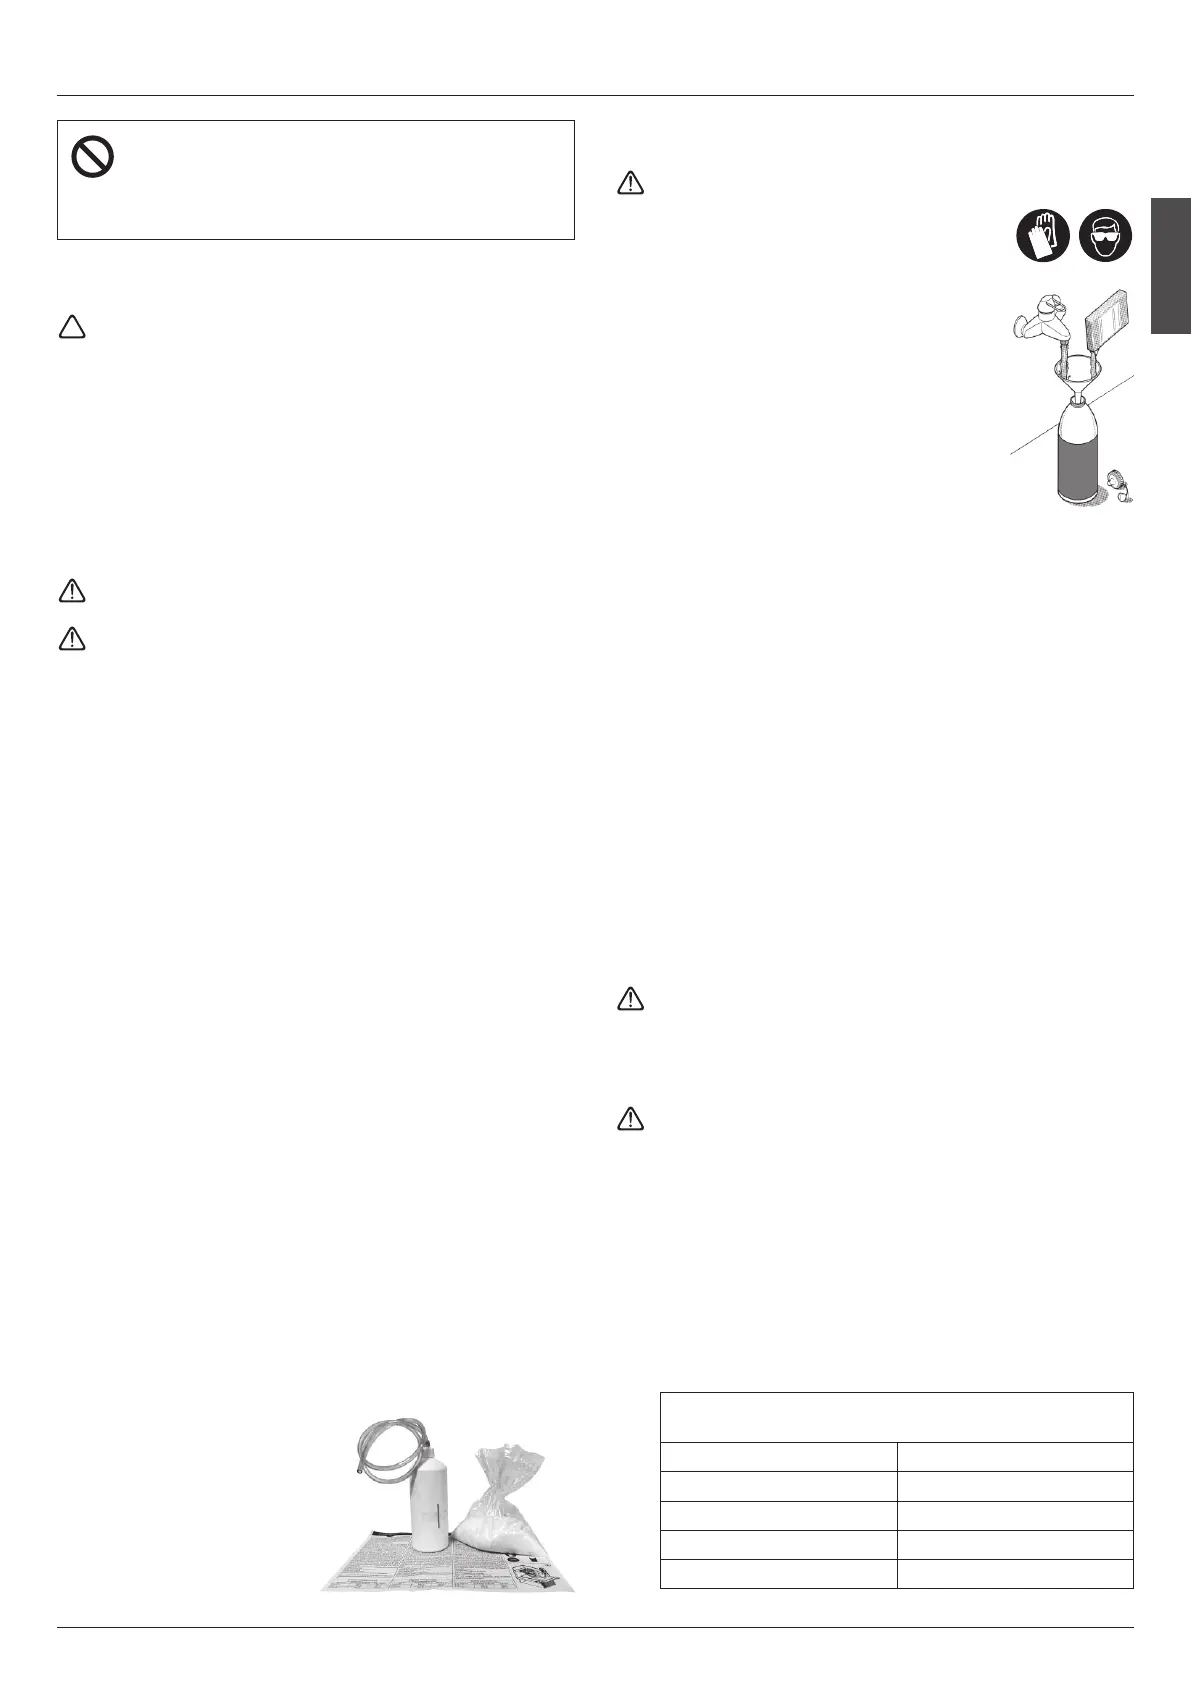
6.5 IMPLEMENTING THE WASH AND SANITATION CYCLE
Adopt proper precautions when handling citric acid whilst
preparing the solution (water+ citric acid,
see the table). Wear protective gloves and
goggles.
• Turn the machine off.
• Remove all ice from the container.
• Using the specific product and the plastic
bottle, prepare the solution by dissolving
the powder in warm water (max. 40°C), ac-
cording to th
e quantities shown on the at-
tached table. Mix well whilst ensuring that
no lumps are formed.
• Switch the machine on by pressing the
ON/OFF button whilst keeping the RESET button pressed
(fig.
2@
). Press the RESET button using a pin of suitable di-
ameter to enter the appropriate hole.
• Both LEDs will flash quickly. Open the deposit hatch, wait for
the tray to go back into closing position. Insert the cannula
into the bottle throughout its length in the appropriate hole
(fig.
2$
) and drain all the previously prepared descaling mix-
ture, applying pressure with your hands on the bottle. Close
the hatch and repress the RESET button to start the WASH-
ING cycle.
• Once the wash cycle is started, LED flashing will slow down.
During the wash function, rinse the container thoroughly.
• The duration of the washing cycle is of approximately 3
hours.
• Once the descaling function has started it is not possible to
interrupt the washing cycle. In case of a power-cut, the ma-
chine resumes from where it had stopped.
• At the end of the washing and rinsing cycle the machine
restarts in the cold cycle.
For all extraordinary maintenance and/or repairs (me-
chanical, cooling and electrical parts) that require adjust-
ments and/or components to be replaced, always refer to
an authorised service centre.
If the appliance should not be used for long periods of
time:
- disable the machine
- remove all the ice from the container
- drain all the water
- thoroughly clean the machine
- leave the door of the container ajar
• After a long period of inactivity one recommends to perform
a cleaning/descaling cycle before commencing ice produc-
tion.
i
THE FOLLOWING OPERATIONS MUST BE
IMPLEMENTED SOLELY BY OUR
QUALIFIED PERSONNEL
Quantities of citric acid to be mixed with water
in the bottle to obtain the mixture
MODEL CITRIC ACID Q.TY
E21 - E25 200 gr.
E35 - E35L 250 gr.
E45 - E50 500 gr.
E60 - E75 - E90 500 gr.