12 13icklebubba.com icklebubba.com
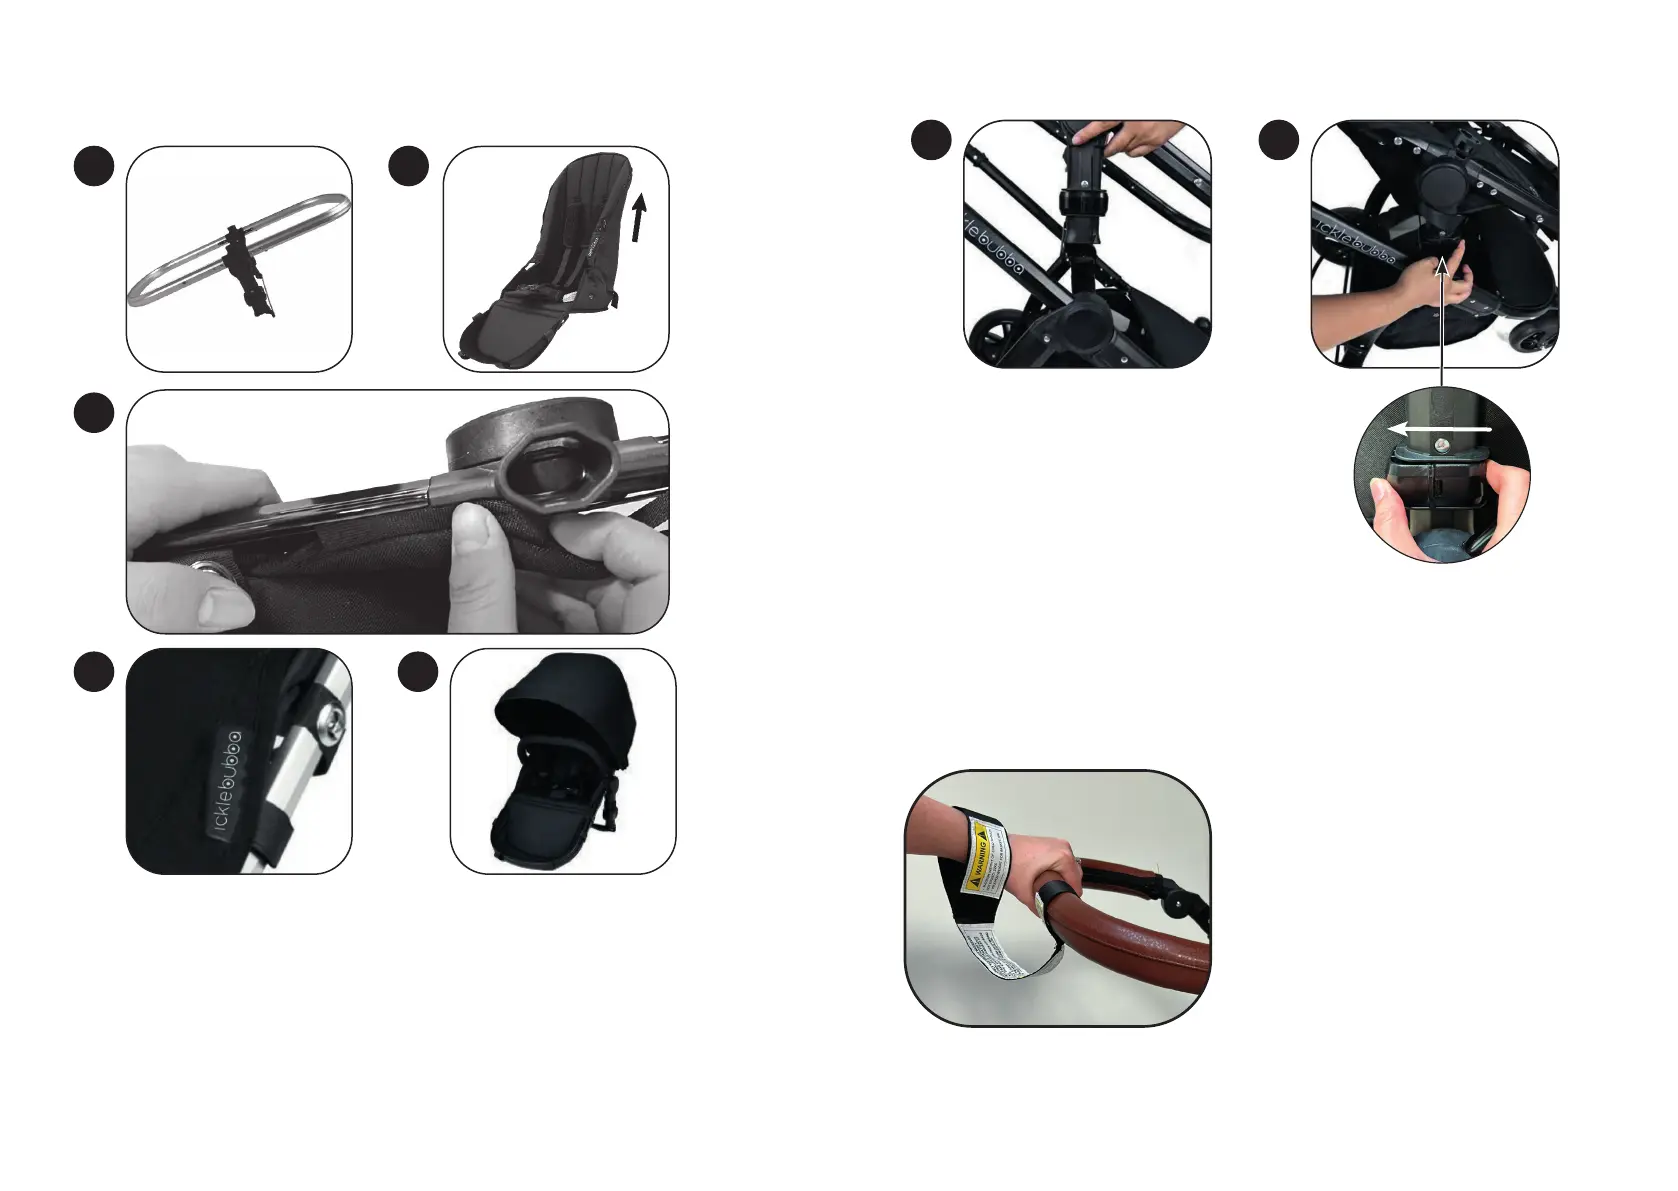
1. Remove the carry cot fabric from the frame in preparation for the seat unit attachment.
2. To attach the seat unit fabric, first slide the top of the seat fabric onto the top of the chassis.
PLEASE NOTE: The top of the chassis will not have the studs on.
3. Feed the two narrow fabric trim panels positioned either side of the seat unit, into the slots on the
inside of the seat frame which are positioned just below the bumper bar attachment point in the
middle of the seat frame. The holes in the seat fabric need to be placed over the bumper bar
brackets/holes.
4. Secure the fabric seat un place using the velcro fastenings and eyelet hooks.
5. Connect buckle under seat unit and tighten. Clip the canopy onto the frame.
PLEASE NOTE: The seat unit is suitable for children 6 months or over.
Preparing the Seat Unit
1
4 5
2
3
SEAT UNIT SET UP
CARRY COT/STROLLER ATTACHMENT
Tether Strap
1 2
Installation
1. Line up the release clips with the chassis and then push down until both sides click into place.
Please test this by pulling upwards.
IMPORTANT: There may be a slight movement to the carry cot when it is locked onto the chassis.
Disassembly
2. Push the release buttons forward until you feel it click before lifting upwards to remove.
Whenever a child is in the pram and the brakes are not engaged, the large loop should
be around your wrist.