5
Getting Started
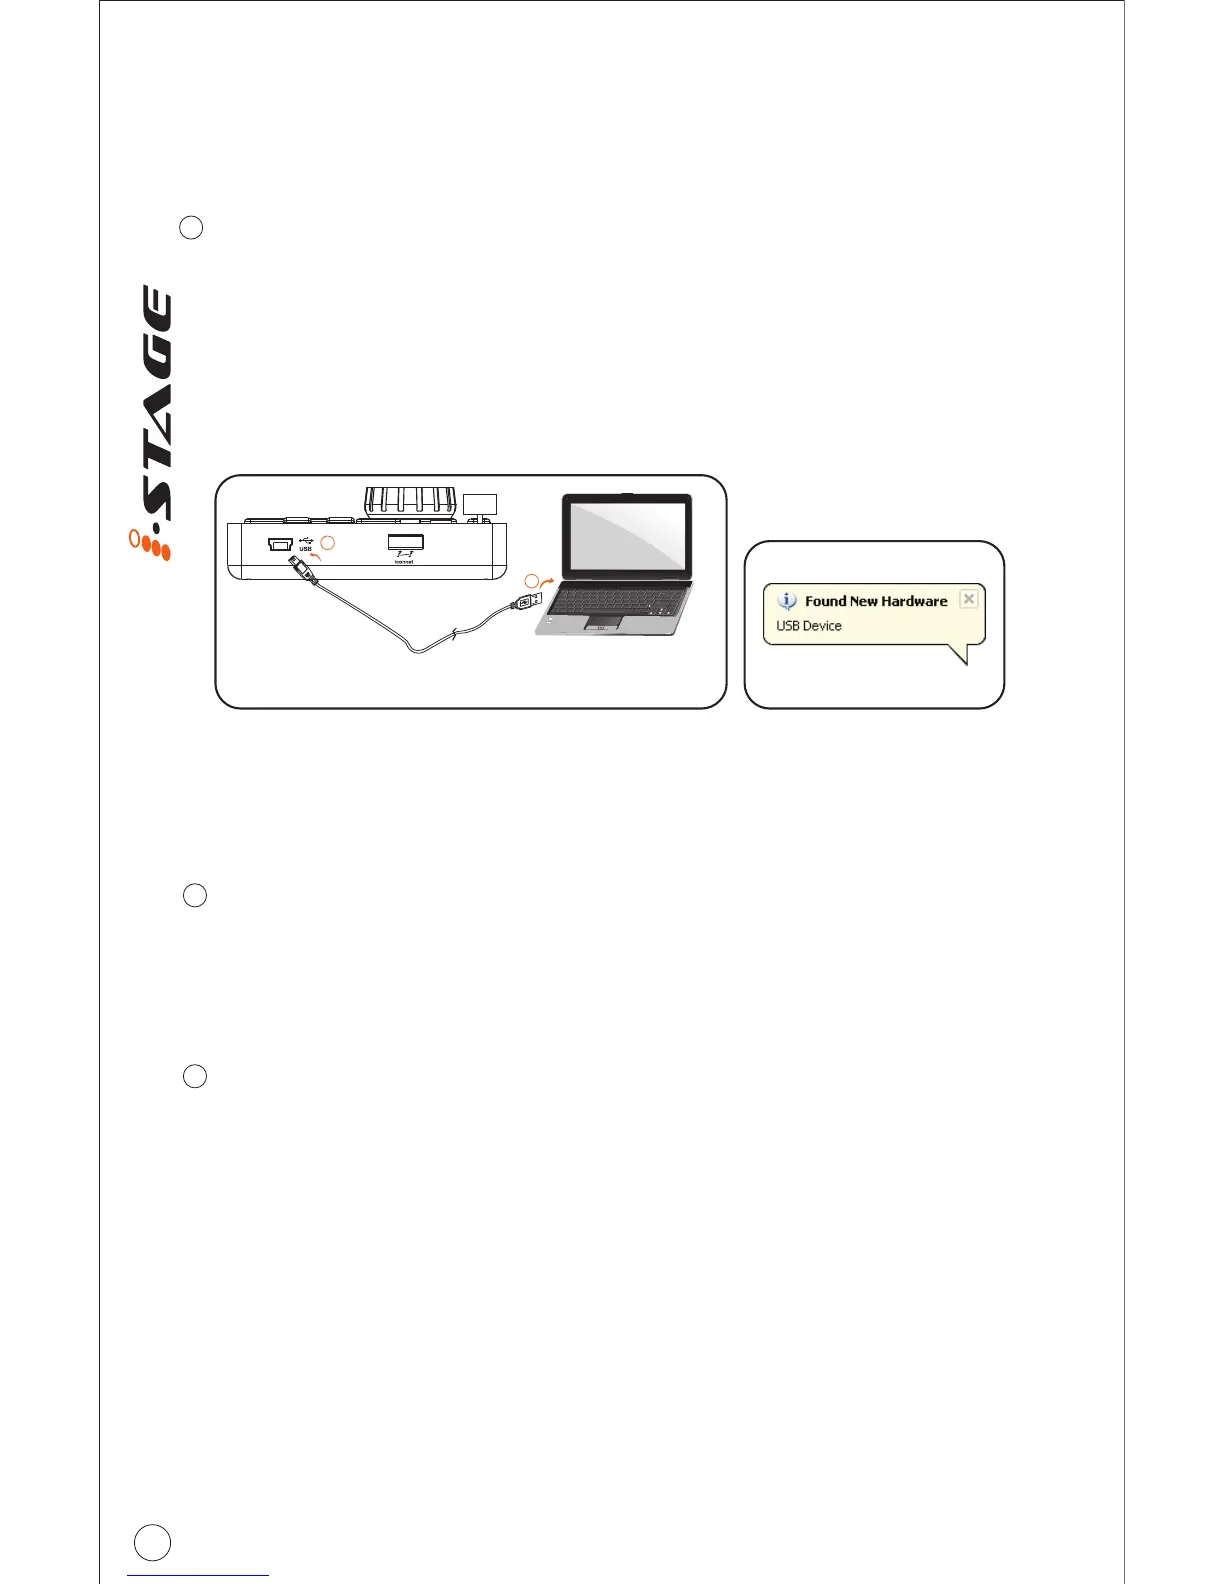
Connecting your iStage controller
Select a USB port on your Mac/PC and insert the wide (flat) end of the USB
cable. Connect the cable's small jack end to the iStage. Your Mac/PC will
automatically detect the new hardware and notify you that it is ready to use.
Connect the iStage to your Mac/PC via the USB port
1
Diagram 1 Diagram 2
b
a
Esc
F1
F2
F3
F4
F5
F6
F7
F8
F9
F10
F11
F12
Prtsc
sysrq
pause
Break
Lns
Del
Home
Pgup
PgDN
End
$
~
`
!
1
··
2
3
4
5
6
7
78
9
0
)
)
*
—
-
+
=
#
¥
%
*
#
#
Q
W
E
R
T
Y
U
I
O
P
{
}
|
A
S
D
F
G
H
J
K
L
:
;
Z
X
C
V
B
N
M
<
>
?
Tab
CapsLook
Shift
Ctrl
Alt AltGr
Ctrl
Backspace
[
]
|
Enter
Shift
intel
Setup your software
Activate the ICON iStage controller in your DAW or MIDI software using
“MIDI setup” or “MIDI devices”.
(
the settings.)
Select the desired mode
Select the correct mode according to your application. You may use all 4
modes to control different functions in the same software application.
TM
For example: Using iStage at Abelton Live
DJ mode: Control the clips
Effector mode: Control the different effect parameters (pre-assign each
button with your desired effect parameter.)
DAW mode: Control and adjust the pan, volume, solo and mute functions
for each track for up to 8 tracks in total.
Drummer mode: Control the drum rack of the software
Note: Every application does this a little different, so refer to your software user manual for
2
3