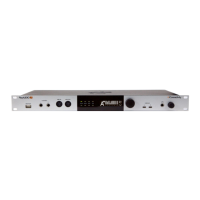
Getting Started
Install iConnectivity Audio Drivers (Windows)
Before connecting the PlayAUDIO1U to a Windows computer, be sure to install the supplied iConnectivity audio drivers that are part of the Windows
Auracle X installer. Once the driver is successfully installed, you can attach your computer to either USB DAW Port A or B using a USB cable. The
interface should appear as a standard audio output device in Windows. You can route audio from music or video apps directly to the interface to
test.
Note that the headphone output volume is turned down and needs to be turned up before listening. This Quick Start Guide will show you how to get
sound running in and out of your interface as simply as possible.
Install iConnectivity RTP MIDI Driver for Network MIDI (Windows)
Before connecting the PlayAUDIO1U to a Windows computer, navigate to https://www.iconnectivity.com/windows-drivers and download the
RTP-MIDI Driver for Network MIDI. Launch the rtpMIDISetup Application and follow all prompts to install.
By default, your PlayAUDIO1U is pre-configured to work with standard Windows stereo audio. The interface is configured by default to send stereo
audio from the computer attached to USB DAW port A or B to all of the XLR outputs simultaneously and the headphone jack.