ADS-RR(SR)-HK2-DS-IG-EN maestro.idatalink.com
Kia soul witH naV witH aMP 2014-2017
Automotive Data Solutions Inc. © 2021
3
INSTALLATION INSTRUCTIONS
STEP 1
• Unbox the aftermarket radio and locate its main harness.
• Connect the wires shown on the next page from
aftermarket radio main harness to the rHK2 T-harness and
match the wire functions.
• Connect the rHK2 T-harness and the RCA cables to the
rSPDIF1.
There are two switches on the rSPDIF that need to be set
properly: Bit Rate and Input Level:
• Bit Rate: Set switch to 48 kHz.
• Input Level: If the radio you are installing has a rca preout
voltage of 3 volts or less (Look in the radios owners manual
for this specifi cation) set the Input Level to “Low”. If the
radio has a rca preout voltage of 4 volts or more then select
“High”.
Note: Isolate (tape) unused wires, if applicable.
STEP 2
• Remove the factory radio.
• Assemble the rHK2 T-harness as shown in wiring diagram.
If there is an OEM camera, connect the backup cam RCA
cable to the rHK2 CAM4 harness, as shown.
If equipped with 360 camera system: plug together the
BLACK 2 pin (with brown and yellow wires) connectors
(rHK2 CAM4 harness).
If not equipped with 360 camera system: do not plug the
black 2 PIN (with brown and yellow wires) connectors.
• Connect the factory radio harness to the rHK2 T-harness.
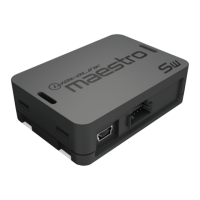
• Connect the 6 pin BLACK connector from the rHK2
T-harness to the RR2 module.
STEP 3
• Plug the aftermarket radio harnesses into the aftermarket
radio.
• Connect the RCA cables in the front RCA outputs of the
radio.
• Plug the backup camera RCA into the aftermarket radio’s
backup camera input (if applicable).
• Plug the Data cable to the data port of the aftermarket
radio.
• Insert the Audio cable into the iDatalink 3.5 mm audio jack
of the aftermarket radio (If there is no iDatalink audio input,
connect to AUX).
Note: On Pioneer radio, ensure that there is nothing
plugged into the W/R port.
STEP 4
• Connect all the harnesses to the Maestro RR2 module
then test your installation.
6
 Loading...