Do you have a question about the Ideal Boilers Classic FF 2 100 and is the answer not in the manual?
Overview of the Ideal Classic LXFF/FF boilers, their features, and suitability for different systems.
Guidance on selecting an appropriate and safe location for boiler installation, including specific building types.
Details on gas supply connection, pressure, and testing requirements for safe operation.
Instructions and safety requirements for installing the boiler's flue system and terminal.
Recommendations for ensuring adequate air supply for proper boiler operation and ventilation.
Details on setting up the water circulation system, pipework, and cylinder requirements.
Guidance on using water treatment for system protection, preventing deposits, and maintaining efficiency.
Advice on using TRVs and room thermostats for optimal heating control and system design.
Requirements for the electrical supply, wiring standards, and connections to the boiler.
Specific requirements for fully pumped open vent heating systems, including vent and feed connections.
Method for installing boilers in low head situations using a surge arrester for system stability.
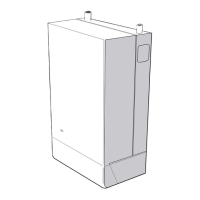
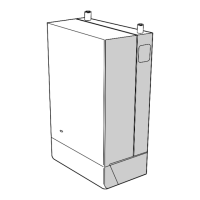
A diagram showing the main components of the boiler for identification and reference.
Instructions for safely unpacking the boiler and its associated components from the packaging.
Step-by-step instructions for removing the boiler casing for installation and servicing access.
Guidance on calculating and setting the correct flue length based on wall thickness and configuration.
An exploded view illustrating the assembly of the flue system for rear outlet installations.
Instructions for using the wall mounting template to mark and drill holes for rear flue installation.
Steps for preparing the wall, including cutting the flue hole and drilling mounting points.
Procedure for accurately measuring and cutting the flue to the required length for rear outlet.
Instructions for correctly fitting the boiler sealing ring onto the flue assembly for a secure seal.
Steps for assembling and fitting the flue into the wall for rear outlet connection.
Instructions for fitting the wall mounting plate securely for rear flue installation.
Steps for securely mounting the boiler onto the wall mounting plate for rear flue.
Procedure for connecting the flue assembly to the boiler for rear outlet configuration.
Instructions for fitting the terminal wall plate for a neat and secure finish on rear outlets.
An exploded view illustrating the assembly of the flue system for side outlet installations.
Instructions for using the wall mounting template for side flue installation.
Steps for preparing the wall, including cutting the flue hole and drilling for side flue.
Procedure for accurately measuring and cutting the flue for side outlet connection.
Instructions for fitting the foam seal around the flue entry to ensure weatherproofing.
Instructions for fitting the boiler sealing ring for side flue assembly.
Steps for assembling and fitting the flue into the wall for side outlet connection.
Instructions for fitting side outlet plates when the boiler is installed close to a side wall.
Instructions for fitting the wall mounting plate for side flue installation.
Steps for securely mounting the boiler onto the wall mounting plate for side flue installation.
Procedure for connecting the flue assembly to the boiler for side flue configuration.
Instructions for fitting the terminal wall plate for a neat finish on side flue outlets.
Information on flue extension kits for achieving longer flue runs beyond standard lengths.
Detailed steps for safely connecting the gas supply to the boiler.
Instructions for making the necessary water connections to the boiler and system.
Guidance on making safe electrical connections to the boiler according to regulations.
Wiring considerations for connecting external system controls like programmers and thermostats.
Visual wiring diagrams illustrating connections for various system components and the boiler.
Wiring details for mid-position automatic control valves commonly used in heating systems.
Wiring details for two-spring closed valves, often used for zone control.
Recommendations for fitting frost thermostats to prevent damage to the system during cold weather.
Procedures for electrical and gas safety checks and system testing before initial operation.
Step-by-step guide for the first-time lighting and startup of the boiler.
Final operational checks to ensure the boiler and system are functioning correctly.
Process for handing over the boiler and instructions to the end-user, including safety advice.
Recommended intervals and procedures for regular boiler servicing to ensure efficiency and safety.
Steps for safely removing the boiler casing to gain access for servicing.
Procedure for removing the burner and air box assembly for cleaning or inspection.
Instructions for cleaning the fan unit and flue passages to maintain optimal performance.
Steps for cleaning the main burner and pilot light components for reliable ignition.
Guidance on reassembling the boiler components correctly after servicing.
Procedures for adjusting gas pressure for the main burner and pilot to ensure correct output.
General precautions and steps to follow before replacing any boiler component.
Instructions for safely replacing the boiler's sightglass assembly.
Steps for replacing the overheat thermostat, a critical safety component.
Procedures for replacing thermostat controls, sensor leads, and on/off switches.
Instructions for replacing the pilot burner assembly, including injector and electrode.
Steps for replacing the ignition electrode and its associated lead for reliable ignition.
Procedure for replacing the main burner assembly and its injector.
Instructions for replacing the main gas control valve assembly.
Procedure for replacing the boiler's fan assembly.
Steps for replacing the air pressure switch.
Instructions for replacing the main printed circuit board (PCB).
Procedure for replacing the insulation panels within the combustion chamber.
Steps for replacing the boiler's heat exchanger unit.
Instructions for replacing the seals around the boiler casing for airtightness.
Procedure for replacing an optional programmer unit connected to the boiler.
An exploded view identifying the individual parts of the burner assembly.
An exploded view identifying the components within the boiler's control box.
Identification of parts related to the standard and deluxe boiler casing assemblies.
A list of commonly required spare parts for the appliance, with part numbers.
Section for recording boiler model, size, and date of installation for feedback.
Section for installer's name, address, and telephone number for feedback.
Area for users to provide suggestions on how to improve the boiler's design or performance.
Open field for customers to provide general comments or feedback about the product or service.
Form section for installer contact information to receive further details.
Checkboxes for requesting training course details or a technical representative contact.
Checkboxes for requesting product guides for specifiers and householders.
Checkboxes for requesting specific technical manuals for other Ideal boiler models.
| Brand | Ideal Boilers |
|---|---|
| Model | Classic FF 2 100 |
| Category | Boiler |
| Language | English |