55
SERVICING
isar - Installation and Servicing
83
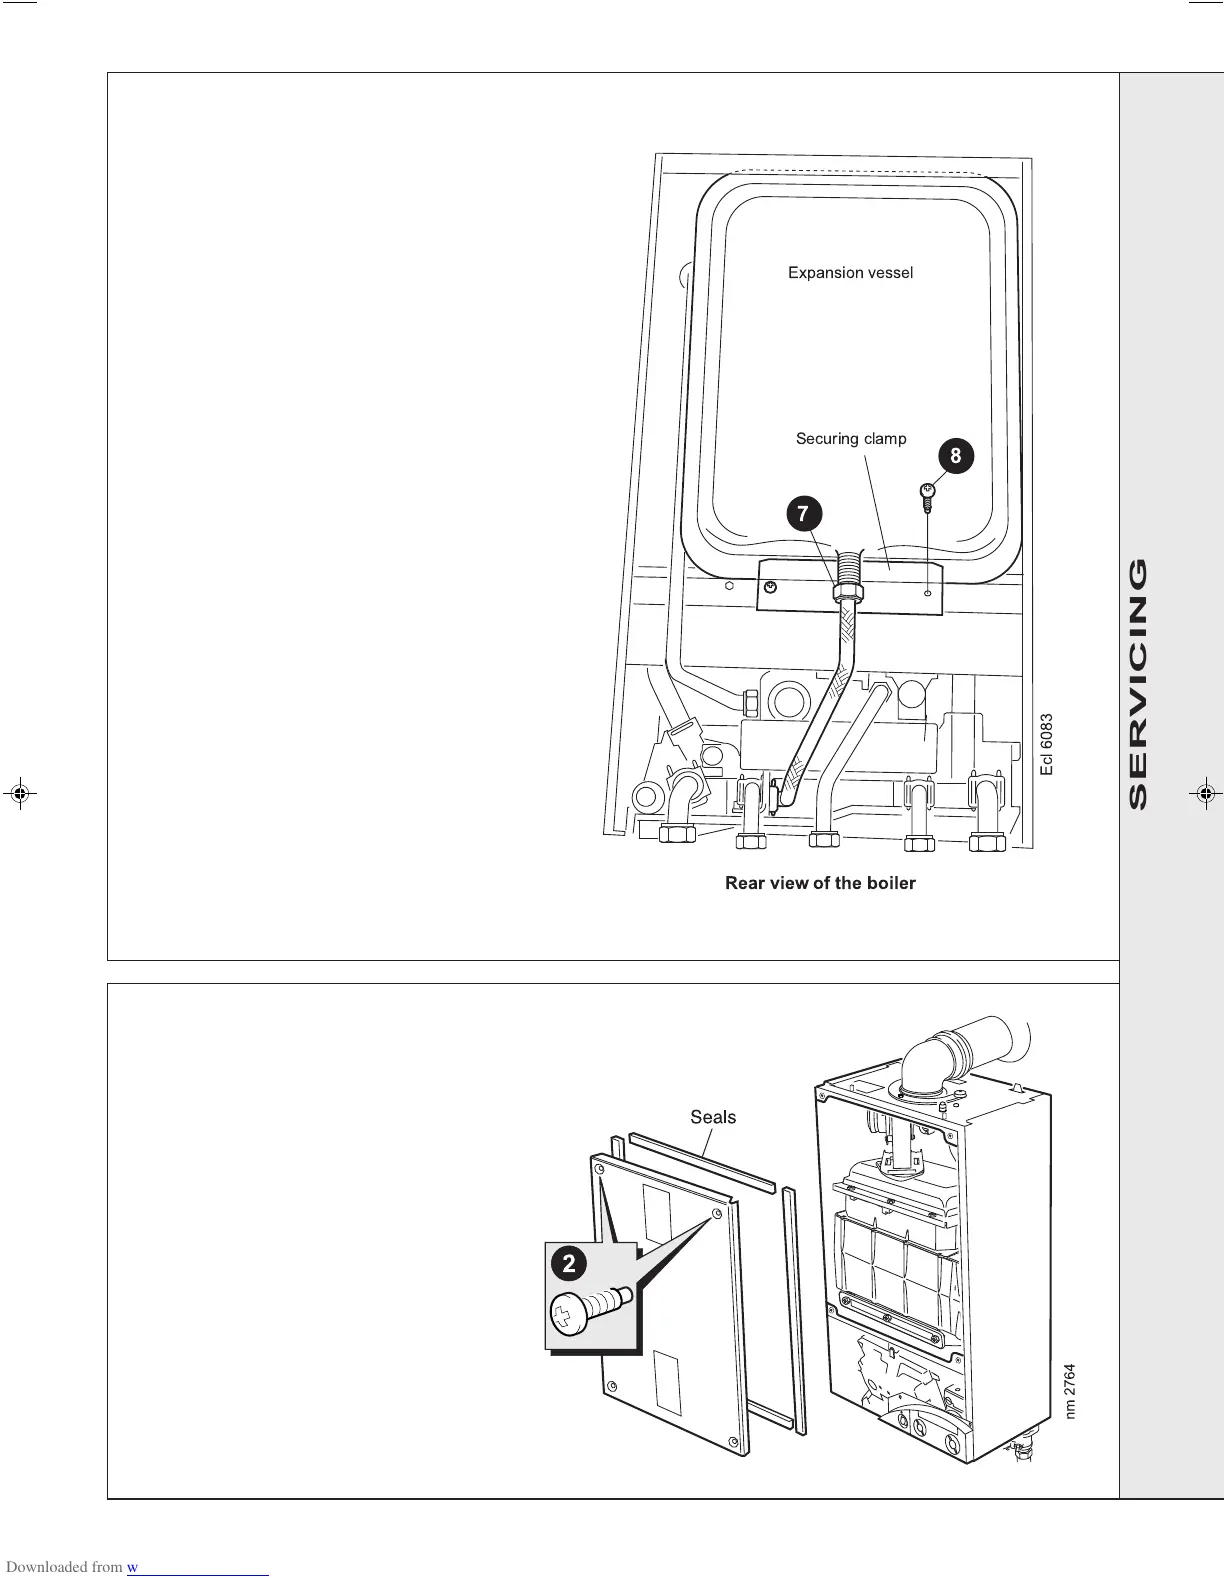
BOILER SEALING PANEL SEAL REPLACEMENT
1. Refer to Frame 57.
2. Remove the boiler front and sealing
panels. Refer to Frames 49 & 50.
3. Remove the old seal from the casing
and thoroughly clean the casing
surfaces.
4. Fit the new adhesive seals, note that
they are supplied to the correct length
for the relevant sides.
5. Reassemble in reverse order.
6. Check operation of the boiler. Refer to
Frame 57.
Note. Ensure that the boiler sealing
panel is correctly sealed,
compressing the seal to make an
airtight joint.
82
EXPANSION VESSEL REPLACEMENT
1. Refer to Frame 57.
2. Drain the boiler. Refer to Frame 77.
3. Unscrew all the gas and water connection unions on the
boiler side of the valves.
4. Remove the screw from the turret clamp and remove.
5. Remove the turret.
6. Lift the complete boiler from the wall mounting frame
and place on a flat surface, face down, to expose the
expansion vessel.
7. Unscrew the union nut on the vessel water connection
pipe.
8. Unscrew the 2 screws from the securing clamp and
remove.
9. Remove the expansion vessel.
10. Fit the new expansion vessel.
11. Reassemble in reverse order.
12. Refill the boiler. Refer to Frame 36.
13. Check operation of the boiler. Refer to Frame 57.
Note.
If preferred, and for convenience, a new expansion vessel
may be installed elsewhere in the heating system, providing
it ensures equivalent system protection.
SERVICING
203319-3.pmd 27/03/2008, 08:1555
 Loading...