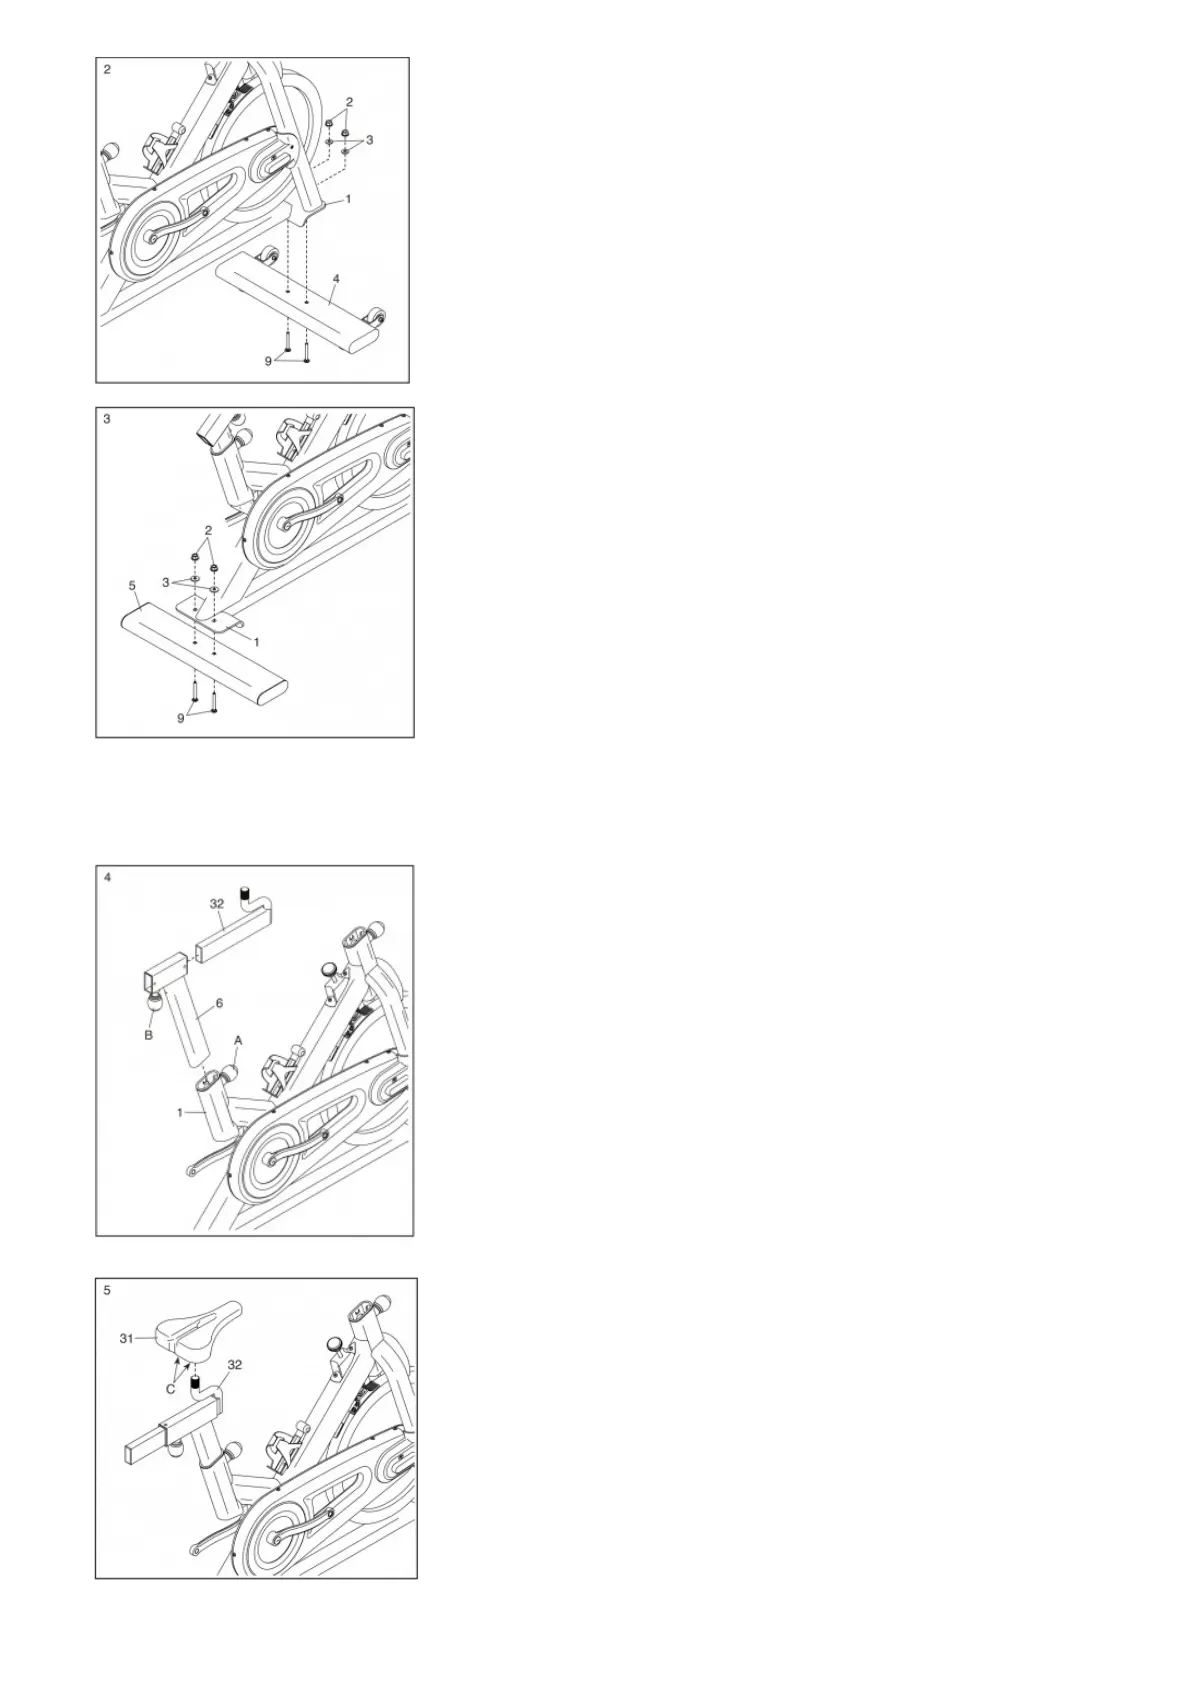
3. Attach the Rear Stabilizer (5) to the Frame (1) with two M8 x 55mm Carriage Bolts (9), two M8 Washers (3), and two M8 Flange Nuts (2).
4. Locate the Adjustment Knob (A) on the rear of the Frame (1). Loosen the Adjustment Knob, pull it outward, remove the Saddle Post (6), and release the Adjustment Knob.
Orient the Saddle Post (6) as shown. Next, pull the Adjustment Knob (A) outward, insert the Saddle Post into the Frame (1), move it upward or downward to the desired position,
and then release the Adjustment Knob into an adjustment hole in the Saddle Post. Tighten the Adjustment Knob. Make sure that the Adjustment Knob is firmly engaged in
an adjustment hole.
Orient the Saddle Carriage (32) as shown. Next, locate the Adjustment Knob (B) on the Saddle Post (6). Then, loosen the Adjustment Knob, pull it downward, insert the Saddle
Carriage into the Saddle Post, move it to the desired position, and then release the Adjustment Knob into an adjustment hole in the Saddle Carriage. Tighten the Adjustment
Knob.
5. Orient the Saddle (31) as shown.
Slide the Saddle (31) onto the Saddle Carriage (32); make sure that the Saddle is level and is pointing straight ahead. Then, tighten the two nuts (C) beneath the Saddle.
6. Orient the Handlebar (7) and the Handlebar Post (72) as shown. Attach the Handlebar to the Handlebar Post with four M8 x 16mm Bolts (76) and four M8 Locknuts (77); start
all the Locknuts, and then tighten them.