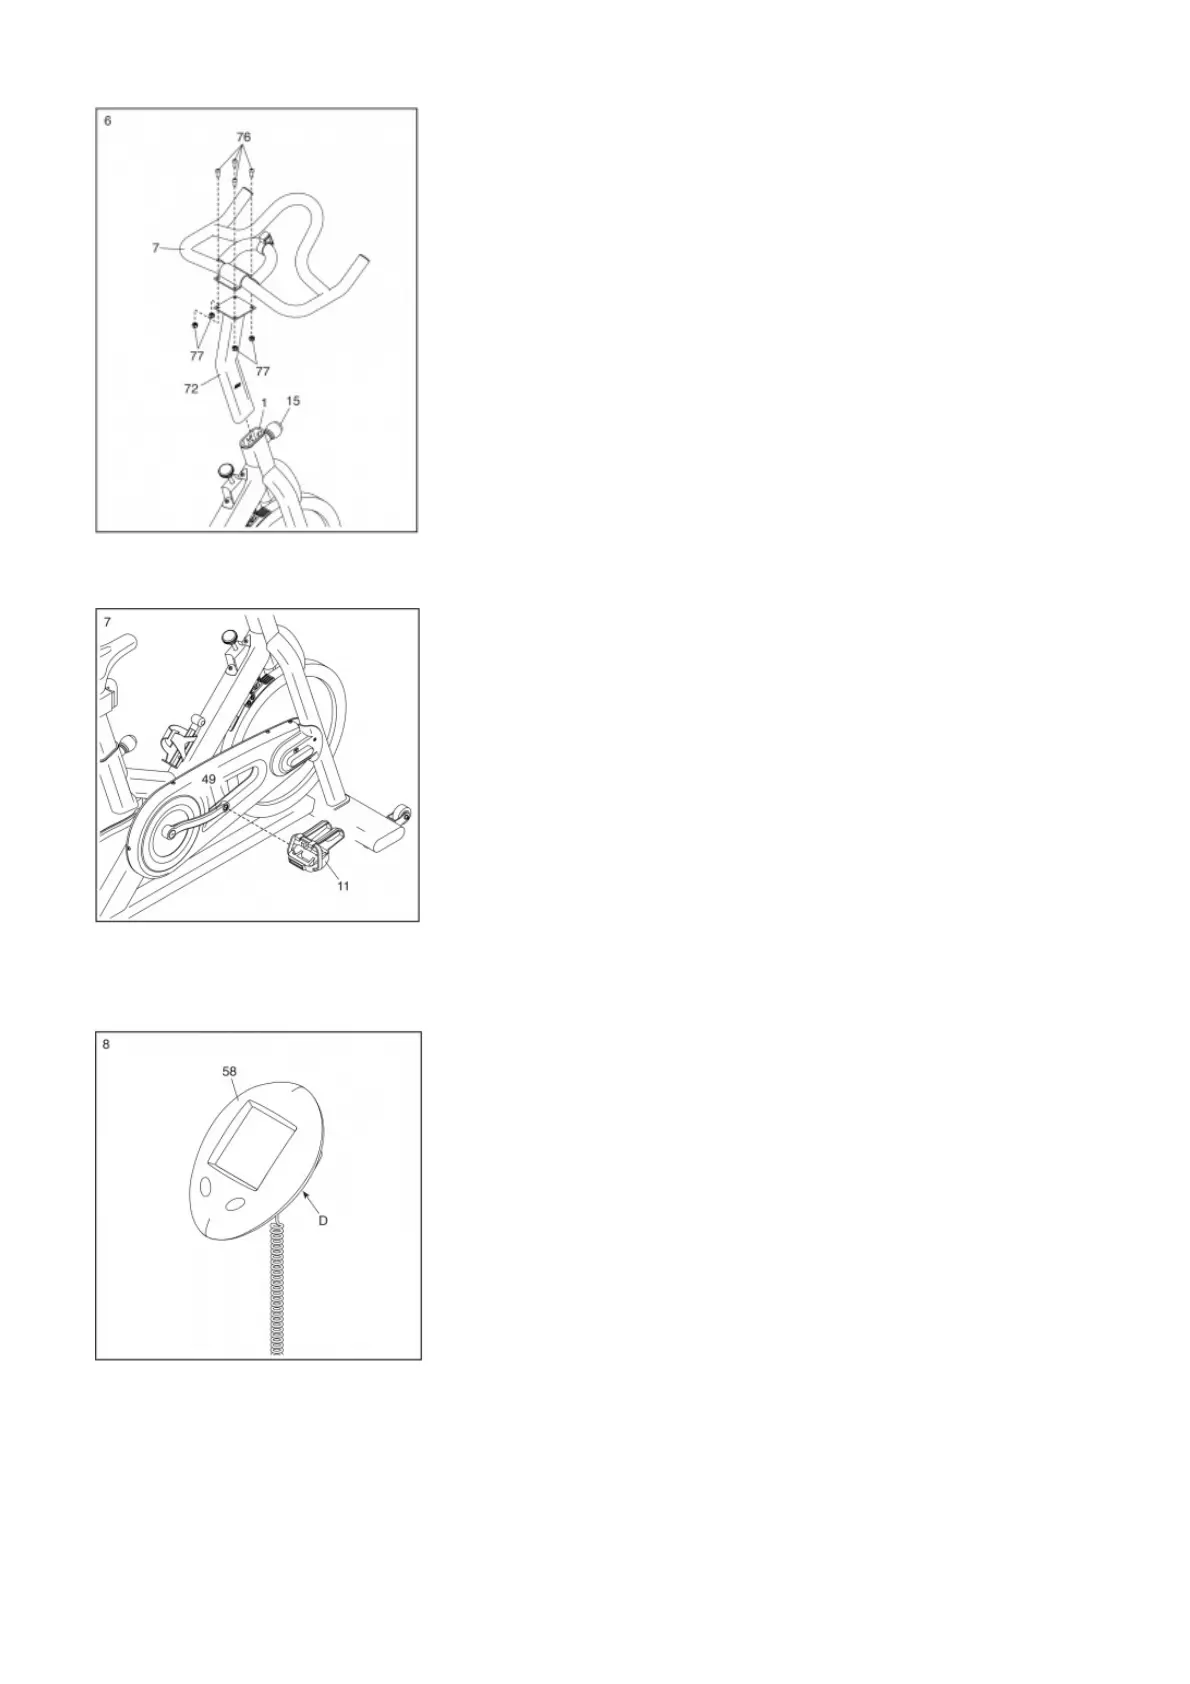
Next, locate the Adjustment Knob (15) on the front of the Frame (1). Loosen the Adjustment Knob and pull it outward. Then, insert the Handlebar Post (72) into the Frame. Move
the Handlebar Post (72) upward or downward to the desired position, release the Adjustment Knob (15) into an adjustment hole in the Handlebar Post, and then tighten the
Adjustment Knob. Make sure that the Adjustment Knob is firmly engaged in an adjustment hole.
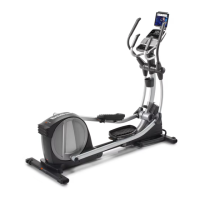
7. Identify the Right Pedal (11).
Using an adjustable wrench, firmly tighten the Right Pedal (11) clockwise into the Right Crank Arm (49).
Firmly tighten the Left Pedal (not shown) counterclockwise into the Left Crank Arm (not shown). IMPORTANT: You must turn the Left Pedal counterclockwise to
attach it.
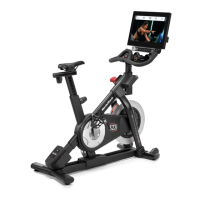
8. The Console (58) can use two AAA batteries (not included); alkaline batteries are recommended.
Do not use old and new batteries together or alkaline, standard, and rechargeable batteries together. IMPORTANT: If the Console has been exposed to cold temperatures,
allow it to warm to room temperature before you insert batteries. Otherwise, you may damage the console displays or other electronic components. Remove the
battery cover, and insert the batteries into the battery compartment (D).
Make sure to orient the batteries as shown by the diagram inside the battery compartment.
Then, reattach the battery cover.
9. Slide the Console (58) onto the Console Bracket (10) on the Handlebar (7).