25
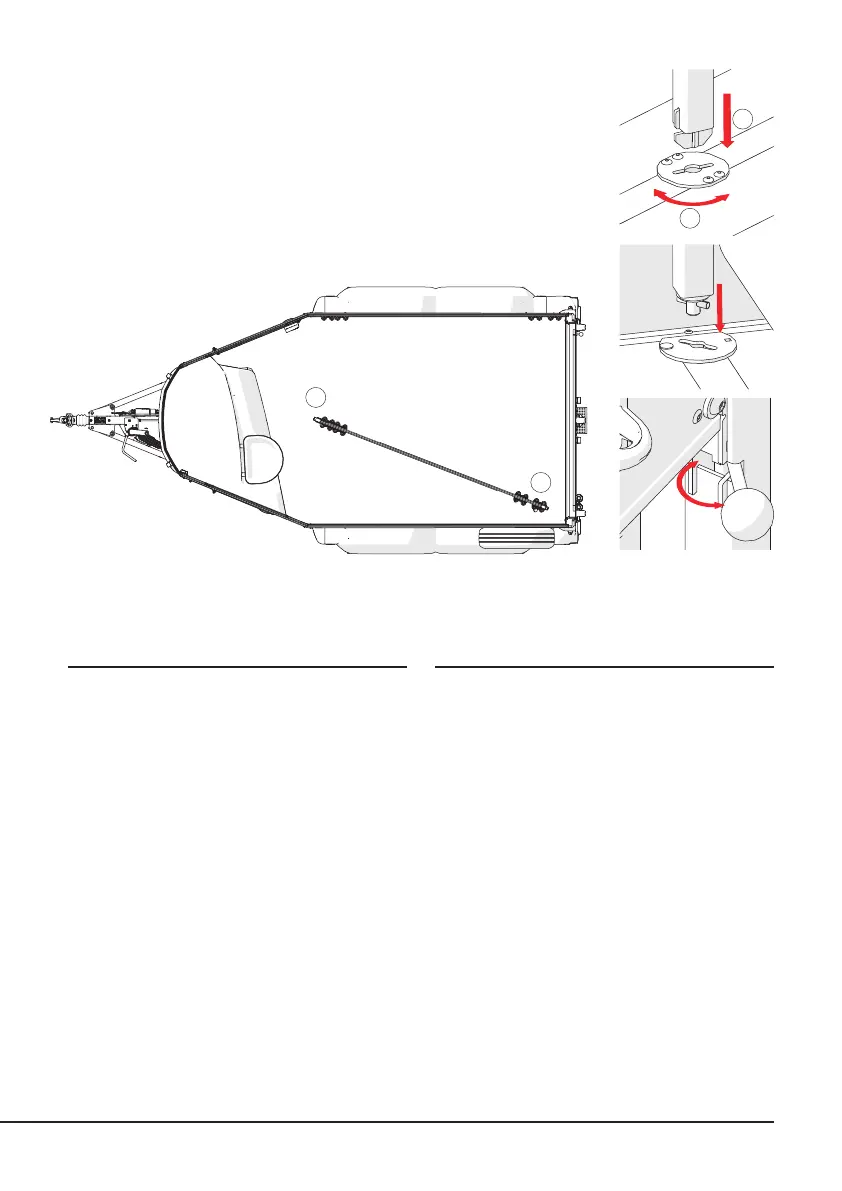
Lower the rear leg down into the slot in the
floor and rotate the “rear leg locking knob”
to lock the partition into place.
4. Fit the breast/breeching bars to the
partition by attaching the hook ends to the
partition and then the pin ends to the walls,
securing in place with the provided linch
pins. (See section 5.2.2)
5.2.2 SECURING
THE STALL
1. Hook the breast/breeching bar on to the
partition breast/breeching bar brackets.
2. Lift up the pin end over the wall mounted
breast/breeching bar bracket.
3. Insert breast/breeching bar pin end into
wall mounted bracket, ensuring that the
breast/breeching bar is level and at right
angles to the wall and partition.
4. Insert linch pin through the hole in breast/
breeching bar pin end.
5. Repeat for the other side.
5.2.3 REMOVING
THE STALL
The partition can only be removed when the
breast/breeching bars have been removed.
Removal is the reverse of the installation
procedure explained in Section 5.2.1.
1. Remove the breast/breeching bars (reversal
of procedure explained in 5.2.2).
2. Rotate the “rear leg locking knob” to
unlock the partition.
3. Rotate the partition to allow the front leg
to be removed from the keyed slot.
4. With the aid of an assistant lift the partition
out of the front keyed slot.
1
1
2
2