Do you have a question about the IKEA FRAMTID OV9 and is the answer not in the manual?
Important safety warnings, potential risks, and how to reduce them.
Precautions for safe electrical connection and installation.
Specifies intended use and restrictions for user operation.
Warnings about touching hot parts and flammable materials.
Instructions for safe door opening, venting, and accessory handling.
Advice on preventing fires and responsible appliance disposal.
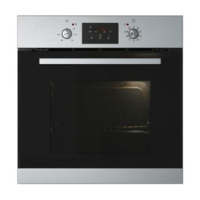
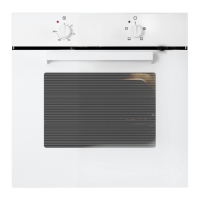
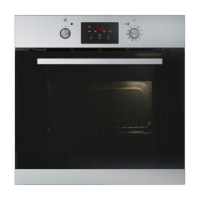
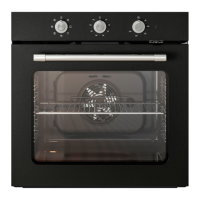
Identifies and labels the main parts of the oven.
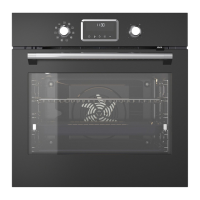
Lists and shows the accessories provided with the oven.
Explains the function of each control knob and button.
Steps for turning on the oven and setting temperature.
Instructions for setting and adjusting the clock time.
Guide to choosing oven functions and temperature.
How to set a specific duration for cooking.
How to program the oven to finish cooking at a specific time.
Details on using the special pizza cooking function.
How to use the function to keep food warm at 80°C.
Instructions for setting the kitchen timer.
How to activate and deactivate the child lock feature.
Describes conventional, grill, and turbo grill functions.
Details on convection bake and defrost functions.
Using forced air for cooking multiple dishes.
For crisp bases and soft surfaces, ideal for cakes and frozen products.
Describes 'S - Pizza' and 'S - Holding' special functions.
Cooking times and temperatures for cakes, biscuits, and tarts.
Cooking guidelines for bread, pizza, and savory pies.
Cooking guidelines for pasta, meat, fish, and vegetable dishes.
Cooking times and temperatures for various types of meat.
Cooking guidelines for fish and vegetable dishes.
Specific cooking table for using the grill function.
Instructions for cleaning the outside and inside of the oven.
How to clean oven accessories and catalytic panels.
Safety, maintenance, and door removal instructions.
Instructions for reattaching the oven door.
Guide to replacing the oven's interior light bulb.
Troubleshooting steps for when the oven is not functioning.
Solutions for when the oven door is locked and won't release.
Troubleshooting for issues with the electronic programmer.
Recommendations to solve problems before contacting service.
Details to specify when contacting After-Sales Service.
Provides physical dimensions and usable volumes of the oven.
Details power consumption, heating elements, and functions.
Information on the oven's energy usage.
Instructions for preparing the kitchen unit for oven installation.
Steps to take before the first use of the appliance.
Safety advice for during appliance operation.
Explains the door lock mechanism and its removal.
Verifying mains voltage matches appliance specifications.
Guidance on packaging disposal, scrapping, and energy saving.
Statement of compliance with EU safety and EMC directives.
Explains guarantee duration, what's covered, and what's not.
Details who performs service and how IKEA resolves faults.
Specific exclusions, country law application, and legal rights.
Instructions on contacting IKEA for service and support.
Importance of the sales receipt for guarantee claims.
This document provides a comprehensive guide for the FRAMTID OV9 oven, covering its functions, usage, and maintenance.
The FRAMTID OV9 oven offers a variety of cooking functions designed to cater to different culinary needs. The core functions are selected using the function selector knob (A) on the control panel.
Oven Off (0): This setting turns off all oven operations.
Lamp: This function simply switches on the oven light, allowing you to view the food inside without opening the door.
Conventional: This function is ideal for achieving an evenly browned and crisp surface and base. It's suitable for baking pies with liquid fillings (savoury or sweet) on a single shelf, and pizzas on one or two levels. For two-level cooking, it's recommended to switch the food's position halfway through to ensure even results. Preheating the oven to the desired temperature is crucial before placing food inside. For single-shelf cooking, the 2nd level from the bottom is advised, while for two levels, use the 1st and 3rd levels.
Grill: This function is perfect for grilling steak, kebabs, sausages, cooking vegetables au gratin, and toasting bread. Preheating the oven for 3-5 minutes is recommended. For meat, pouring a small amount of water into the drip tray (placed on the 3rd level from the bottom) helps reduce smoke and fat spatters. The oven door must remain closed during grilling.
Turbo Grill: Designed for grilling large joints of meat, such as roast beef. The oven door must be kept closed. Similar to the grill function, pouring water into the drip tray (on the first/second level from the bottom) is advised to minimize smoke and fat splattering. The meat should be turned during grilling for even cooking.
Convection Bake: This function is suitable for baking cakes with liquid filling (sweet or savoury) on a single level. If needed, switch the positions of the dishes to ensure more even cooking.
Defrost: This function speeds up the thawing of food at room temperature. To prevent food from drying out, it should be placed in the oven in its original wrapping. The central level is recommended for this function.
Forced Air: This versatile function allows cooking different types of food simultaneously, even if they require the same cooking temperature (e.g., fish, vegetables, cakes), on up to two levels. It prevents odour transfer between foods. For single-level cooking, the 2nd level from the bottom is recommended. For two-level cooking, use the 1st and 3rd levels, and preheat the oven first.
Bottom Heating + Forced Air: This function provides a crisp base and soft surface, making it ideal for baking cakes with liquid filling and no precooked base (e.g., tarts, plum cakes, ricotta cakes, pizzas with abundant topping) on a single level. Preheating is necessary. Placing food on the 2nd cooking level from the bottom is advised. This function is also excellent for frozen products like pizza, chips, strudel, and lasagna; follow the package directions for these items.
Special Function (S): This category includes specific modes for specialized cooking.
The FRAMTID OV9 oven is equipped with an electronic programmer (B) and a thermostat knob (C) for precise control over cooking.
Daily Use: To start cooking, turn the function selector knob (A) to the desired function, then turn the thermostat knob (C) clockwise to set the temperature. Press the "ok" button to confirm. The oven will begin heating. The indicator next to "°C" on the display will disappear once the set temperature is reached. After cooking, turn both knobs to "0". When grilling, it's advisable to set the thermostat to 250°C, which can be adjusted lower if less intense heat is needed.
Starting the Oven: Upon initial connection or after a power failure, the display will show "12:00".
Selecting and Changing the Clock Time:
Select Cooking Function: Turn knob A to the desired function. The display will show the preset temperature or power level. For grill and turbo grill functions, confirm the temperature or power level by pressing "ok". To modify the temperature, turn knob C. For the defrost function, proceed directly to confirmation. Press "ok" to confirm; the oven will switch on. The "°C" indicator will turn off when the set temperature is reached. To change the temperature during cooking, turn knob C to select a new temperature.
Important Notes: To cancel any selection, turn knob A to "0". Alternatively, press "set" to turn off the oven while retaining previously selected functions.
Selecting the Cooking Time: This feature allows the oven to operate for a specified duration, after which it automatically switches off. The maximum programmable time is 6 hours.
Selecting the End of Cooking Time: This function allows presetting the time when cooking should finish, up to 23 hours and 59 minutes.
Keep Warm: This function maintains a constant temperature of 80°C in the oven.
Timer: The timer can only be set when the oven is not in use, with a maximum setting of 6 hours.
Childproof Lock:
Proper cleaning and maintenance are essential for the longevity and performance of your FRAMTID OV9 oven.
Cleaning: WARNING! Never use steam cleaning equipment. Only clean the oven when it is cool to the touch. Disconnect the appliance from the power supply before cleaning.
Oven Exterior: IMPORTANT: Do not use corrosive or abrasive detergents. If such products accidentally contact the appliance, clean immediately with a damp cloth.
Oven Interior: IMPORTANT: Do not use abrasive sponges, metallic scrapers, or scourers, as these can damage enamelled surfaces and the oven door glass over time.
Accessories:
Cleaning the Rear Wall and Catalytic Side Panels (if present): IMPORTANT: Do not use corrosive or abrasive detergents, coarse brushes, pot scourers, or oven sprays, as these can damage the catalytic surface and its self-cleaning properties.
Maintenance: WARNING! Use safety gloves. Ensure the oven is cold before performing any maintenance. Disconnect the oven from the power supply.
To Remove the Door:
To Refit the Door:
To Replace the Rear Lamp:
| Type | Electric |
|---|---|
| Energy efficiency class | A |
| Number of ovens | 1 |
| Control type | Rotary |
| Built-in display | No |
| Timer | Yes |
| Timer type | Mechanical |
| Interior light | Yes |
| Number of lamps | 1 |
| Lamp power | 25 W |
| Voltage | 220-240 V |
| Frequency | 50 Hz |
| Color | Stainless Steel |
| Width | 595 mm |
| Depth | 560 mm |
| Power | 2800 W |