EasyManua.ls Logo

IKEA RAFFINERAD RUTINERAD - User Manual

IKEA RAFFINERAD RUTINERAD
24 pages
Print Icon
To Next Page IconTo Next Page
Loading...
RAFFINERAD
RUTINERAD
GB
Question and Answer IconNeed help?

Do you have a question about the IKEA RAFFINERAD RUTINERAD and is the answer not in the manual?

Summary

Safety Information

Children and Vulnerable People Safety

Safety guidelines for children and vulnerable people to prevent risks like suffocation or injury.

General Safety

Important safety precautions for operating and maintaining the appliance.

Safety Instructions

Installation

Guidelines for safe installation of the appliance by qualified personnel.

Electrical Connection

Requirements for safe electrical connections to prevent fire and shock hazards.

Use Precautions

Operational Warnings

Important warnings related to operating the appliance to prevent injury or damage.

Installation and Disposal

Installation Guidelines

Instructions and warnings for the safe installation of the appliance.

Daily Use Operations

Oven Functions Explained

Function and Application Guide

Detailed description of each oven function and its application for cooking and baking.

Cooking Guidance and Times

Troubleshooting Common Issues

Oven Not Heating Solutions

Solutions for common problems where the oven does not heat up, checking settings and fuses.

Other Common Problem Resolutions

Addressing issues like the oven lamp not operating, display errors, and steam condensation.

IKEA Guarantee Information

Guarantee Validity and Coverage Details

Details on the duration, what is covered, and what is not covered under the IKEA guarantee.

Service Execution and Country Law

Information on who executes service, how country law applies, and the area of validity.

IKEA Service and Support

After Sales Service for IKEA Appliances

Contacting IKEA for service requests, installation clarifications, and user manual support.

How to Reach IKEA Service

Guidance on contacting IKEA for service, including necessary information for a quick response.

Overview

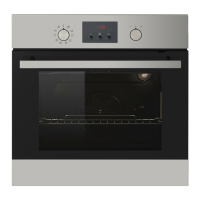
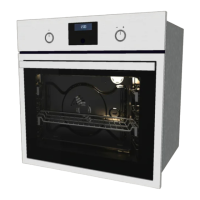
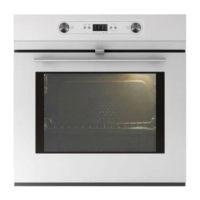
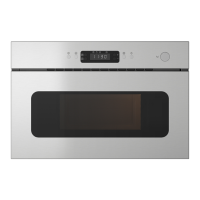
This document describes the RAFFINERAD RUTINERAD oven, an appliance designed for household use, offering various cooking functions, safety features, and maintenance guidelines.

Function Description

The oven is equipped with a knob for selecting oven functions and another for setting the temperature. An electronic programmer manages the appliance's operations and displays information such as time, temperature, and active functions.

Oven Functions:

  • Off position: The appliance is off.
  • Forced Air Cooking: Bakes on up to three oven levels simultaneously. When using this function, the oven temperature should be decreased by 20-40 °C from standard temperatures. Also suitable for drying food.
  • Conventional (Top and Bottom Heat): Bakes and roasts on one oven level.
  • Grilling: Grills flat food in the middle of the grill and toasts.
  • Bottom Heat: Bakes cakes with crispy or crusty bottoms and preserves food.
  • Grilling with Fan: Roasts larger joints of meat or poultry on one level, also suitable for gratinating and browning.
  • Bread and Pizza Baking: Bakes food on one oven level for more intensive browning and a crispy bottom. When using this function, the oven temperature should be decreased by 20-40 °C from standard temperatures.
  • Defrost: Defrosts frozen food.
  • Top Heat: Finishes cooked dishes.
  • Fast Grilling: Grills flat food in large quantities and toasts.
  • Light: Activates the oven lamp without a cooking function. Can be used with residual heat in the final cooking phase to save energy.

Clock Functions: The electronic programmer includes several clock functions:

  • Minute Minder: Sets a countdown time (up to 23 hours 59 minutes) that does not affect oven operation.
  • Time of day: Allows setting, changing, or checking the current time.
  • Duration: Sets how long the appliance must operate. This function requires an oven function to be set first.
  • End: Sets when the appliance must be deactivated. This function also requires an oven function to be set first. Duration and End can be used together for a time delay.
  • Count Up Timer: Monitors how long the oven operates. This cannot be used when Duration or End functions are active.

Usage Features

Before First Use: Before using the oven for the first time, all accessories and removable shelf supports should be removed. The appliance should be cleaned, and then preheated by setting a function and maximum temperature for one hour, followed by ten minutes with the grilling function. This process helps burn off any remaining grease and odors.

Setting the Time: The time of day is set using the '+' and '-' buttons and confirmed with the 'OK' button. The time can only be changed when the appliance is in standby mode.

Activating and Deactivating: To activate the appliance, turn the oven function knob clockwise to the desired function. To deactivate, turn the knob to the off position.

Mechanical Child Lock: The appliance features a mechanical child lock located below the control panel on the right side. To open the oven door when the child lock is installed, pull the child lock handle up. The child lock can be removed using a Torx key provided in the oven fitting bag.

Child Lock Function (Electronic): When the electronic child lock is activated, the oven cannot be operated. To activate or deactivate, ensure no oven function is set, then press and hold the 'OK' and '+' buttons simultaneously for two seconds. An acoustic signal will sound, and "SAFE" will appear or disappear from the display.

Automatic Switch-off: For safety, the appliance automatically deactivates after a certain time if an oven function is operating and the oven temperature is not changed. The switch-off time varies depending on the oven temperature. After an automatic switch-off, pressing any button will reactivate the appliance. This feature works for all oven functions except Light, Duration, and End.

Cooling Fan: A cooling fan automatically activates during operation to keep the appliance's surfaces cool. It continues to operate after deactivation until the oven cools down.

Safety Thermostat: The oven has a safety thermostat to prevent dangerous overheating due to incorrect operation or defective components. It interrupts the power supply and reactivates automatically when the temperature drops.

Helpful Hints and Tips:

  • The oven has four shelf levels, counted from the bottom.
  • A special air circulation system helps keep food soft inside and crispy outside, reducing cooking time and energy consumption.
  • Moisture condensation on the appliance or door glass is normal. Stand back when opening the door. Operating the appliance for 10 minutes before cooking can reduce condensation. Clean moisture after each use.
  • Avoid placing objects or aluminum foil directly on the appliance floor or components, as this can damage the enamel and affect baking results.
  • When baking cakes, avoid opening the oven door before 3/4 of the set cooking time has passed.
  • If using two baking trays, leave one empty level between them.
  • For fatty foods, use a deep pan to prevent stains.
  • Allow meat to rest for 15 minutes before carving to prevent juice from seeping out.
  • To reduce smoke during roasting, add water to the deep pan and replenish as it dries.
  • Cooking times vary based on food type, consistency, and volume. Monitor performance initially to find optimal settings.

Using Accessories:

  • Telescopic Runners: These can be installed on any shelf level, ensuring they are on the same level with the stop element pointing up. They facilitate easier insertion and removal of shelves and trays. Do not clean telescopic runners in a dishwasher or lubricate them.
  • Wire Shelf: For cookware, cake tins, roasts.
  • Baking Tray: For cakes and biscuits.
  • Grill-/Roasting Pan: For baking, roasting, or collecting fat.

Maintenance Features

Care and Cleaning:

  • Clean the front of the appliance with a soft cloth, warm water, and cleaning agent.
  • For metal surfaces, use a standard cleaning agent.
  • Clean the oven interior after each use to prevent dirt from burning on.
  • Stubborn dirt can be cleaned with a special oven cleaner.
  • Clean all oven accessories after each use with a soft cloth, warm water, and cleaning agent, then dry them.
  • For nonstick accessories, avoid aggressive agents, sharp objects, or dishwashers to prevent coating damage.
  • For stainless steel or aluminum appliances, clean the oven door with a wet sponge and dry with a soft cloth. Avoid steel wool, acids, or abrasive materials on the oven surface and control panel.

Cleaning the Door Gasket: Regularly check the door gasket around the oven cavity frame. Do not use the appliance if the gasket is damaged; contact the Service Centre. Clean the gasket with a soft cloth, warm water, and cleaning agent.

Removing Shelf Supports: To clean the side walls, the shelf supports can be removed by pulling the front end away from the side wall, then the rear end. Install them in the opposite sequence, ensuring the rounded ends point to the front.

Changing the Oven Lamp:

  • Deactivate the oven and disconnect the power supply (remove fuses or deactivate circuit breaker).
  • Place a cloth on the oven bottom to protect the lamp and glass cover.
  • Turn the glass cover counterclockwise to remove it, then clean it.
  • Replace the bulb with a 25-watt, 230V (50Hz), 300 °C heat-resistant oven light bulb (E14 connection type).
  • Install the glass cover.

Cleaning the Oven Door and Glass Panels: The oven door has three glass panels that can be removed for cleaning.

  • Close the oven door to the first opening position (halfway), then pull it forward and remove it from its seat.
  • Place the door on a soft cloth on a stable surface.
  • Open the door fully, lift, and turn the levers on the two hinges.
  • Release the locking system to remove the glass panels.
  • Turn the two fasteners by 90° and remove them.
  • Carefully lift and remove the glass panels one by one, starting from the top.
  • Clean the glass panels with water and soap, then dry them carefully.
  • To reinstall, follow the steps in reverse. Ensure glass panels are in the correct sequence, with the second panel's screen-printing zone facing the inner side of the door. The surface of the glass panel frame on the screen-printing zones should not be rough after installation. Ensure the top panel is installed correctly in its seats.

IKEA RAFFINERAD RUTINERAD Specifications

General IconGeneral
TypeBuilt-in oven
Energy efficiency classA
Voltage220-240 V
TimerYes
Door cooling systemYes
Interior lightYes
Frequency50 Hz

Related product manuals