3)
Error Codes
a) E001: x-ray exposure button was released too fast.
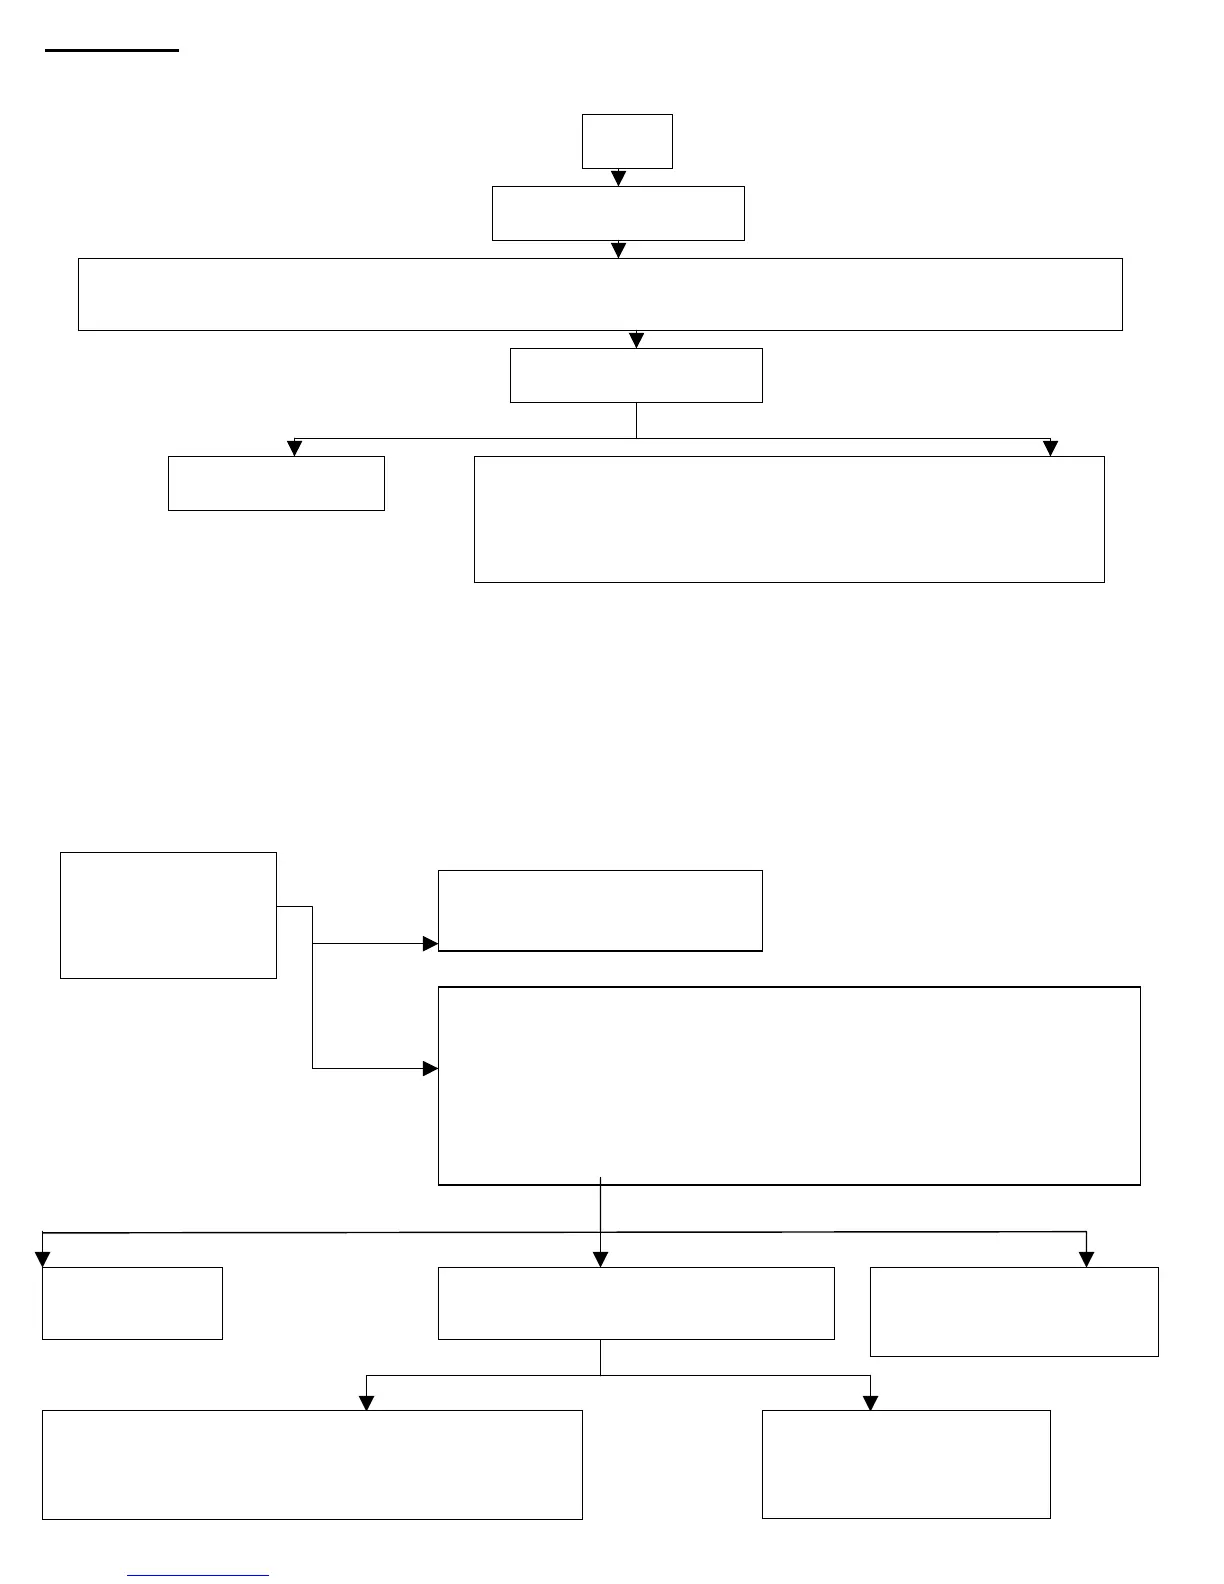
b) E002:
Problem Solved Problem wasn’t solved
Machine is good
Try to use another jumper and if it doesn’t work, call
electrician. The frequency problem is coming from the wall.
If the frequency coming out from the wall is good, replace the
oard. P/N: 897ZZ1145021 (115V) / 897-ZZ1145051 (230V)
Turn the machine on
Turn the machine off and remove J3 from the PC board (it is located on the left edge when facing the
ower switch on the control box) make sure it is clean and put it back in place (covers both pins).
Frequency is incorrect
E002
c) E003-Turn the machine off and then on. If the problem persists, replace the PC Board.
d) E004 / E005:
The operational voltage range is 108 < V < 126. If the error message is E004 / E005 than the voltage supply is
above or below this range, respectively. Call an electrician to fix the problem.
e) E006: -Two or more X-ray tubes may have been pulled out- Make sure that all tube heads besides one are in
Position.
-Equipment selector switch may be faulty.
-Check wiring.
f) E009:
Fuse Bad
2
Fuse Good
Voltage & Resistance Good Voltage Good-Resistance Bad No Voltage
Resistance Good Resistance Bad
Check Fuse, F1,
located in a black
tube on the PC
Board.
Replace PC Board
P/N: 897-ZZ1145021 (115V).
P/N: 897-ZZ1145051
230V
Machine
should work
Replace the Tube
P/N: 9992700130 (115V)
P/N: 9992700330 (230V)
Replace the Arm
P/N: 9992700105 (Folding Arm)
P/N: 9992700108 (Standard Extension Arm (35.4”))
Check the resistance of the tube head
Should be between 1.2
-1.6
-Turn Off the machine and then turn it On. That will enable you to
take one additional exposure. Check that the voltage between 10 &
16 on the bar closest to the Power switch during an exposure is about
line voltage (≈115V).
-Check the resistance between 10 & 16 on the bar closest to the
Power switch when the machine is shut down (≈1.2Ω-1.6Ω)
Replace fuse F1:
P/N: 897FU0001013
 Loading...