Do you have a question about the IMOU Ranger 2C and is the answer not in the manual?
Scan the QR code or search 'Imou' on app stores to download and install the Imou application.
Run the Imou app and register an account for the first-time use.
Connect the camera to the power supply using the provided power adapter.
Wait for the camera to finish booting until the indicator flashes green.
Connect your smartphone to a 2.4 GHz Wi-Fi network and follow app instructions to add the camera.
Drill screw holes on the mounting surface and install expansion bolts.
Secure the mounting plate to the mounting surface using self-tapping screws.
Place the camera on the mounting plate, turn it on, and adjust the lens angle.
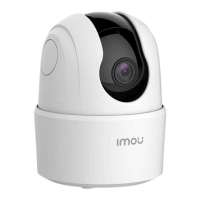
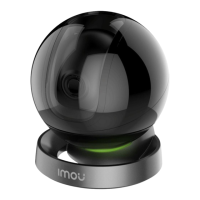
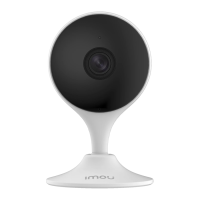
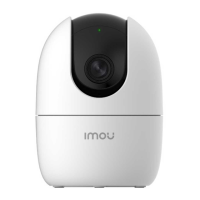
Identifies key components of the camera including ports and slots.
Details the meaning of different LED indicator patterns and their corresponding device statuses.
This document serves as a quick start guide for the Imou camera, providing essential information for its setup, operation, and basic maintenance. It's designed to help users get their device up and running efficiently, offering a clear, step-by-step approach to installation and connectivity.
The Imou camera is a smart surveillance device designed for home or small business security. Its primary function is to capture video footage, allowing users to monitor their premises remotely. The camera connects to a Wi-Fi network, enabling real-time viewing and interaction through a dedicated mobile application. It features a lens for video capture, a built-in microphone for audio input, and a speaker for two-way communication. An LED indicator provides visual feedback on the camera's status, such as power, network connection, and operational state. The device also includes a Micro SD card slot for local storage of recordings, ensuring that footage is saved even without a continuous cloud connection. An Ethernet port is available for wired network connectivity, offering an alternative to Wi-Fi for more stable connections. The camera is powered via a power adapter and cord, ensuring continuous operation.
Initial Setup and Connectivity: The setup process begins with downloading and installing the Imou app from Google Play or the App Store. Users are guided to register an account for first-time use. The camera is then connected to a power supply using the provided adapter. Once powered on, the camera's indicator light will flash green, signaling that it's ready for connection.
To add the camera to the app, users must ensure their smartphone is connected to a 2.4 GHz Wi-Fi network. The app then guides them through a series of steps:
For multiple cameras, the process is repeated for each device. If the Wi-Fi network changes or the indicator status fails, users are advised to reboot the camera and repeat the adding process.
Mounting and Positioning: The camera is designed for easy installation on a mounting surface. The process involves:
LED Indicator Status: The camera's LED indicator provides crucial feedback on its operational status:
Resetting the Device: The camera includes a reset button, typically located on the device itself. Pressing and holding this button for 10 seconds will reset the camera to its factory default settings. This feature is useful for troubleshooting connectivity issues, reconfiguring the device, or preparing it for a new user.
Firmware Updates: The device supports firmware updates, indicated by the alternating green and red LED lights. These updates are crucial for improving performance, adding new features, and enhancing security. Users are generally notified through the app when an update is available.
Troubleshooting: The guide emphasizes consulting the final explanation for any doubts or controversies, and encourages users to visit the website or contact a local service engineer for more information. This highlights the availability of support resources for troubleshooting and maintenance. The quick start guide itself serves as a primary troubleshooting tool, offering solutions for common issues like network connection failures (flashing red light) and re-adding the camera after network changes.
General Care: While not explicitly detailed, the nature of the device implies general care practices such as keeping the lens clean for optimal image quality and ensuring the camera is placed in an environment suitable for its intended use (e.g., avoiding extreme temperatures or direct exposure to elements unless specified as outdoor-rated). The guide also notes that all design and software are subject to change without written notice, implying that users should stay updated with the latest information from Imou.
| Sensor type | CMOS |
|---|---|
| Optical sensor size | 1/2.8 \ |
| Privacy masking | Yes |
| Total megapixels | 2 MP |
| Maximum resolution | 1920 x 1080 pixels |
| Supported video modes | 1080p |
| Video compression formats | H.264, H.265 |
| Night vision distance | 10 m |
| Digital zoom | 16 x |
| Number of lenses | - |
| Fixed focal length | 3.6 mm |
| Pan range | 0 - 355 ° |
| Tilt angle range | -5 - 80 ° |
| Audio system | 2-way |
| Alert notification type | Text alert message |
| Intelligent Video Surveillance (IVS) system features | Scene change |
| Ethernet LAN | No |
| Wi-Fi standards | 802.11b, 802.11g, Wi-Fi 4 (802.11n) |
| Mobile operating systems supported | Android, iOS |
| Type | IP security camera |
| Certification | CE, FCC |
| Placement supported | Indoor & outdoor |
| Connectivity technology | Wireless |
| Maximum operating distance | 50 m |
| Compatible memory cards | MicroSD (TransFlash) |
| Maximum memory card size | 256 GB |
| DC output current | 1 A |
| DC output voltage | 5 |
| Power source type | USB |
| Power consumption (typical) | 3.5 W |
| Operating temperature (T-T) | -10 - 45 °C |
| Operating relative humidity (H-H) | 0 - 95 % |
| Form factor | Dome |
| Mounting type | Ceiling/wall |
| Product color | White |
| Cables included | AC |
| Number of cameras | 1 |
| Width | 77.4 mm |
|---|---|
| Height | 106.1 mm |
| Weight | 219 g |