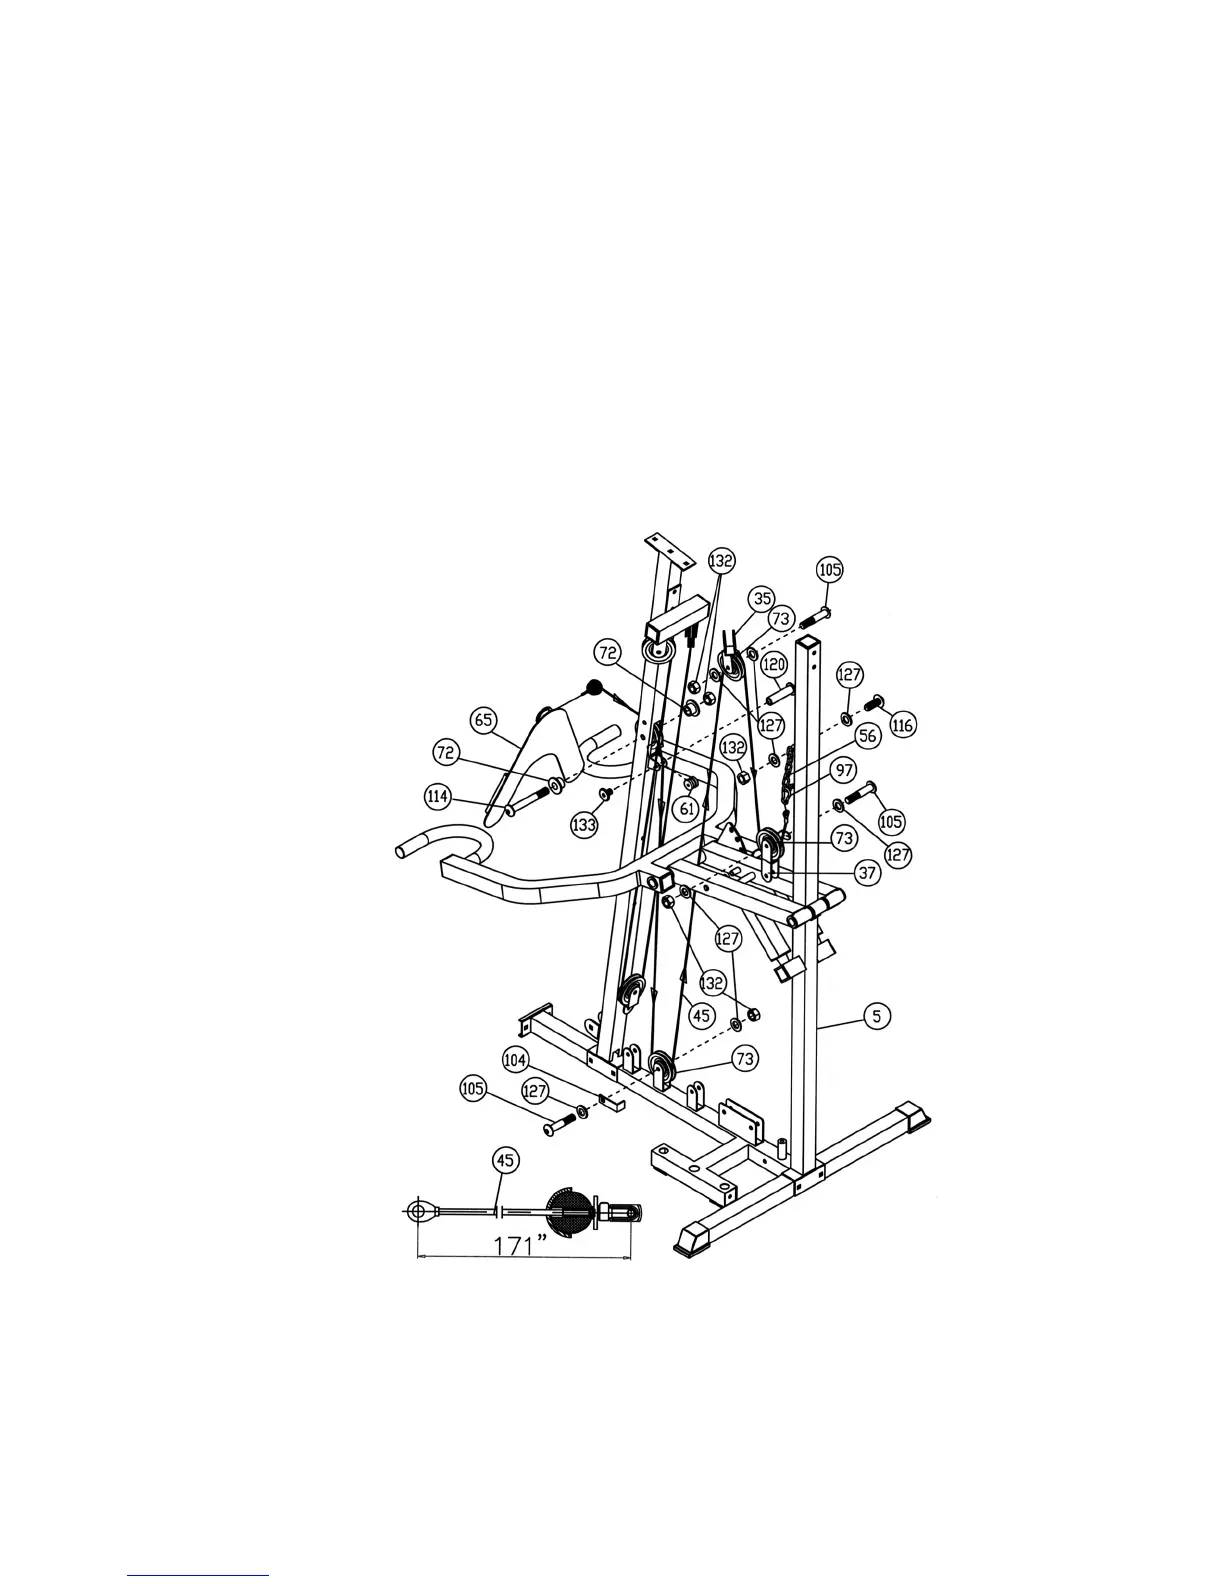
one M10 Aircraft Nut (#132). Use Quick Release Connector and Clip (see How To Use) to
connect Ab Strap (#65) to the end of Cable (This is optional).
B.) Install a Small Pulley Wheel (#61) to the bracket behind the opening on the Front Vertical
Beam. Secure it with a 1¼” Philips Head Axle (#120) and M5 x 5/16” Philips Head Screw
(#133).
C.) Pull the Cable downwards over the Small Pulley Wheel (#61) to the second bracket on the
Main Base Frame. Install a Pulley (#73). Then pull the Cable upward to the Angled Double
Floating Pulley Bracket (#35) previously installed in STEP 8C. Install a Pulley. Secure it with
a M10 x 1 ¾” Allen Bolt (#105), two ∅ ¾” Washers (#127), and one M10 Aircraft Nut (#132).
D.) Draw the Cable downwards then install a Pulley and a Flat Double Floating Pulley Bracket
(#37). Let the Bracket hang for now. Attach a Short Chain (#56) to the end of the Cable with
a Clip (#97). Attach the other end of the Chain to the bracket on the Rear Vertical Beam (#5).
Secure it with a M10 x ¾” Allen Bolt (#116), two ∅3/4” Washers (#127) and a M10 Aircraft Nut
(#132). Note: After completing the installation, adjust the length of the Chain to remove the
excess sag in the cable loop system.
DIAGRAM 10
13
STEP 10 (See Diagram 7 & 11)
 Loading...