This document provides a comprehensive guide for the use and maintenance of an Indesit dishwasher, covering everything from initial setup to troubleshooting.
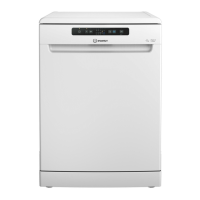
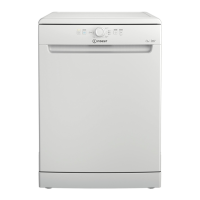
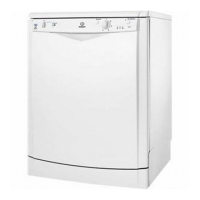
Product Description and Control Panel
The dishwasher features an upper rack, foldable flaps, an upper rack height adjuster, upper and lower spray arms, a lower rack, a cutlery basket, a filter assembly, a salt reservoir, and detergent and rinse aid dispensers. The control panel includes an On-Off/Reset button, a program selection button, a Half Load button, salt and rinse aid refill indicators, program indicator lights, a delay indicator light, a delay button, a Push&GO button, and a Start/Pause button with a drain out function.
First Time Use: Salt, Rinse Aid, and Detergent
Before first use, it is crucial to remove stoppers from the racks and elastic elements. The salt reservoir, located at the bottom of the dishwasher, must be filled to prevent limescale. For the first fill, water should be added to the reservoir before approximately 1 kg of dishwasher salt. After filling, the cap must be screwed on tightly to prevent detergent from entering. The salt refill indicator light on the control panel will illuminate when salt is needed.
The water hardness setting is essential for the water softener to function effectively. This setting should be based on local water hardness information, obtainable from your water supplier. To adjust, switch the appliance on and off, then press and hold the Start/Pause button for 5 seconds until a beep is heard. Switch the appliance on again, and the program indicator light for the current level will flash. Use the program selection button to choose the desired hardness level according to the provided Water Hardness Table.
The rinse aid dispenser, located on the door, should be filled when the rinse aid refill indicator light is lit. To fill, open the dispenser by pressing and pulling up the tab, then pour in rinse aid (max. 110 ml), ensuring no overflow. Close the lid until it clicks. Never pour rinse aid directly into the appliance tub. The dosage of rinse aid can be adjusted if drying results are unsatisfactory. This is done by switching the dishwasher on and off, pressing the Start/Pause button three times, then switching it on again. The program indicator light will flash, allowing adjustment with the program selection button.
Detergent should be introduced into the dry dispenser only. The dispenser has indications to aid in dosing. After adding detergent, remove any residues from the edges and close the cover until it clicks. The detergent dispenser opens automatically during the program. Using detergent not designed for dishwashers can cause malfunction.
Programs Table and Description
The dishwasher offers several programs:
- Eco (50°C): Suitable for normally soiled tableware, optimized for combined energy and water consumption.
- Auto Intensive (65°C): Automatic program for heavily soiled dishes and pans (not for delicate items).
- Auto Mixed (55°C): Automatic program for normally soiled pans and dishes.
- Fast&Clean 28' (45°C): For half loads of lightly-soiled dishes with no dried food residues; does not include a drying phase.
- Extra (50°C): For very big items loaded in the lower rack. Detergent should be applied directly to the tub, and the upper rack removed.
- Push&GO (50°C): An everyday wash and dry cycle for great cleaning performance in a short time without pre-treatment.
Options and Functions
Several options can be selected via the control panel:
- Half Load / Extra Light: This button has two functions. Half Load saves water, electricity, and detergent for smaller loads. Extra Light, compatible only with the Extra program, makes it suitable for large delicate crockery and items, and includes no drying phase.
- Delay: Allows delaying the program start by 2, 4, or 8 hours. The selected delay time is indicated by flashing lights. The countdown begins after pressing Start/Pause.
- Push&GO: Activates the Push&GO program directly by pressing the button for 3 seconds.
- Drain Out: Stops and cancels the active cycle, draining the water from the dishwasher. Activated by a long press of the Start/Pause button.
- Extra: Facilitates a heavy-duty wash for large crockery up to 53cm, such as baking pans, oven grids, and large saucepans. The upper rack must be removed for bulky items. For Extra and Extra with Extra Light, detergent is poured directly into the tub.
- Auto Door: A convection drying system that automatically opens the door during or after the drying phase for exceptional drying performance. This feature can be disabled or enabled via a specific sequence of button presses (On, Off, then P button for 5 seconds, then On/Off).
Loading the Racks
- Upper Rack: For delicate and light dishes like glasses, cups, and small salad bowls. The height of the upper rack can be adjusted using the height adjuster without pressing levers. It is recommended not to adjust the height when the rack is loaded. Foldable flaps optimize crockery arrangement and can hold wine glasses.
- Lower Rack: For pots, lids, plates, and cutlery. Large plates and lids should be placed at the sides to avoid interfering with the spray arm. Tip-up supports can be used vertically for plates or horizontally for pans and salad bowls.
- Cutlery Basket: Positioned at the front of the lower rack, it includes top grilles for improved arrangement. Knives and sharp utensils should be placed with points facing downwards or horizontally in the upper rack's tip-up compartments.
Daily Use
- Check Water Connection: Ensure the dishwasher is connected and the tap is open.
- Switch On: Press the On/Off button.
- Load Racks: Arrange crockery as described in the "Loading the Racks" section.
- Fill Detergent Dispenser: Add the appropriate amount of detergent.
- Choose Program and Customise: Select a program and any desired options.
- Start: Press the Start/Pause button.
- End of Wash Cycle: The cycle ends with beeps and a flashing indicator. Open the door and switch off the appliance. Wait a few minutes before unloading to avoid burns, starting with the lower rack.
The machine automatically switches off during extended periods of inactivity to minimize electricity consumption. If crockery is lightly soiled or pre-rinsed, reduce the amount of detergent.
Modifying a Running Program: If a wrong program was selected, it can be changed if it has just begun by holding the On/Off button, then switching the machine back on, selecting the new program, and pressing Start/Pause.
Adding Extra Crockery: Open the door (beware of hot steam!), place crockery inside, close the door, and press Start/Pause to resume the cycle.
Accidental Interruptions: If the door is opened or there is a power cut, the cycle stops. Close the door or restore power, then press Start/Pause to resume.
Advice and Tips
- Remove all food residues and empty glasses before loading. Pre-rinsing under running water is not necessary.
- Arrange crockery firmly, with openings facing downwards, allowing water to reach all surfaces.
- Ensure spray arms can rotate freely.
- Place small items in the cutlery basket.
- Place very soiled dishes and pans in the lower basket for stronger water sprays.
- Unsuitable Crockery: Wooden items, delicate decorated glasses, antique crockery, synthetic materials not resistant to high temperatures, copper, tin, and items soiled with ash, wax, grease, or ink.
- Damage to Glass and Crockery: Use only dishwasher-safe items and delicate detergent. Collect items promptly after the cycle.
- Energy Saving: Initiate wash cycles with a full load. For partial loads, use dedicated options. Incorrect loading or overloading increases resource usage. Manual pre-rinsing is not recommended.
- Hygiene: Run a high-temperature program at least once a month with a teaspoon of detergent and no loading to clean the appliance and prevent odors.
Care and Maintenance
- Cleaning the Filter Assembly: Regularly clean the filter assembly (at least once a month or every 30 cycles) to ensure proper drainage and prevent malfunction. The assembly consists of three filters: cylindrical filter A, cup filter B, and stainless-steel plate filter C. Remove them by turning, pulling, and sliding, then clean under running water with a non-metallic brush. Remove any foreign objects from the trap.
- Cleaning the Spray Arms: Check and clean spray arms periodically with a non-metallic brush to remove encrusted food residues. The upper spray arm can be removed by turning a plastic locking ring, and the lower spray arm by pulling it upwards.
- Water Softening System: This system automatically reduces water hardness and regenerates with salt. Refill the salt container when empty. Regeneration frequency depends on water hardness level and occurs once per 6 Eco cycles (with hardness level 3).
- Cleaning the Water Inlet Hose: If the water hoses are new or unused for a long time, let water run until clear before connecting to prevent blockages.