Do you have a question about the Indesit TI 60 W and is the answer not in the manual?
This document provides instructions for the Indesit TI 60 X and TI 60 W cooking hobs. It covers essential information for safe and efficient use, environmental protection, maintenance, and installation.
To ensure full satisfaction with your cooking hob, it is crucial to read these instructions carefully and keep them for future reference. Always keep packaging materials, such as plastic bags and polystyrene parts, out of reach of children as they can be dangerous. Before installation, check if the cooking hob has been damaged during transport. Installation and electrical connections must be performed by a qualified technician, adhering to the manufacturer's instructions and all current local safety regulations.
Packing: The packaging material is fully recyclable and marked with the recycling symbol, indicating it should be sent to local waste-disposal centers.
Domestic Appliances: This appliance is marked according to European Directive 2012/19/EC on Waste Electrical and Electronic Equipment (WEEE). Proper disposal of this appliance helps prevent potential environmental and health damage. The symbol on the appliance or accompanying documentation signifies that the product should not be treated as household waste but must be delivered to the nearest collection center for recycling electrical and electronic appliances. Disposal must comply with local environmental regulations. For more information on treatment, recovery, and recycling, contact your local authority, household waste collection service, or the store where you purchased the appliance.
Before any cleaning or maintenance, disconnect the cooking hob from the main power supply. In cases of prolonged use, additional ventilation may be needed, such as opening a window or increasing the hood's extraction force. Keep children away from the cooking hob when it is in use. The appliance should not be used by individuals with limited physical, sensory, or mental abilities, or those without experience or expertise, unless they have received instructions from a responsible person regarding its safe use. After use, ensure all knobs are in the zero position.
Declaration of Conformity CE: This oven is designed for contact with food and complies with regulation (EC) no. 1935/2004. This cooking hob (Class Y) is intended solely for cooking; any other use, such as heating a room, is improper and dangerous. The cooking hob has been designed, constructed, and marketed in compliance with the safety requirements of "Low Voltage" Directive 2006/95/EC (replacing 73/23 EEC as amended), protection requirements of EEC Directive "EMC" 89/336, and requirements of EEC Directive 93/68.
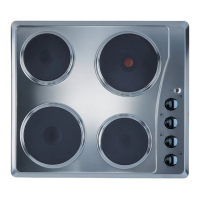
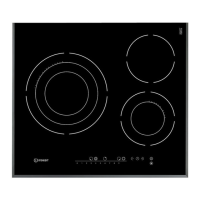
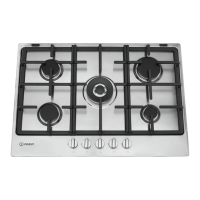
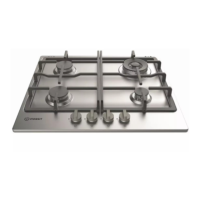
The cooking hob is equipped with hotplates of different diameters. Use pots and pans with a bottom diameter equal to or slightly larger than the hotplates. Always use flat-bottomed pots and pans. Do not operate a hotplate without a container on it. If possible, keep the container covered when cooking. Cook vegetables, potatoes, etc., with a small amount of water to reduce cooking time. Using a pressure cooker can save even more energy and time.
Cleaning the Hob: Before cleaning, disconnect the cooking hob from the mains power supply and allow it to cool down. Never clean the appliance with steam cleaning equipment. Wipe it with a cloth moistened with hot water and soap or diluted liquid detergent. Avoid using abrasive or corrosive products, chlorine products, or steel wool. Do not leave acidic or alkaline substances, such as vinegar, salt, or lemon juice, on the cooking hob.
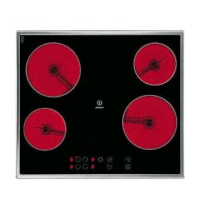
Stainless Steel Surface: Clean stainless steel surfaces with a specific commercial product. Note that continuous use of the cooking hob at high temperatures may alter the color of the hotplates.
Cleaning the Electric Hotplates: Electric hotplates should be cleaned when they are lukewarm. Wipe them with a cloth moistened with water and salt, then polish with an oil-moistened cloth.
Before contacting After-sales Service:
When contacting service, provide the following information:
If any repairs are needed, contact an authorized After-sales Service as indicated in the warranty. In the unlikely event that an operation or repair is carried out by an unauthorized technician, always request a certification of the job performed and insist on the use of original spare parts. Failure to comply with these instructions may compromise the safety and quality of the product.
Technical Information for Installer: This cooking hob can be embedded in a worktop 20 to 50 mm thick. If no other appliance is fitted under the cooking hob, insert a separator panel at a distance of at least 90 mm from the cooking hob bottom. If a vertical piece of furniture is installed, there must be a gap of at least 100 mm between it and the edge of the cooking hob.
Installation of Cooking Hob: Apply the supplied gasket to the cooking hob (unless already fitted) after cleaning its surface as shown in the figure.
Before installing, remove any plastic film protecting the cooking hob. The outer surfaces of adjoining furniture or appliances must be heat resistant (heat protection "Y" according to standards EN 60335-2-6). Installation must comply with current local safety regulations.
Electrical connections must comply with local regulations. The voltage and power absorption data are indicated on the rating plate. Earthing of this appliance is compulsory by law. The manufacturer is not responsible for injury to persons or animals or damage to property arising from failure to comply with these requirements. When installed, provide a multi-pole circuit breaker with a contact separation (at least 3 mm) in all poles that provide full disconnection under overvoltage category III and must be incorporated in the fixed wiring in accordance with national wiring rules. After installation, the electric parts must not be accessible. For electrical connection, use an H05RR-F cable (see table in product description sheet). The power cable must be long enough to connect the appliance to the power supply once fitted in its housing. The electrical components must not be accessible to the user after installation.
Connection to Terminal Board (Electrical Cooking Hobs with Side Controls):
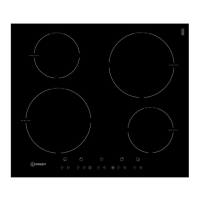
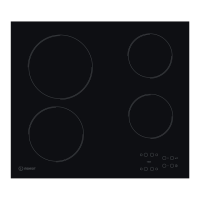
The cooking hob features four hotplates:
Control knobs are provided for each hotplate:
There is also a hotplate operation control lamp.
Operation of Electric Hotplates: Set the knob to one of positions 1-6, which correspond to different temperatures. To switch off the hotplate, set the knob to position "0".
Dimensions of Cooktop and Worktop (mm): The document provides detailed diagrams for the dimensions of the cooktop and the required worktop opening, including minimum clearances for installation. For installation of a hood above the cooktop, refer to the hood instructions for the correct distance.
Supply Voltage and Electrical Connection: The device operates on 230V ~ + supply voltage, requiring 3 x 2.5 mm² conductors. The electrical connection diagram shows terminals 1, 2, 3, and L, N for line and neutral connections.
Type: The device is identified as PLETP, 230V ~ 50Hz, 5.5 kW.
| Type | Electric Hob |
|---|---|
| Colour | White |
| Number of cooking zones | 4 |
| Residual Heat Indicator | Yes |
| Total Power | 6000 W |
| Safety Features | Overheat protection |
| Material | Glass Ceramic |