Page 8 Interactive Touch Display Hardware Guide
SET UP ALL MODELS
Mounting technique
This product does not ship with mounting accessories. Only use commercially manufactured mounting accessories which meet the
product specications.
• Use a professional technician to install the display.
• Mount the display to a solid wall or a stable horizontal surface.
• Chose a mounting point which will protect the display from environmental hazards such as heavy dust, insects, condensation and
other moisture, as well as strong electromagnetic elds.
• Install the display near an easily accessible AC power outlet.
• Use only properly-rated wall and stand mounting hardware that meets the product specications. The warranty does not cover
damage caused by use of improperly-rated mounting hardware or from improper installation.
• After you remove the display from its carton and before you install it, always place the display front screen side down on a
clean, cushioned surface, to prevent damage to the screen surface.
• The mounting means should be strong enough to bear the weight of the display:
• Use only M8 (25 mm) screws when you mount the display to a wall. Use spring washers to prevent the screws from
coming loose.
• The mounting interface should comply with the UL1678 standard in North America.
• Maintain a distance of at least 2 inch (5 cm) between the display and the wall, if the display is installed against the wall; this
distance provides adequate ventilation.
Connect to display
Connect to AC outlet
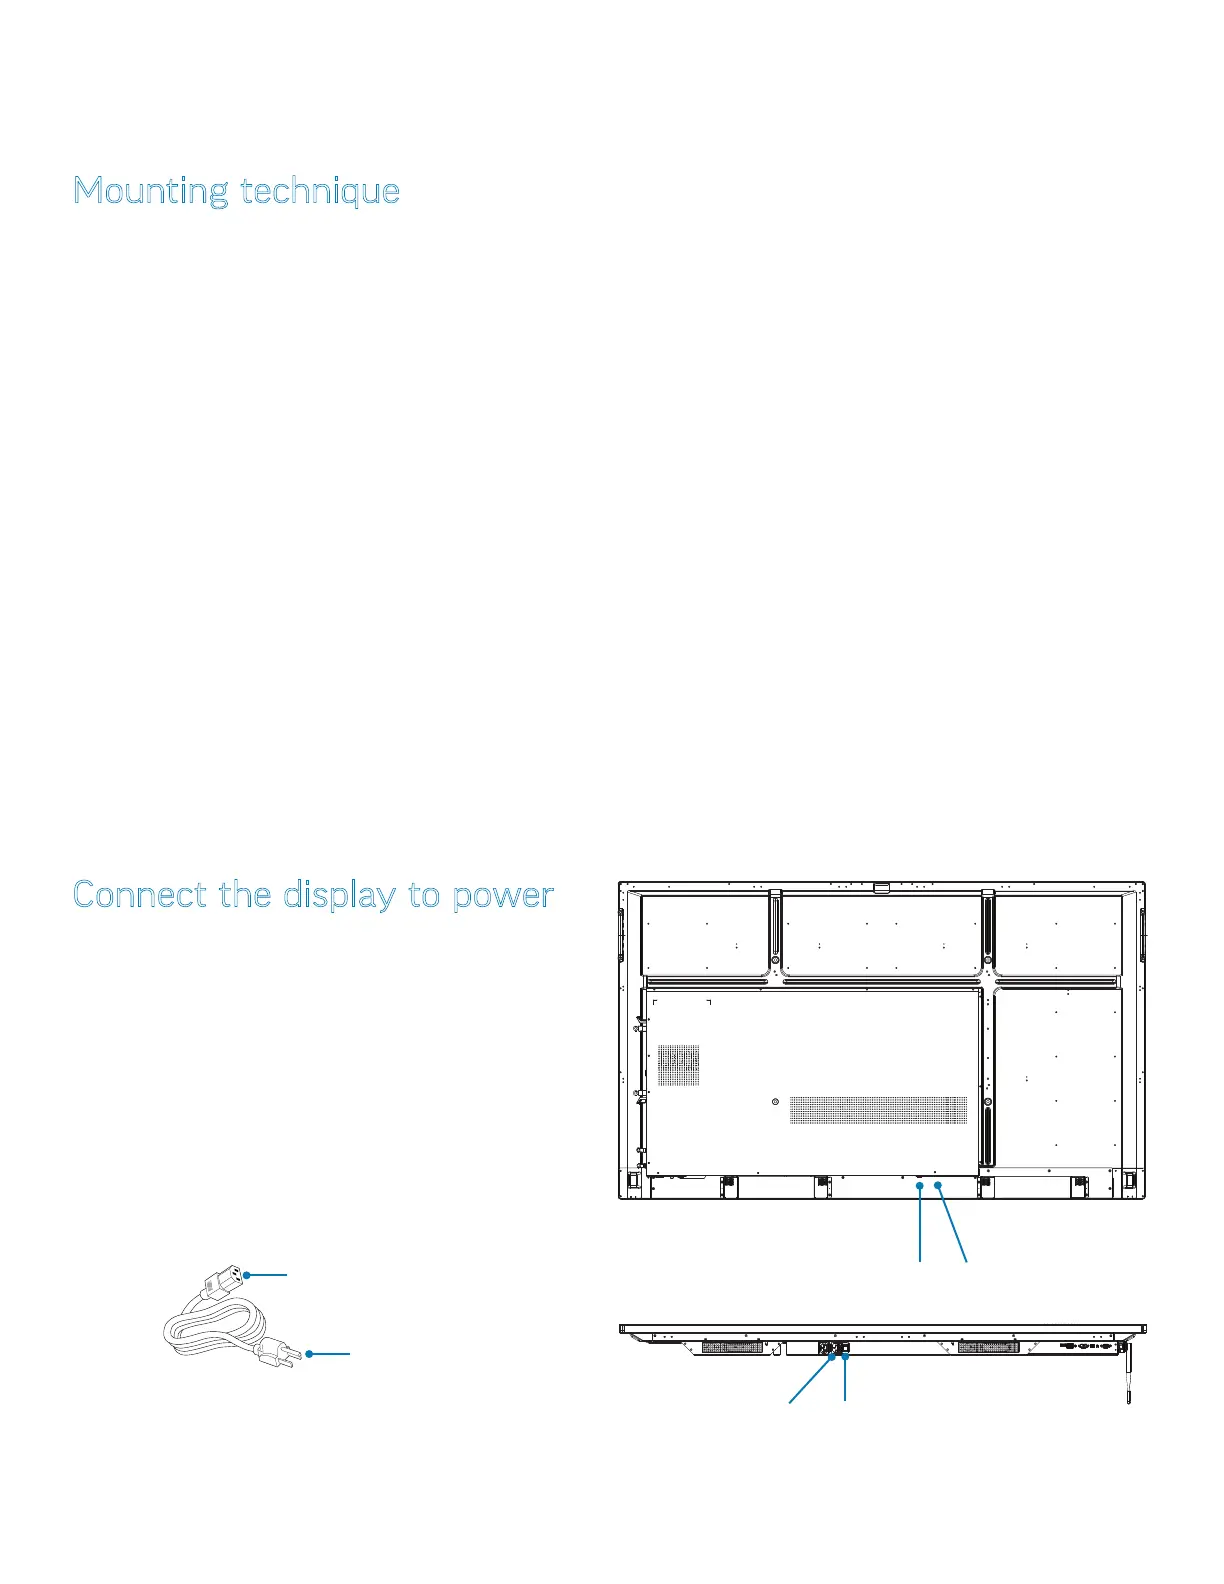
Connect the display to power
on/o
switch
1) Connect the plug end of the AC power cord to the 3-prong
plug-in (shown to the right) on the underside of the display.
2) Connect the 3-prong end of the AC power cord (below) to
an AC outlet.
NOTE: Depending on your region, it may be necessary to
check for compatibility.
VGAAUDIO IN SPDIF RS232AUDIO OUTLAN 2.0
3-prong
plug-in
on/o
switch
3-prong
plug-in