(B) Coolant Reservoir Tray
(E) Open Grid Work
Surface
(1) White (1) White
(F) BitSerts™ (2) White (1) White
(G) Coolant Feed Sponge (2) Yellow (2) Yellow
(H) Grinding Bit (2) 1" WB-9, 1/4" WB-8 (1) 3/4" WB-1
(I) Allen Wrench (2) Black (2) Black
(J) Splash Guard (1) White (1) White
To assemble your grinder:
Refer to the exploded view drawing. Place the Coolant Reservoir Tray on the white main Grinder Body by inserting the
locator pegs on the bottom of the reservoir into the corresponding holes in the grinder body. Place the work surface on
the coolant reservoir so that it sits on the inside lip of the reservoir. Insert the BitSert™.(Impulse™ owners refer to the
BitSert™ section on page 6 for more detailed information. ) Install the splash guard behind the BitSert™ by pushing
the posts into the grid holes of work surface. Note:The splash guard is reversible.
Installing the grinding bit:
Before mounting the grinding head and any time you change or remove heads, we recommend you apply a light
coating of Inland Motor Shaft Lubricant™ to the motor shaft (Stock #50022). Our Teflon based lubricant helps
prevent the bit from seizing on the shaft and seals out ground glass particles. In a pinch, you can use a bit of Vaseline.
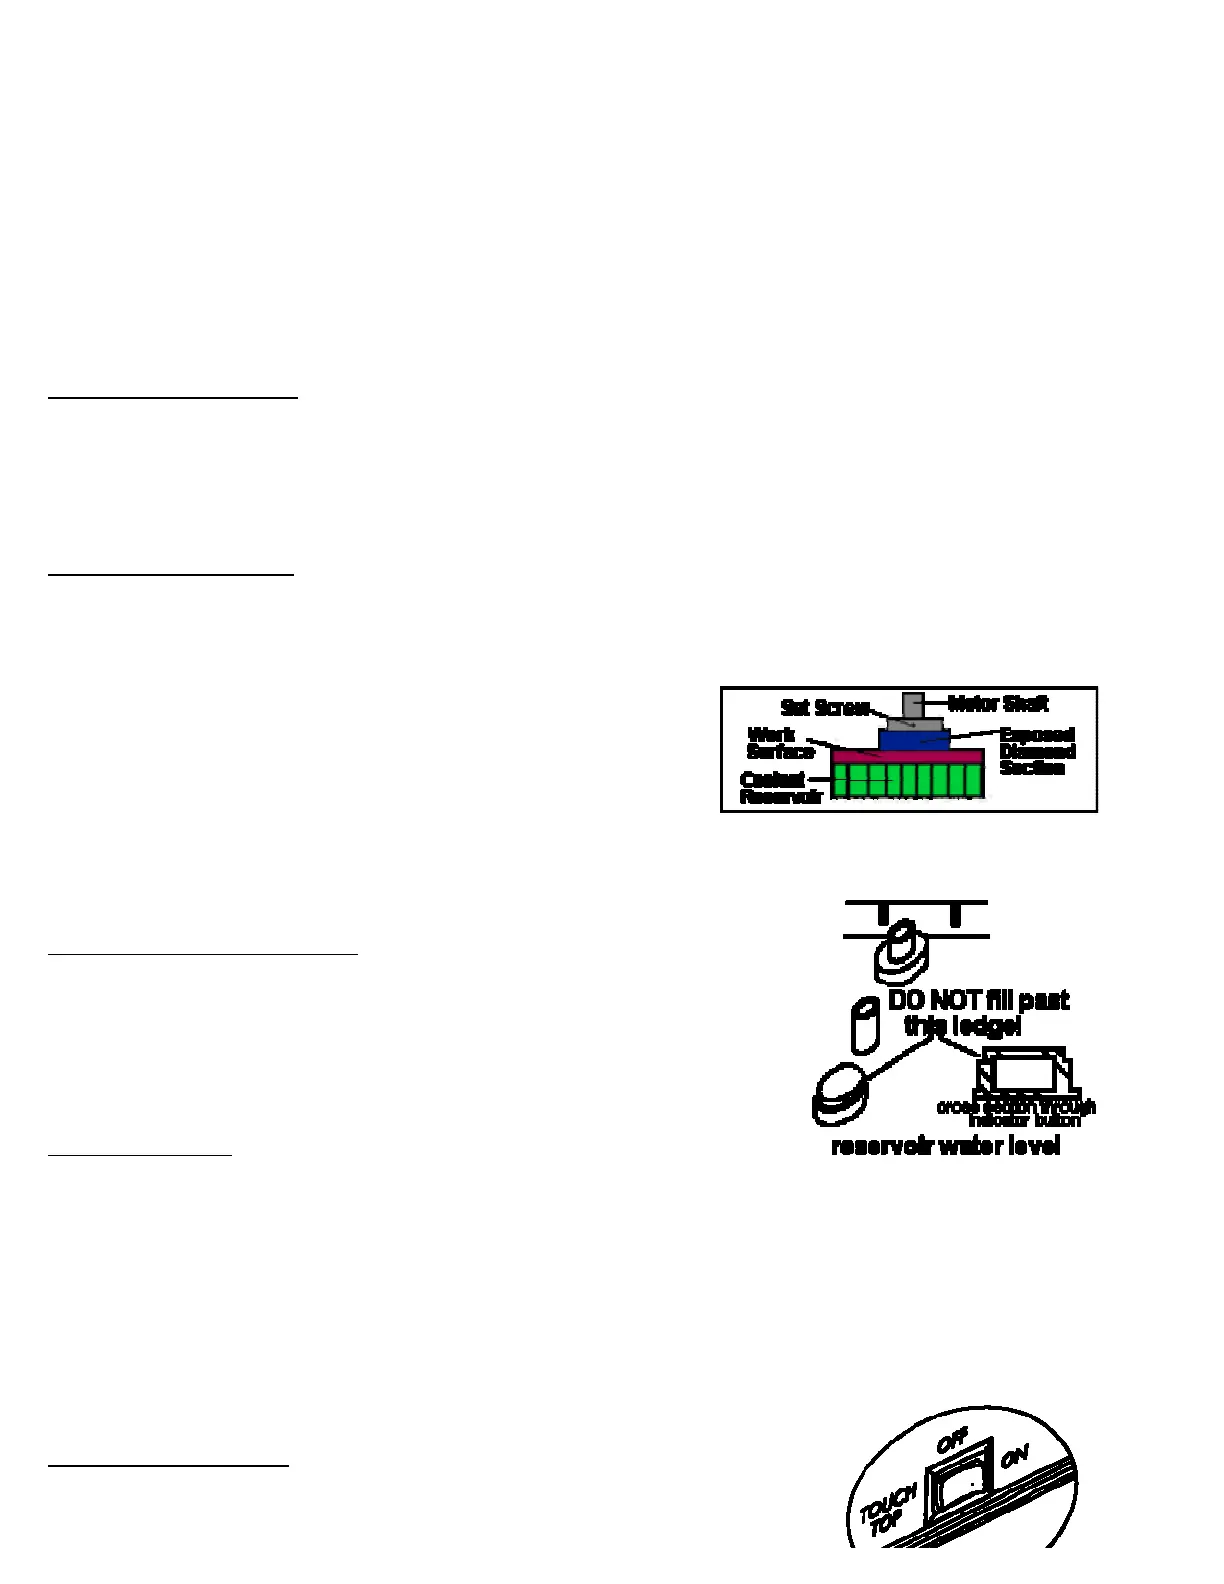
Select the 1" (Impulse™) or 3/4" (Aero™) grinding head. Use the allen
wrench to loosen the set screw by turning it counter clockwise. Slide the bit
onto the motor shaft. Turning it slightly will help it slide down. Position the
head so that about 1/8" of the silver diamond surface is above the work
surface. Make sure that the set screw sits over the flat side of the motor
shaft and secure the head in place by tightening the set screw. Important:
Always remember to sec ure to the flat side of the motor shaft. Mounting to the rounded side can scar the shaft
preventing bit removal.
Page 3
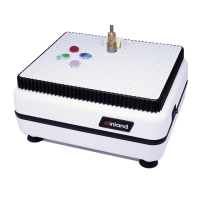
Filling the coolant reservoir tray:
Coolant helps keep glass dust from becoming airborne, increases grinding speed,
lubricates the diamond and increases the life of the head. Fill the reservoir by
removing the work surface and pouring water into the tray up to the fill level
indicator located in the tray center. You can also add a capful of Inland
DiamondCoolant™ to the water to further the life of the bit. Do Not Overfill the
reservoir. Causing coolant to flow out over the edges will damage the grinder.
Sponge placement:
The conventional way to get coolant onto the grinding head is to use a sponge held in by the BitSert™. Insert the
sponge into the slot of the BitSert™. The bottom of the sponge should contact the coolant in the reservoir, and the
upper portion should contact the diamond surface of the grinding head. You may need initially to wet the sponge. The
sponge should always be in contact with the head. If a white paste develops on the head while grinding, either the
sponge is not properly positioned on the bit or the coolant level is low. Periodically remove the sponge and rinse it out
to remove grinding residue.
An alternative to the sponge is the patented InvisibleSponge™ system explained in the BitSert™ section on page 4. It
is a standard feature on the Impulse™ and available as an accessory (Stock #40035) for the Aero™.
Page 4
The TouchTop™ Feature:
Your grinder has a three-way switch on the right side of your grinder. The grinder can
be off, on or TouchTop™. When set for TouchTop™, the grinder turns on when you
http://www.inlandcraft.com/Uguid... 7/13/2013