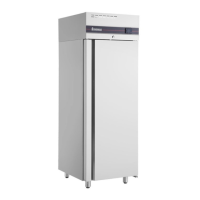
Do you have a question about the Inomak PNN and is the answer not in the manual?
Guidelines for safe appliance use, especially concerning children and hazardous materials.
Ensure proper ventilation and avoid obstructions for safe operation.
Grounded sockets, qualified personnel for repairs, and fire safety.
Keep the device upright during transport and installation.
Avoid heat sources and note the appliance's climatic class.
Adjust legs to ensure doors close properly by tilting the unit.
Position internal shelves and racks as needed.
Maintain 50cm gap above for condensing unit ventilation.
Leave 25mm gap on sides to prevent condensation.
Connect power and observe temperature display; compressor has a delay.
Operate lamp and wait for temperature to stabilize before loading products.
Avoid overloading the appliance with large product quantities.
Store products to ensure unobstructed airflow around the unit.
Keep 10cm clearance from evaporator fans for proper cooling.
Do not store hot items; cover food and seal acidic products properly.
Avoid immediate door opening after closing due to vacuum pressure.
Unlock thermostat using buttons; it auto-locks after inactivity.
Switch the appliance off using the standby function.
Unlock thermostat, view, change, and save temperature settings.
Automatic defrost is standard; manual defrost can be initiated.
Alarm codes alternate with temperature; buzzer can be muted.
LF1/LF2 indicate sensor failures requiring technical assistance.
Room sensor failure affects compressor; door alarms require closing the door.
AHI indicates high temperature, ALO indicates low temperature.
Display shows standby, compressor running, fan operation, and defrost status.
"Loc" signifies that the thermostat is locked.
Disconnect power before cleaning; frequent cleaning is recommended.
Use mild soap solution and avoid sharp objects for cleaning.
Avoid chlorine/acid cleaners and water jets to prevent damage.
Remove internal components for easier cleaning access.
Disconnect power before maintenance; professional service recommended annually.
Steps for safely shutting down and storing the appliance for extended periods.
Optimize door usage, avoid heat sources, and prevent overfilling.
Diagnosing and resolving cooling problems and evaporator ice buildup.
Addressing water in the appliance and blocked drainage issues.
Manage thermostat lock status and adjust operational parameters.
Control device power and mute temperature alarms.
Initiate manual defrost cycle using the dedicated key.
Monitor evaporator and room temperatures using the T2 function.
Details on temperature setpoints, alarms, and defrost intervals.
Parameters for evaporator fan and compressor minimum on-time control.
Wiring diagrams for compressor, drain, fans, defrost, lighting, and probes.
Wiring diagrams for freezer compressor, door heaters, fans, and defrost.
Wiring for freezer probes and door switch.
Information plate detailing model, serial number, voltage, and other technical specifications.
Certification for 100kg load capacity per shelf when properly assembled.
Declarations regarding the absence of asbestos and PCB oils.
Technical specifications for various chiller and refrigerator models.
Technical specifications for various freezer models.
Defines temperature and humidity for climate classes 3, 4, and 5.
Step-by-step instructions for assembling and attaching the door handles.
Lists necessary tools and details for removing hinges.
Steps for reversing the door and attaching the hinge to the opposite side.
Secure the door and adjust the gasket for proper seal and alignment.
| Brand | Inomak |
|---|---|
| Model | PNN |
| Category | Refrigerator |
| Language | English |