Do you have a question about the Insignia NS-19D310NA19 and is the answer not in the manual?
How to attach the TV stand to your TV using screws on a clean surface.
How to prepare your TV for wall mounting by removing stands and checking bracket support.
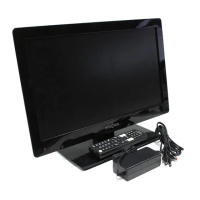
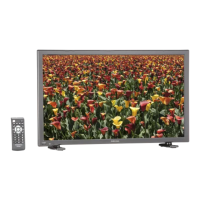
Details on remote control, batteries, TV stands, and M3 screws included with the TV.
Identifies the remote control sensor and the TV's power/input button.
Guide on connecting devices like cable boxes, DVD players, or game consoles to the TV.
Explains which cables to use for different connection types such as HDMI, AV, and Coaxial.
How to connect external speakers using the TV's digital or analog audio outputs.
Explanation of the buttons and functions on the Insignia TV remote control.
List of codes for programming universal remotes to control the Insignia TV.
Steps for turning on the TV after setup, including plugging in power and installing batteries.
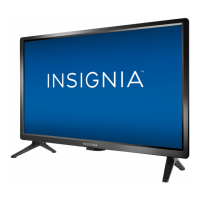
This document serves as a comprehensive quick setup guide for Insignia 19"/24" 720p 60Hz LED TVs, models NS-19D310NA19 and NS-24D310NA19. It covers initial physical setup, various connection options for external devices, and basic operation, including remote control usage and universal remote codes.
The first step in setting up your Insignia TV, if you're not wall mounting it, involves attaching the stand. You will need a soft surface to protect the TV screen and a Phillips screwdriver. To begin, place your TV face-down on a cushioned, clean surface. This prevents scratches or damage to the screen during the assembly process. Next, align the screw holes on the TV stands with the corresponding holes located on the bottom of your TV. Once aligned, secure each stand firmly to the TV using the provided M3 screws, which are 14 mm in length. Two screws are provided for this purpose. The guide includes an illustration showing the 19" TV with its stands being attached, clearly indicating the screw locations.
If you intend to wall mount your Insignia TV, a different set of initial steps is required. Again, you will need a soft surface and a Phillips screwdriver. Before mounting, ensure that the stand legs are removed from the TV. It is crucial to verify that the wall mount bracket you plan to use can safely support the weight of your TV. To prepare the TV, carefully place it face-down on a cushioned, clean surface. The guide advises consulting the instructions that came with your specific wall mount for detailed information on how to correctly and securely mount your TV.
The back of your Insignia TV features four VESA mounting holes. When attaching a wall-mount bracket, it is imperative that the bracket is securely fastened using all four of these holes. Failure to use all four mounting holes could result in the TV falling, potentially causing property damage or personal injury. The VESA mounting pattern for the NS-19D310NA19 model is 75 x 75 mm, using M4 type screws. For the NS-24D310NA19 model, the VESA mounting pattern is 100 x 100 mm, also using M4 type screws. An illustration shows the back of the 19" TV with the VESA mounting holes highlighted, emphasizing the importance of using all four for secure mounting.
Before plugging in the power cord, it is recommended to connect all other devices to your TV. The guide details various connection types for watching TV (cable, satellite, or antenna) or connecting external devices such as DVD/Blu-ray disc players, game consoles, or tablets.
For the best video quality, use an HDMI connection. The TV is equipped with multi-purpose HDMI jacks. You can plug any device that uses HDMI into either HDMI jack. However, certain devices may require connection to the HDMI 1 (ARC) jack. It is advisable to refer to the instructions provided with your ARC device for specific connection requirements. An illustration shows the HDMI ports on the back of the TV, labeled HDMI 1 (ARC) and HDMI 2.
For good video quality, you can use the AV (Audio/Video) input. This typically involves connecting composite video (yellow) and stereo audio (red and white) cables from your external device to the corresponding AV IN ports on the TV. An illustration depicts the AV IN ports on the back of the TV.
For connecting an antenna or cable TV, use the coaxial input. This involves connecting a coaxial cable from your antenna or cable wall outlet to the ANT/CABLE port on the TV. An illustration shows the ANT/CABLE port.
The guide also provides instructions for connecting external audio devices, such as soundbars or home theater systems, to your TV.
For digital audio, you can use the DIGITAL COAXIAL OUTPUT port. After connecting your audio device, navigate to your TV's Audio menu, highlight "Digital Audio Format/Audio Delay," and press ENTER. Set the "Audio Format" option to PCM. An illustration shows the DIGITAL COAXIAL OUTPUT port on the TV and a typical connection to a soundbar.
For analog audio, use the AUDIO OUT (red and white) ports. Connect these to the corresponding audio input ports on your external audio device. An illustration shows the AUDIO OUT ports on the TV and a typical connection to a soundbar. The guide reminds users to consult the instructions that came with their speakers or soundbar for more detailed information.
Once all connections are made, you can proceed to turn on your TV.
The included remote control (model NS-RC4NA-18) provides comprehensive control over your TV. Key functions include:
If you already own a universal remote control and wish to program it to work with your Insignia TV, the guide provides a list of common universal remote codes for various providers:
For an up-to-date list of codes for other cable providers and universal remote brands, users are directed to visit www.insigniaproducts.com/remotecodes.
While the guide does not explicitly detail maintenance features, the general care for an LED TV involves:
The Insignia TV offers several usage features designed to enhance the viewing experience:
The guide emphasizes the availability of online resources for further support:
This comprehensive guide ensures that users can quickly and effectively set up and begin enjoying their new Insignia LED TV, covering everything from physical assembly to advanced connectivity and remote control operation.
| Screen Size | 19 inches |
|---|---|
| Resolution | 1366 x 768 |
| Display Type | LED |
| HDMI Ports | 1 |
| USB Ports | 1 |
| Weight | 8.6 lbs |
| Refresh Rate | 60 Hz |
| Backlight Type | LED |
| Aspect Ratio | 16:9 |
| Inputs | HDMI, USB, Composite, RF |
| Sound Output | 10W (2 x 5W) |