www.insigniaproducts.com
5
NS-DCDCHH2
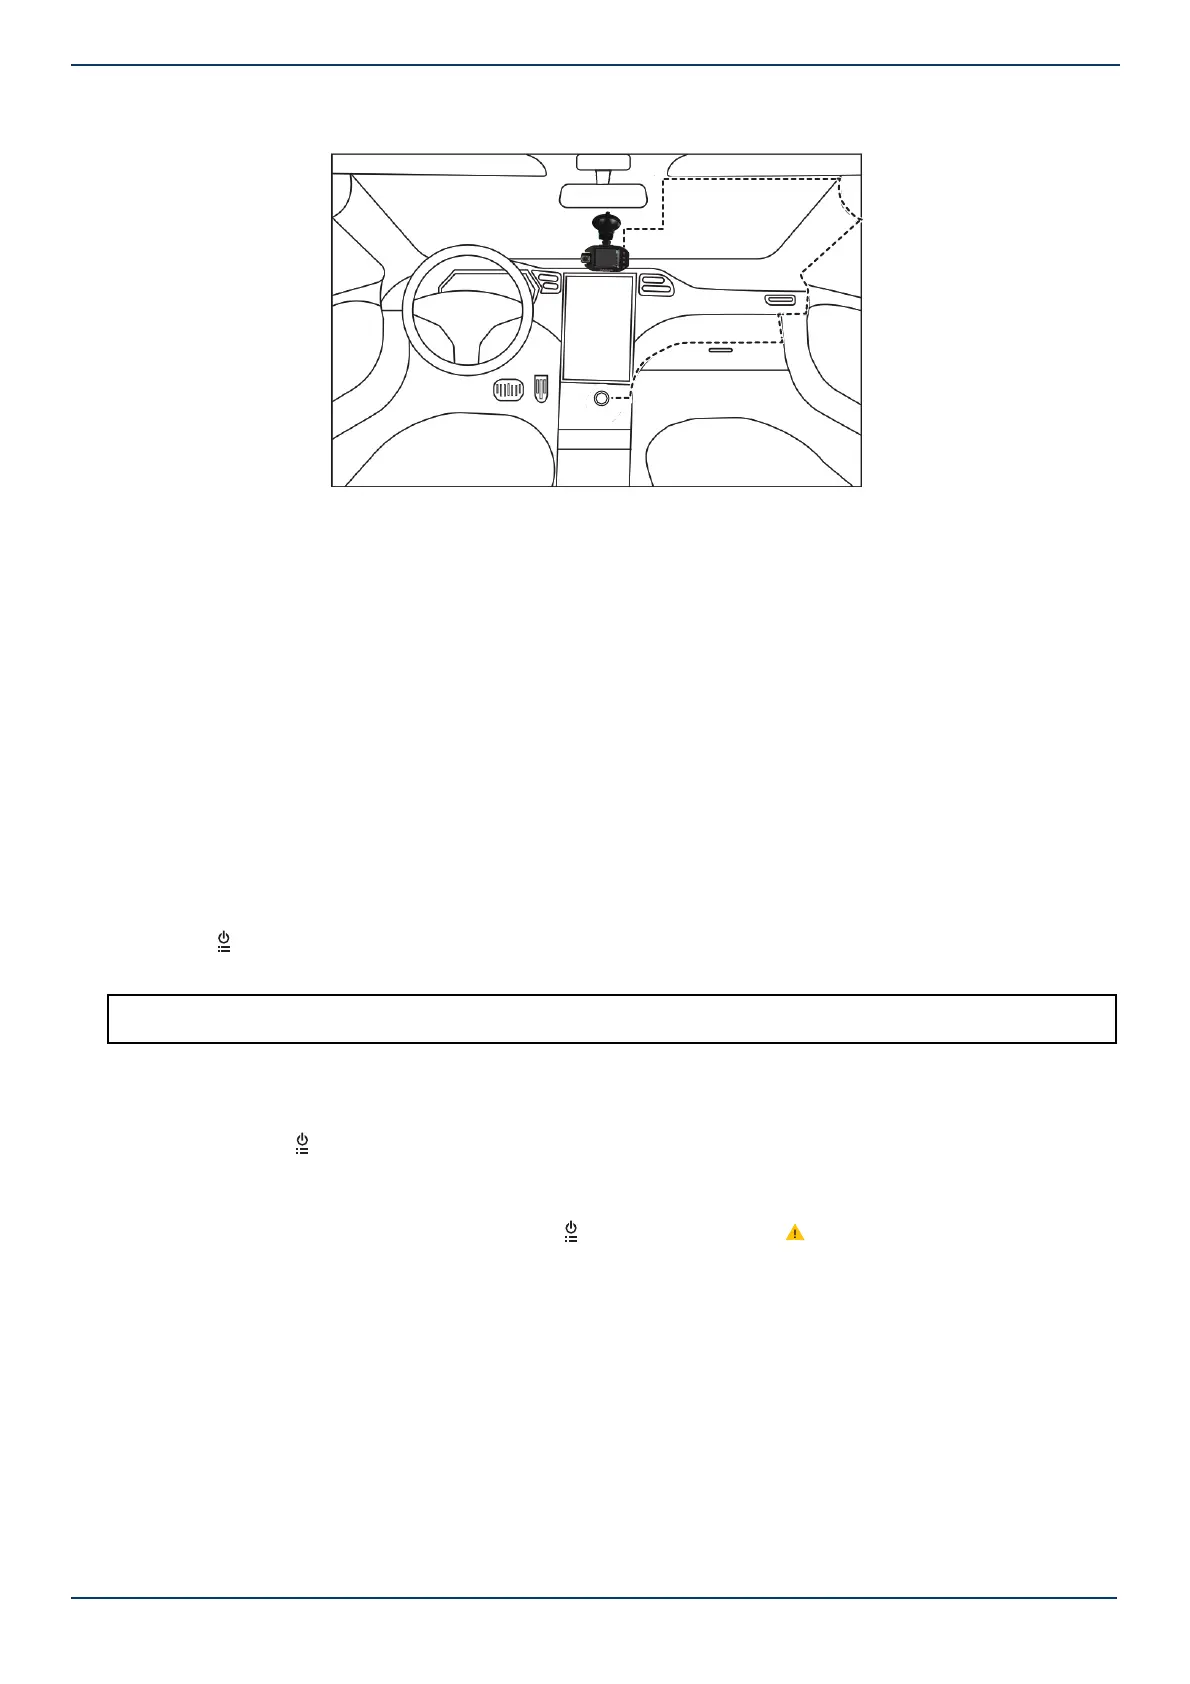
6 Connect the provided USB cable to the USB jack on your dash cam, then thread the cable from your dash cam, around
the outer edge of the windshield, and to a 12V vehicle power socket.
7 Plug the cable into the vehicle power adapter, then plug the adapter into the power socket and turn on your vehicle.
Your dash cam starts automatically.
8 Rotate the mounting bracket to adjust the viewing angle as needed.
9 Follow the on-screen prompts to set up your dash cam. Make sure that you format the memory card during setup. If
the card is not formatted, it may not record or play back. See Formatting a MicroSD memory card on page 5.
When you turn on your dash cam for the first time, you are prompted to enter basic setup information, such as
Language, Year, Month, Day. See Menu options and settings on page 6.
Your dash cam uses this information when creating file names and when displaying time stamps. Subsequent startups
go directly to the video screen.
Using your dash cam
Formatting a MicroSD memory card
You must format a memory card before you can use it in your dash cam. If the card isn’t formatted, your dash cam may not
be able to record or save.
1 Make sure that your dash cam is turned on and not in recording mode.
2 Press the (power/set) button. The on-screen display opens.
3 Press the (up) or (down) button to select Format, then press the OK button,
Manually turning your dash cam off and on
Your dash cam turns on automatically when you turn on your vehicle. You can manually turn your dash cam off, then turn
it back on.
• Press and hold the (power/set) button to turn your dash cam off. Press this button again to turn it back on.
Understanding loop recording
When the MicroSD memory card is full, your dash cam continuously overwrites the oldest footage recorded. To protect a
specific video clip against being overwritten, press the (power/set) button. The (emergency recording) icon appears
on the screen. You can also protect files on the playback screen in video playback mode.
Recording an emergency video
An emergency recording automatically starts when the G-Sensor registers an impact. Emergency recordings create
protected (locked) files that are not overwritten by continuous loop recording. In addition, to make sure that important
footage isn’t lost surrounding an incident, adjacent video clips are locked if the incident happens within 30 seconds of the
beginning or end of a clip.
You can manually start and stop an emergency video.
• When your dash cam is turned on, press the OK button to start recording. Press this button again to stop recording.
Taking photos
• Press the (up) button to enter camera mode. Press the button or the camera icon to take a photo.
CAUTION: When you format a memory card, it erases all the data on the card. Make sure that you backup any recordings you want to
save. See Downloading files to a computer on page 6.
12V 180W