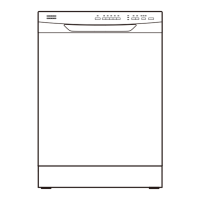
This document is a user guide for an Insignia Front Control Dishwasher, models NS-DWRF2SS3 and NS-DWRF2WH3. It provides comprehensive instructions for installation, operation, maintenance, and troubleshooting of the appliance.
Function Description
The Insignia Front Control Dishwasher is designed to clean dishes and silverware efficiently. It operates by filling with water, pumping it through various filters and spray arms, and spraying a mixture of hot water and detergent against soiled surfaces. Soil particles are separated and drained, with dirty water replaced by clean water. The number of water fills depends on the selected wash cycle. The dishwasher features a multiple filter system with four separate filter meshes to separate dirty and clean water, enhancing performance with less water and energy. It also includes a smart wash system that automatically adjusts the wash cycle based on the load size and soil level, optimizing cleaning efficiency.
Usage Features
The dishwasher offers a range of wash cycles and options accessible via its front control panel.
Control Panel and Cycles:
The control panel is located on the front of the door and requires the door to be closed for settings and operation. The "Power" button turns the appliance on and off. Available wash cycles include:
- Normal: For regularly soiled dishes or silverware. Sensors determine soil level and adjust the cycle for optimized wash performance, water, and energy usage.
- Heavy: For hard-to-clean, heavily soiled dishes, pots, and pans.
- Express: For lightly soiled and pre-rinsed dishes and silverware.
- Rinse: A pre-rinsing cycle to prevent food from drying on dishes and reduce odor buildup until a full wash load is ready. Detergent should not be used with this cycle.
- Child Lock: Locks all controls to prevent accidental changes or starts. Activated or canceled by pressing the button for three seconds, with an indicator light showing its status.
Options:
Additional options enhance the wash cycles:
- Clean: Illuminates after a cycle is finished and turns off when the door is opened for five minutes or any button is pressed.
- Sanitized: Illuminates when a sanitized cycle is finished and turns off under the same conditions as "Clean."
- Rinse Aid: Turns on when rinse aid needs to be refilled.
- Heat Dry: Activates a heat drying process.
- Sanitize: Maintains water temperature at 158°F (70°C) max. for sanitizing dishes and glassware, available with Normal and Heavy cycles. This cycle is NSF certified.
- Delay: Allows delaying the start of a selected wash cycle by 2, 4, or 8 hours. The delay countdown begins after pressing "Start/Cancel." Opening the door during a delay requires pressing "Start/Cancel" again to resume. To cancel a delay, press and hold "Start/Cancel" for three seconds.
- Start/Cancel: Initiates the selected cycle and options. If not pressed after closing the door, the dishwasher pauses. Pressing and holding for three seconds cancels a running cycle, initiates a one-minute countdown, and drains the dishwasher before returning to standby.
Basic Operation:
- Loading: Scrape off large food pieces, bones, and pits. Loosen burned-on foods. Empty liquids from glasses. Rinse off acidic foods (mustard, mayonnaise, vinegar, lemon juice, tomato-based products) if the dishwasher won't be run immediately, as they can cause discoloration. If draining into a garbage disposal, ensure it's empty.
- Detergent: Fill the detergent dispenser with dry powder, liquid, or packets. The amount depends on water hardness and the selected cycle.
- Rinse Aid: Fill the rinse aid dispenser with liquid rinse aid. Adjust the dial to control the dispensed amount, which improves drying and reduces spots. The rinse aid light indicates low levels.
- Closing the Door: Ensure the door is securely closed.
- Cycle and Options Selection: Choose the desired wash cycle and any additional options.
- Starting: Press "Start/Cancel."
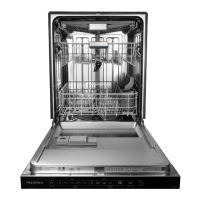
Loading Dishes:
- Upper Rack: Designed for cups, glasses, small plates, bowls, and dishwasher-safe plastic items. Place items with soiled surfaces facing down or toward the center, tilted for better drainage. Ensure items do not obstruct the middle spray arm.
- Bottom Rack: Accommodates plates, bowls, saucers, and cookware. Large items should be placed along the edge, facing down, to avoid obstructing spray arms or the detergent dispenser. Fold-down tines provide flexibility for larger items.
- Silverware Basket: Divided into three sections, can be placed in either rack. Load sharp items and knives with handles up to prevent injury. Ensure nothing protrudes through the bottom to block the lower spray arm.
Adding a Dish During a Cycle:
Open the door slowly and wait for wash action to stop. If the detergent dispenser is still closed, dishes can be added. If it's open, small quantities can be added; for large quantities, restart the cycle. Close the door and press "Start/Cancel" to resume.
Water Temperature and Pressure:
Hot water (120°F ~ 149°F or 49°C ~ 65°C) is crucial for optimal cleaning and drying. Run the hot water faucet near the dishwasher for several minutes before starting a cycle to ensure hot water enters the appliance. Water pressure should be between 20 psi and 100 psi for optimum performance.
Maintenance Features
Regular maintenance ensures optimal performance and longevity of the dishwasher.
Cleaning:
- Stainless Steel Panel: Clean the door and handle monthly with a soft cloth and standard household cleaner. Avoid appliance wax, polish, bleach, or chlorine-containing products.
- Control Panel: Clean gently with a soft, lightly dampened cloth.
- Stainless Steel Inner Door and Tub: Clean spots with a damp, non-abrasive cloth. The stainless steel tub will not rust or corrode.
- Filters: The multiple filter system collects debris and should be cleaned monthly.
- Remove the bottom rack.
- Rotate and lift out the cylinder filter.
- Lift out the fine filter.
- Remove the plastic and fabric filter.
- Flush all filters under running water.
- Replace the fabric, fine, and cylinder filters, locking the cylinder filter into place.
- Replace the bottom rack.
- Door and Tub Gaskets: Clean regularly with a damp cloth to remove food particles. Use a brush to clean the opening in the end of the gasket.
- Air Gap: If installed, ensure the air gap is clean for proper drainage. Turn off the dishwasher, remove the plastic cover, and clean with a toothpick.
Protecting for Long Periods (Freezing Prevention):
If leaving the dishwasher in an unheated place for an extended period, follow these steps:
- Turn off electrical power at the supply source.
- Turn off the water supply.
- Place a pan under the inlet valve, disconnect the water line, and drain it.
- Disconnect the drain line from the pump and drain the water.
To restore service, reconnect all lines, turn on power and water, fill detergent and rinse aid cups, and run a heated-wash cycle. Check for leaks.