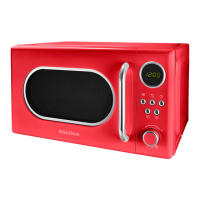
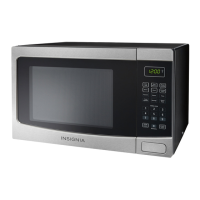
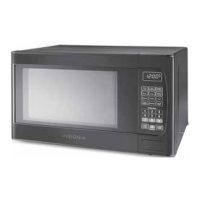
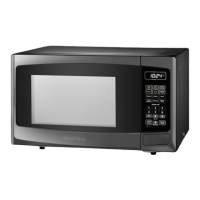
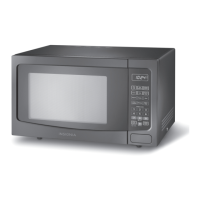
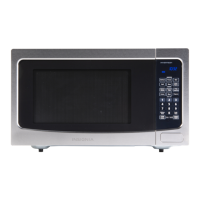
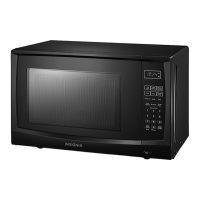
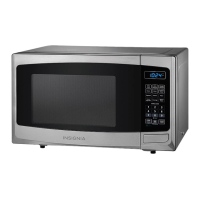
This document is a user guide for the Insignia .7 Cu. Ft. Retro Microwave Oven, models NS-MWR07R2 and NS-MWR07M2.
Function Description
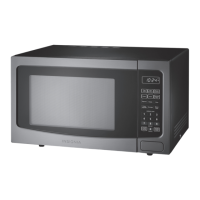
The Insignia .7 Cu. Ft. Retro Microwave Oven is designed for heating, cooking, and drying food. It offers a variety of cooking modes, including preset auto menus, quick cooking, defrosting by weight or time, and multi-stage cooking. The microwave features a retro design with a round viewing window and chrome details. It includes a child-lock function for safety and an Eco mode for energy saving.
Important Technical Specifications
- Rated Voltage: 120 V~60 Hz
- Rated Input Power (Microwave): 1,050 W
- Rated Output Power (Microwave): 700 W
- Oven Capacity: .7 cu. ft.
- Turntable Diameter: 10.3 in. (25.5 cm)
- External Dimensions (H×W×D): 10.2 × 17.3 × 14.1 in. (25.9 × 44 × 35.9 cm)
- Internal Dimensions (H×W×D): 8.1 × 12 × 11.9 in. (20.5 × 30.6 × 30.3 cm)
- Certifications: UL approved
- Power Cord Length: 39.4 in. (1 m)
- Net Weight: 21.2 lbs. (9.6 kg)
Usage Features
The microwave offers several user-friendly features:
Control Panel:
- Display: Shows time in standby mode, and cooking time, weight, and other information in cooking mode.
- Defrost Button (❄): Press once for defrosting by weight (dEF1, weight range 4 to 54 oz.), or twice for defrosting by time (dEF2). The defrost power level is fixed at PL 3.
- Microwave Button (≈): Press repeatedly to select power levels from 100% (PL10) down to 10% (PL1).
- Stop/Clear Button (||): Stops cooking, clears operations, and sets/unlocks the child lock (press and hold for three seconds).
- Adjustment Knob: Used to adjust settings such as time, weight, and menu selection.
- Kitchen Timer/Clock Button (L): Press once to set the kitchen timer (1 to 95 minutes), or twice to set the clock (1-12 hours, 0-59 minutes).
- Start/+30 Sec. Button (▷): Starts cooking, adds 30-second increments to cooking time (up to 95 minutes), and confirms settings.
Cooking Modes:
- Setting the Clock: Allows setting the time in 12-hour format. The oven exits setting if no changes are made within one minute or if the stop/clear button is pressed.
- Kitchen Timer: Functions independently of cooking, with a maximum setting of 95 minutes.
- Cooking in Microwave: Select power levels from 10% to 100% using the microwave button or adjustment knob, then set cooking time.
- Quick Cooking: In standby, press start/+30 sec. to cook at 100% power for 30 seconds, with each subsequent press adding 30 seconds (max 95 minutes). Alternatively, turn the adjustment knob left to set time, then press start/+30 sec.
- Auto Menu: Nine pre-programmed cooking modes (A-1 to A-9) for common foods like Popcorn, Beverage, Fresh Vegetable, Meat, Pizza, Potato, Pasta, Soup, and Reheat. Users select the menu number and weight, and the microwave automatically sets cooking time. Auto cooking cannot be used with multi-stage cooking.
- Defrosting by Weight (dEF1): Automatically sets defrost time based on the weight of the food (4 to 54 oz.).
- Defrosting by Time (dEF2): Allows manual setting of defrost time. The power level for defrosting is fixed at PL 3.
- Multi-Stage Cooking: Allows setting up to two stages, for example, defrosting followed by cooking. Auto cooking is not compatible with multi-stage cooking.
- Energy Saving (Eco) Mode: Turns off the LED display to save power. Activated by pressing the stop/clear button for less than three seconds in standby mode. Exited by pressing any button or opening the door. Only works when the door is closed and child lock is off.
- Checking Time and Power Level: During cooking, press the microwave button to see the current power level or the kitchen timer/clock button to see the current time.
- Child-Lock: Locks the microwave to prevent accidental use. Activated by pressing and holding the stop/clear button for three seconds.
- Turning Off the Buzzer: The buzzer can be turned off by pressing and holding the kitchen timer/clock button for three seconds in standby mode.
- Resetting the Turntable: If the turntable is not in its initial position after cooking, it will automatically reset, indicated by "7" on the display. This function only works at the end of a completed cooking cycle, not if cooking is paused or the door is opened.
Maintenance Features
- Cleaning: Keep the microwave clean, especially the interior. Clean the exterior with a damp cloth or sponge, avoiding water or cleaning solution dripping into air vents. Clean the interior with a damp cloth or sponge.
- Magnetron Protection: Do not remove the light brown mica cover in the microwave cavity, as it protects the magnetron.
- Turntable Care: Ensure the glass tray is never upside down or restricted. Both the glass tray and turntable ring must always be used during cooking. Place all food and containers on the glass tray. If the glass tray or turntable ring cracks or breaks, contact customer service.
- Microwave Energy Exposure: Do not operate with the door open, tamper with safety interlocks, or place objects between the door and oven front face. Do not operate if damaged.
- Grounding: The oven must be grounded. Connect only to a properly grounded outlet. Do not alter the plug. Use a 3-wire extension cord if necessary.
- Fire Risk: Do not overcook food, use combustible materials carelessly, or store paper products or food in the cavity. If materials ignite, keep the door closed, turn off, and unplug.
- Liquids: Liquids can overheat beyond boiling point without visible bubbling. Stir liquids before and halfway through heating. Use extreme care when inserting utensils.
- Materials: Refer to the provided tables for materials that can and cannot be used in the microwave. Avoid metal, plastic foam, and tightly closed containers.
- Placement: Place on a level surface with adequate clearance (3 in. from adjacent walls, 12 in. above). Do not block air vents. Do not mount under a cabinet or over heat-producing appliances.
- Servicing: Only qualified service technicians should service the oven.
- Power Cord: Avoid immersing the cord or plug in water, and keep the cord away from heated surfaces.
Package Contents
- .7 Cu. Ft. Retro Microwave Oven
- Glass tray
- Turntable ring assembly
- User Guide