6
www.insigniaproducts.com
STEP 2: Attach the left and right support bars and wall straps
You n e ed :
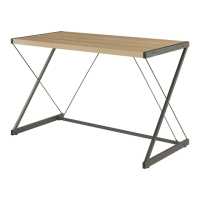
1 Align the straight end of the left support bar (4) with the hole on the left side of the bottom support bar (3), then
secure with an M6 × 15 mm bolt (D) using the hex wrench (F). Do not fully tighten the bolt.
2 Align the angled end of the left support bar (4) with the hole in the desktop, then secure with a Ø4 × 25 mm screw
(E) using a Phillips screwdriver.
3 Repeat steps 1–2 to attach the right support bar (5) on the other side of your desk, then fully tighten the bolts and
screws on both support bars.
4 Align the wall straps (H) with the two holes along the back edge of the desktop (1), then secure with Ø4 × 25 mm
screws (E) and washers (G) using a Phillips screwdriver.
E
Ø4 × 25 mm (4)
4
Left support bar
5
Right support bar
D
M6 × 15 mm bolts (2)
F
Hex wrench
G
Washers (2)
H
Wall straps (2)
Phillips screwdriver
 Loading...

