This document is a user guide for the Insignia 10 Cu. Ft. Top Mount Refrigerator, models NS-RTM10WH2, NS-RTM10WH2-C, NS-RTM10SS2, and NS-RTM10SS2-C. It provides essential information for setting up, using, and maintaining the refrigerator, along with important safety instructions and troubleshooting tips.
Function Description
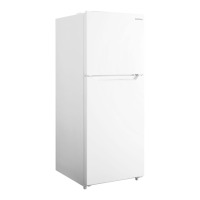
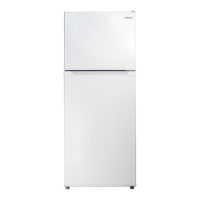
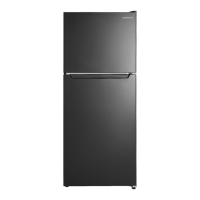
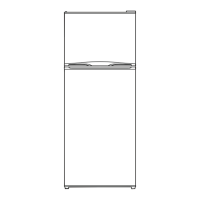
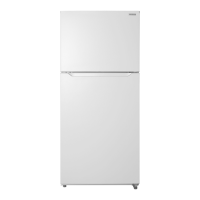
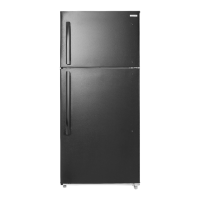
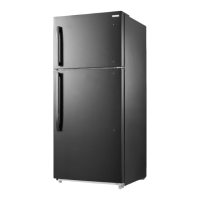
The Insignia 10 Cu. Ft. Top Mount Refrigerator is designed for household use to store food at appropriate temperatures. It features a top-mounted freezer compartment and a lower refrigerator compartment. The appliance uses R600a refrigerant and is designed for reliable, trouble-free performance. It operates within an ambient temperature range of 50°F (10°C) and 109°F (43°C).
Usage Features
Setting Up Your Refrigerator:
Before initial use, remove all packaging and clean the interior with a damp, warm cloth and a baking soda solution. Allow the refrigerator to stand for approximately six hours before plugging it in to allow the cooling system to settle. The refrigerator is heavy, so two people are recommended for moving it.
Location:
Place the refrigerator on a strong, level floor, avoiding carpeting or rugs. It is designed to be free-standing, not recessed or built-in. Avoid installing it in garages or outside. Position it away from direct sunlight and heat sources like stoves or radiators, as these can affect performance and increase electrical consumption. Ensure adequate ventilation by allowing at least 2 inches (5 cm) of space on the sides and top, and 5 inches (12.7 cm) at the back.
Power Source:
The refrigerator requires a 115V, 60Hz power supply with a 3-prong grounding plug. Do not use extension cords or ungrounded adapters, and ensure the power outlet is not controlled by a switch.
Leveling:
Leveling the refrigerator is crucial for proper door closure and sealing, which prevents cooling, frost, and moisture problems. Adjust the leveling feet by rotating them clockwise to raise or counter-clockwise to lower.
Door Reversal:
The refrigerator door can be reversed to open from the left side. This process involves removing and reattaching hinges and covers, and requires a Phillips screwdriver. After laying the refrigerator on its back for door reversal, wait six hours before plugging it in to prevent damage to internal components.
Using Your Refrigerator:
Temperature Control:
Upon first plug-in, the refrigerator defaults to the "COLDER" setting. It is recommended to wait 24 hours after turning on the refrigerator and freezer compartments before storing food to ensure they reach correct temperatures. The refrigerator temperature can be adjusted by pressing the "SET" button, which cycles through "COLDER," "COLDEST," and "COLD" settings. The "OFF" mode can be activated by holding the "SET" button for three seconds, which stops cooling in both compartments while the light remains active. This mode is useful if you leave home for an extended period, but all food should be removed to prevent spoilage.
The freezer temperature is controlled by a knob, with settings ranging from "COLD" to "COLDEST." The recommended freezer setting is indicated by an asterisk.
Humidity Control (Crisper):
The crisper drawer has a humidity control gauge with a slider. A single water drop indicates less humid conditions, suitable for fruits and vegetables that tend to rot (e.g., apples, avocados, ripe bananas). Three water drops indicate more humid conditions, ideal for leafy greens and vegetables that wilt (e.g., unripe bananas, broccoli, lettuce). Closing the gauge maintains higher water vapor, keeping greens crisper.
Adjusting Shelves and Door Racks:
Both refrigerator and freezer shelves are adjustable. To remove a shelf, lift it and pull it out. To replace, slide it in and lower it into position. Door racks can also be adjusted by holding the rack and tapping its bottom upwards, then removing it. To replace, align and press down until it clicks into place. Avoid placing too many heavy items in door racks to prevent breakage.
Removing the Crisper:
To remove the crisper, open the refrigerator door fully, lift the crisper basket with its glass cover, and pull it out. To replace, slide it into the compartment and lower it.
Tips on Saving Energy:
Locate the refrigerator in the coolest part of the room, away from heat sources. Allow hot foods to cool to room temperature before placing them inside. Wrap foods correctly and wipe containers dry to prevent frost buildup. Organize and label food to reduce door openings and search times. Avoid lining shelves with aluminum foil or wax paper, as this interferes with cold air circulation.
Tips on Storing Food:
Store cooked meats above raw meats to prevent bacterial transfer, covering them with cling film or foil. Leave space around food for cold air circulation. Wrap or cover each food item separately to prevent flavor transfer and drying out, except for fruits and vegetables in the crisper. Limit door openings to prevent warm air entry. Do not store foods that spoil easily at low temperatures (e.g., bananas, melons). Use lidded containers in the refrigerator to prevent moisture evaporation. In the freezer, wrap food in polyethylene film or aluminum foil. Do not block air vents. Avoid storing bottles in the freezer as they may break when frozen. Do not refreeze thawed food. Leave "air space" when freezing liquids for expansion. For best use of freezer space, freeze liquids in square blocks.
Check storage guidelines and "Best Before" dates on packaging. Ensure frozen food cabinets in stores are at the correct temperature. Buy frozen products last while shopping and keep them together to maintain coldness. Use insulated bags for transport. Freeze food in small quantities for faster freezing and thawing. When freezing large amounts of fresh food, select a low temperature range, then return to normal mode once frozen.
Maintenance Features
Cleaning Your Refrigerator:
Unplug the refrigerator before cleaning. Remove all food, shelves, racks, and the crisper. Clean doors, handles, and cabinet surfaces with a mild detergent and warm water. Wash the interior with a solution of one quart (.94 L) of lukewarm water to one tablespoon of baking soda. Clean racks, shelves, and drawers with a mild detergent. Keep door gaskets (seals) clean to ensure a tight seal and efficient operation. Ensure door gaskets are completely dry before plugging the refrigerator back in. Dry all surfaces and removable parts before reassembly.
Defrosting:
The refrigerator is "frost-free" and does not require manual defrosting.
Shutting Down for Long Periods (Several Months):
Turn off and unplug the refrigerator. Remove all food and clean the interior. Leave the door slightly open to prevent condensation, mold, or odor. Exercise extreme caution with children around an open refrigerator.
Moving Your Refrigerator:
Turn off and unplug the refrigerator. Remove all food. Securely tape down all loose items and tape the doors shut. Protect the exterior with moving blankets or pads. Ensure the refrigerator remains in an upright position during transportation.
Disposing of Your Refrigerator:
Do not treat the appliance as regular household waste. It should be taken to an appropriate waste collection point for recycling electrical components, following local regulations regarding flammable refrigerant and gas.