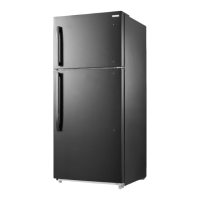
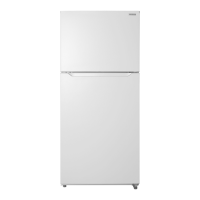
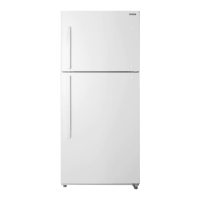
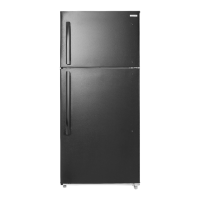
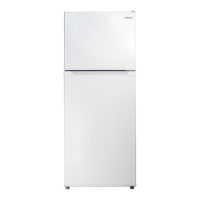
This document provides a user guide for the Insignia 18 Cu. Ft. Top Mount Refrigerator, models NS-RTM18WH8Q, NS-RTM18WH8Q-C, and NS-RTM18BK8Q. This refrigerator is designed for reliable and trouble-free performance, offering a state-of-the-art design for household and similar environments.
Function Description
The Insignia 18 Cu. Ft. Top Mount Refrigerator is a freestanding appliance designed for storing food and beverages. It features a top-mount freezer compartment and a lower refrigerator compartment, each with independent temperature controls. The freezer is frost-free, eliminating the need for manual defrosting. The refrigerator compartment includes wire shelves, humidity-controlled crisper drawers, and LED lighting to optimize food storage conditions. The electronic control system allows for precise temperature adjustments in the refrigerator, while a separate knob controls the freezer temperature. The appliance is designed to operate efficiently within a wide range of ambient temperatures, from 41°F (5°C) to 109°F (42.8°C).
Usage Features
Upon initial setup, the refrigerator should stand upright for approximately four hours before being connected to power to allow the cooling system to stabilize. The interior surfaces should be cleaned with lukewarm water and a soft cloth. It is recommended to wait about 24 hours after setting the thermostat before placing food inside.
Setting Up Your Refrigerator:
- Location: The refrigerator should be placed on a strong, level floor, away from direct sunlight, heat sources (like radiators, stoves, or amplifiers), and moist areas. It requires at least five inches of clearance from walls for proper airflow to the compressor.
- Leveling: The refrigerator must be level to ensure doors close and seal properly. This can be achieved by rotating the leveling feet clockwise to raise or counter-clockwise to lower the appliance. Assistance in pushing against the top of the refrigerator can make this adjustment easier.
- Power Supply: The refrigerator requires a 110V-120V, 60Hz power supply and must be plugged into a properly installed and grounded 3-prong outlet. An extension cord should not be used.
Installing the Door Handle:
The handle kit includes the handle assembly, screws, an Allen wrench, Allen wrench caps, and Allen wrench screws.
- Insert two Phillips-head screws into the refrigerator door and tighten.
- Align the door handle with the screws.
- Insert two Allen-head screws through the side of the handle and tighten with the Allen wrench.
- Place the screw caps on the screws.
Using Your Refrigerator:
- Refrigerator Temperature: The refrigerator temperature is controlled by a SET button on the control panel. Pressing the button cycles through settings from 1 (cold) to 5 (coldest). LED indicators show the current setting. To temporarily suspend cooling (standby mode), press and hold the SET button for three seconds; the STANDBY LED will illuminate. Press SET again to resume cooling. Allow 24 hours for the temperature to stabilize after adjustments.
- Freezer Temperature: The freezer temperature is adjusted using a control knob, with settings ranging from MIN to MAX (recommended). Allow 24 hours for the freezer to adjust and stabilize after making changes.
- Freezer Compartment: Place frozen food in the freezer as quickly as possible after purchase, following package instructions for storage times.
- Refrigerator Compartment: This compartment is suitable for storing meat, vegetables, and fruit.
- Door Racks: These are designed for eggs, canned liquids, bottled drinks, and packed food. Avoid placing too many heavy items. The middle door rack is adjustable; remove food before adjusting its height.
- Refrigerator Shelves: The two wire shelves can be adjusted to various heights. To remove a shelf, lift the front and pull it forward. When reinserting, ensure nothing obstructs it and gently push it back into place.
- Crispers: Use these drawers for vegetables and fruits. The crisper cover's sliding vent adjusts humidity. Low humidity is suitable for fruits like apples, peaches, and pears, while high humidity is better for leafy greens like lettuce, asparagus, carrots, and strawberries. To remove crispers, empty them, pull them forward, separate them from the slide, and push the slides back.
Reversing the Door Position:
The door position can be reversed for convenience, requiring assistance and tools (standard screwdriver, Phillips screwdriver, Allen wrench). All removed parts should be saved for reuse.
- Unplug the refrigerator and remove all food from door shelves.
- Remove the left cover plate and right top hinge cover, then unscrew and remove the right top hinge.
- Lift the freezer door up and away.
- Unscrew the three screws holding the center hinge, remove the hinge, and lift the refrigerator door up and away. Save the screws and hinge.
- Remove screw hole covers from the opposite side where the center hinge will be installed.
- Unscrew the two screws holding the bottom hinge and remove it.
- Remove screw hole covers from the opposite side where the bottom hinge will be installed.
- Unscrew the hinge pin from the bottom hinge, move it to the other hole, and secure the bottom hinge to the left side.
- Remove hole caps and plastic bushings from the top of both doors and save them.
- Insert hole caps and plastic bushings into the opposite sides of the doors.
- Remove the door block from the bottom of the refrigerator door and attach it to the other side.
- Attach the upper door self-locking block and the left door-open stopper (from the hinge kit) to the left side of the freezer door.
- Remove the right upper door self-locking block and right door-open stopper (do not remove parts from step 10) and store them.
- Attach the refrigerator door to the bottom hinge. Use the center hinge from the hinge kit (not the one removed in step 4) and attach it to the left side of the refrigerator.
- Place the freezer door onto the center left hinge. Attach the top left hinge (from the hinge kit) to the top of the refrigerator. Cover the hinge with the top left hinge cover (from the hinge kit) and cover the screw holes on the right side with the previously removed cover plate.
- Remove screw caps from door handles, remove four Allen-screws with the Allen wrench, and remove handles.
- Remove hole caps from the right side of the door and save them.
- Remove four Phillips-head screws from the left side of the door and install them into the holes on the right side.
- Attach handles to the right sides of doors with the Allen-head screws, tighten with the Allen wrench, and replace screw caps.
- Install the hole caps removed from the right side into the left side of the door.
Shutting Down for Long Vacations (Several Months):
- Turn off and unplug the refrigerator.
- Remove all food.
- Clean the refrigerator.
- Leave the door slightly open to prevent condensation, mold, or odor. Exercise caution with children to prevent entrapment.
Moving Your Refrigerator:
- Turn off and unplug the refrigerator.
- Remove all food.
- Securely tape down all loose items inside.
- Tape the doors shut.
- Ensure the refrigerator remains in an upright position during transportation.
Tips on Saving Energy:
- Place the refrigerator in the coolest area of the room, away from heat sources and direct sunlight.
- Allow hot foods to cool before placing them inside.
- Avoid overloading the refrigerator, which forces the compressor to run longer.
- Wrap foods properly and wipe containers dry to reduce frost buildup.
- Organize and label food to minimize door openings and search times.
Maintenance Features
The Insignia refrigerator requires minimal cleaning and maintenance for year-round use.
General Cleaning:
- Periodically wipe the cabinet with a mild detergent and warm water, then dry with a soft cloth to keep it looking new.
- CAUTION: Do not use gasoline, benzine, thinner, or other similar solvents, or abrasive cleaners, as these can damage the finish.
- Before cleaning, turn off the refrigerator and unplug it from the wall outlet.
- Remove all food.
- Wash the inside with a damp warm cloth soaked in a solution of one quart of lukewarm water to two tablespoons of baking soda solution.
- Keep the door gasket (seal) clean to maintain cooling efficiency.
- Dry the interior and exterior with a soft cloth.
Defrosting the Freezer:
This refrigerator is frost-free, so manual defrosting is not required. Regular cleaning as described above is sufficient.
Changing the Interior LED Light:
- Using a Phillips screwdriver, remove the screw securing the lamp cover, then remove the cover.
- Remove the LED light bulb from the lamp base.
- Install a new LED light bulb.
- Reinstall the lamp cover with the screw.
Troubleshooting:
The manual provides a troubleshooting guide for common issues, including:
- Refrigerator not operating: Check if it's plugged in, if the thermostat is in STANDBY, if a fuse is blown, or if there's a power failure.
- Compressor turning on/off frequently: This could be due to frequent door openings, a dirty door seal, high room temperature, or a large amount of recently added food.
- Food freezing in the refrigerator compartment: The thermostat might be set too cold.
- Refrigerator compartment not cold: Check door closure, recently added food, or thermostat setting.
- Unusual noises (popping, crackling, bubbling, gurgling): These are often normal sounds during operation.
- Moisture building on external walls: The door might be slightly open.
- Moisture building in the interior: Check door closure, humidity of the location, or improper food packaging.
- Door not closing completely: Food packages might be interfering, shelves might be out of position, or door gaskets might be dirty.
- Exterior of refrigerator is warm: This is normal.
Error Codes:
The LED display can show error codes indicating specific problems:
- LED 1 and LED 2 lit: Temperature sensor circuit problem.
- LED 1 and LED 3 lit: Freezer defrost sensor problem.
- LED 1 and LED 4 lit: Ambient temperature sensor problem.
If a component part is damaged, it must be replaced by the manufacturer, its service agent, or similar qualified persons to avoid a hazard. Do not attempt to repair the refrigerator yourself, as this invalidates the warranty. For replacement parts, contact Insignia Customer Service.