1 – Cable Adapter
Floating Pulley Bracket Assembly
Pulley 2 Pulley 3
1 – 3 ½” Pulley
1 – 3 ½” Pulley 2 – 3 ¾” Hex Bolts
1 – 4 ¾” Hex Bolt 1 – 2” Hex Bolt 2 – 1“ Step Spacers
2 – 3/8” Flat Washers 2 – 3/8” Flat Washers 2 – 3/8” Flat Washers
1 – 3/8” Lock Nut 1 – 3/8” Lock Nut 2 – 3/8” Lock Nuts
Step 7: Attach Pulley 2 to Arm Assembly using: One (3 ½” Pulley)
(Wrench Tighten Bolt) One (2” Hex Bolt)
Two (3/8” Flat Washers)
One (3/8” Lock Nuts)
Step 8: Attach Pulley 3 and retainer bolt to Base using: One (3 ½” Pulley)
(Wrench Tighten Bolts) Two (3 ¾” Hex Bolt)
Two (1” Step Spacers)
Two (3/8” Flat Washers)
Two (3/8” Lock Nuts)
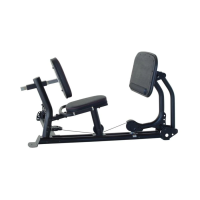
Step 9: Attach Cable End to Leg Press Base using: One (4 ¾” Hex Bolt)
(Wrench Tighten Bolt) Two (3/8” Flat Washers)
(Run Cable as shown in diagram. Make sure that the cable One (3/8” Lock Nut)
is routed between pulley 3 and the cable retainer bolt.)
Step 10: Attach Floating Pulley Bracket Assy to Cable Using: One (Cable Adapter)
Thread the cable end through the hole in the Floating Pulley Bracket Assy and attach Cable
Adapter, as shown in diagram above. This will prevent the cable end from pulling through.
Page 7
STEP 7
STEP 8
STEP 9
STEP 10
 Loading...