8
FOR USE BY QUALIFIED PERSONNEL ONLY
Advanced Controller Functions
Automatic Shut Off
The automatic shut off function is designed to
reduce electrical usage
machine is idle. When active, any user input such as
key presses or starting a heat press cycle will reset
the timer for the automatic shut off.
The automatic shut off has a non-
of 2 hours. By default, the automati
Setting the Automatic Shut Off
The automatic shut off can be set to
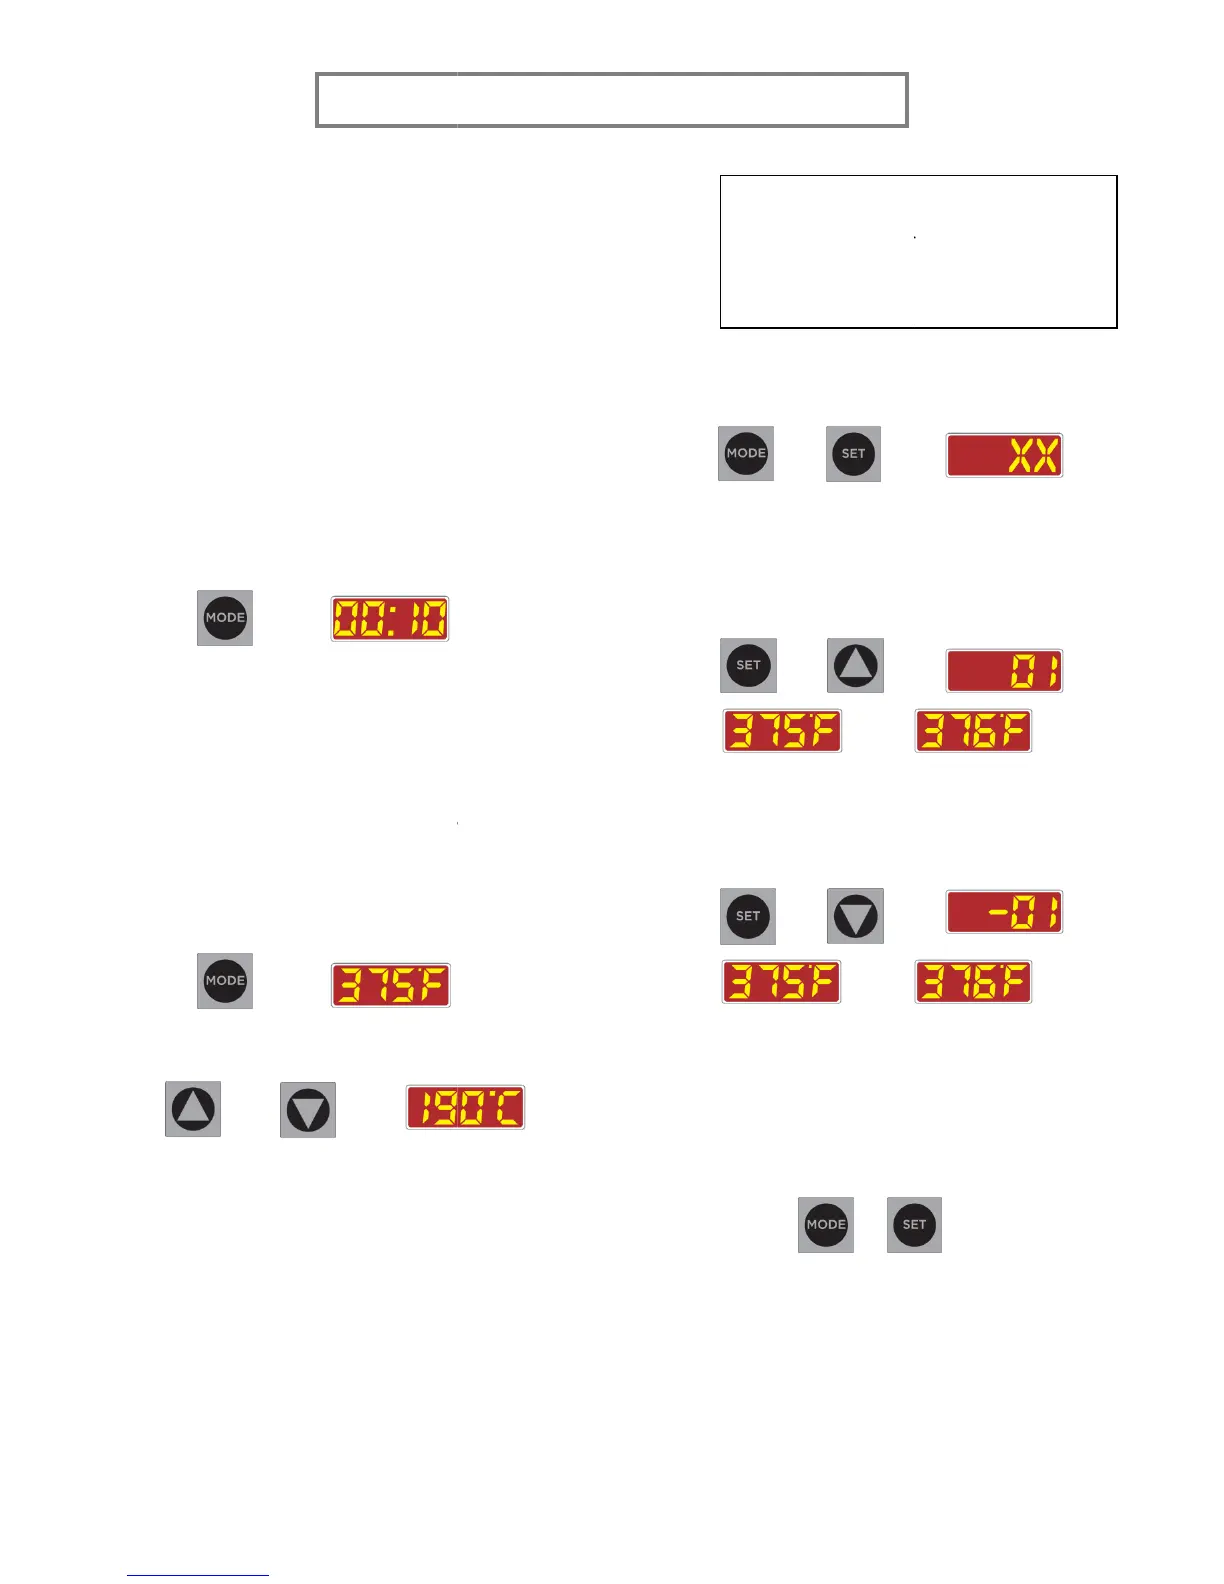
1. Press MODE to cycle to the
→
2. Press and hold UP and DOWN
seconds to turn the automatic shut off
or OFF.
a. ONE
automatic shut off is
b. TWO beeps indicate
automatic shut off is
Changing the Temperature Scale
1. Press MODE to cycle to the
→
2. Press and hold UP and
seconds to switch the temperature scale.
+ →
Setting the Temperature Offset
1.
Switch the temperature scale to Fahrenheit.
2.
Let the platen temperature stabilize. Use a
heat-reading tool such as a
temperature strips to find the temperature
FOR USE BY QUALIFIED PERSONNEL ONLY
The automatic shut off function is designed to
machine is idle. When active, any user input such as
key presses or starting a heat press cycle will reset
on.
or OFF.
seconds to turn the automatic shut off
ON
.
.
Changing the Temperature Scale
.
for 3 to 5
seconds to switch the temperature scale.
Switch the temperature scale to Fahrenheit.
Let the platen temperature stabilize. Use a
or
temperature strips to find the temperature
at the center of the platen.
3. Enter the
temperature offset adjust
pressing and holding
5 seconds.
+
4.
XX is the current temperature offset. Press
SET and UP
Increasing the offset will increase the
display temperature by the corresponding
amount.
+
→
Press SET and DOWN
of
fset. Decreasing the offset will decrease
the display temperature by the
+
→
5.
Change the offset so that the display
temperature matches the temperature
measured in step 1.
6.
been reached, press and hold
SET
for 3 to 5 seconds to exit
+
For the best accuracy, it is suggested
that the temperature offset adjustment
be done in the Fahrenheit scale.
at the center of the platen.
temperature offset adjust
by
and SET for 3 to
XX is the current temperature offset. Press
Increasing the offset will increase the
display temperature by the corresponding
to decrease the
fset. Decreasing the offset will decrease
the display temperature by the
Change the offset so that the display
temperature matches the temperature
ture offset has
been reached, press and hold
MODE and
for 3 to 5 seconds to exit
.
For the best accuracy, it is suggested
that the temperature offset adjustment
be done in the Fahrenheit scale.
 Loading...