10 Advisor Advanced ATSx500A User Guide
• Press Enter to confirm the warning. After this the setting procedure continues.
— or —
• Cancel the setting using the Clear button. After you have determined which
zones are active, check these and resolve the problem (for example, close
the door). Attempt the setting procedure again.
Note: If you do not cancel the setting, after fixing the problem the setting
procedure is continued automatically, and you can raise an alarm when you
proceed to the exit after closing the zone.
The manager of the system must inform users which keypads they can use, and
which areas they can set and unset.
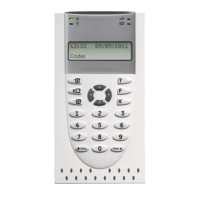
Set areas via LCD keypad
To set areas via LCD keypad:
1. Provide an allowed key sequence indicated in “Common key sequences” on
page 28.
2. If prompted, choose areas. See “Areas displayed during set and unset” on
page 12 for more information.
If there are inhibited or isolated zones in selected areas, they are listed on the
display.
3. If you want to continue setting, press Enter. Otherwise, press Clear to cancel
the set process.
See “Inhibiting / uninhibiting zones” on page 19 for more information.
The exit tone sounds. This may be a continuous tone or an intermittent tone.
4. Exit the premises using the designated entry/exit route.
The exit tone switches off.
When an area is set, its LED lights up red.
If programmed, after a delay the armed display is engaged, and LEDs are
extinguished.
Part set areas via LCD keypad
To part set areas via LCD keypad:
1. Provide an allowed key sequence indicated in “Common key sequences” on
page 28.
2. If prompted, choose the appropriate part set.
3. If prompted, choose areas. See “Areas displayed during set and unset” on
page 12 for more information.
If there are inhibited or isolated zones in selected areas, they are listed on the
display.