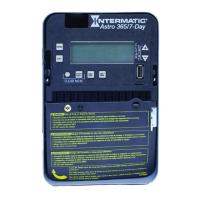
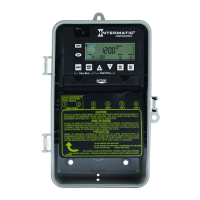
4. The LAT (latitude) entry screen appears showing the value of the selected geographical location.
If Then
LAT accuracy does not require
adjustment (TYPICAL)
Press ENTER/NEXT twice to scroll past the latitude and longitude screens to the
TZCENT screen. Go to step 6.
Greater LAT accuracy is warranted Press + or - to select the latitude and press ENTER/NEXT. Go to step 5.
5. The LN (longitude) entry screen appears showing the value of the selected geographical location.
If Then
LN accuracy does not require
adjustment (TYPICAL)
Press ENTER/NEXT to skip the longitude screen. Go to step 6.
Greater LN accuracy is warranted Press + or - to select the latitude and press ENTER/NEXT. Go to step 6.
6. The TZCENT screen appears. Press + or - to scroll to the desired time zone and press MODE to save the settings.
(See table for a description of the available time zones)
If Then
TZHAI Hawaiian time zone
TZALS Alaskan time zone
TZPACI Pacic time zone
TZMntN Mountain time zone
TZCENT Central time zone
TZEAST Eastern time zone
TZATLN Atlantic time zone
TZNFLD Newfoundland time zone
Setting Sunup and Sunset Offset Times from Astronomic Sunup and Sunset Times
Normally, the time switch’s sunup and sunset times match the actual occurrence of sunup and sunset (astronomic sunup and sunset
times). In some cases it is desirable to change the time switch’s sunrise and sunset times so the circuit turns on or off either before
or after an actual sunup or sunset. For example, a user can set the lights in a parking lot to turn on 30 minutes before the normal
sunset time by changing the time switch’s sunset time to 30 minutes (a 30 minute offset) before the normal sunset time.
Follow this procedure to adjust sunup and sunset times or press MODE to skip this procedure.
1. Press MODE to advance to the Offset mode selection if this selection is not already active. The SET and SUNUP icons appear
at the top of the display. The default sunup is displayed.
2. Press + or - to adjust the time for sunup and press ENTER/NEXT. OFFSET briey appears on the display, and then the offset
time (in minutes) is displayed.
NOTE: Offsets can be set to a maximum of 2 hours (120 minutes) before or after a sunup or sunset time. A minus sign (-)
appears before the digit to indicate minutes before a sunup or sunset time.
3. If needed, press + or - to adjust the offset time value and press ENTER/NEXT to save the value.
4. The updated sunup time is displayed.
5. Press MODE to save settings. The time switch displays SET and SUNSET icons at the top of the display. The default sunset
time is displayed.
6. Press MODE to save.
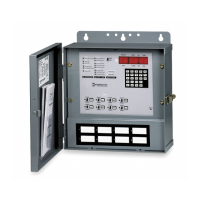
Programming Events
Users can congure Astro events, xed timed events, or a combination of Astro and xed timed events.
Perform the applicable instructions below.
• To set Astro events (sunset and sunup) only, perform the procedure; Setting Astronomic On/Off Events
• To set xed timed events only, perform the procedure; Setting Fixed Timed Events
• To set a combination of Astro and xed events, perform both procedures; Setting Astronomic Events and Setting Fixed Events
Setting Astronomic On/Off Events
Access the Astro Events screen to congure Astronomic ON/OFF events. One Astronomic ON event (at sunset) and/or one
Astronomic OFF event (at sunup) can be enabled for selected days of the week. Follow this procedure to set Astro ON/ OFF Events
(if no astronomic events need to be set press MODE to move to the next mode selection).
1. Press MODE to advance until SET ASTRO ON/OFF EVENTS SUNSET icons appear on the display (if this selection is not
already active). The display also shows the ON@ icon and the LOAD icon above the circuit ON/OFF button.
2. If an event is not set the time display will show - - - -.
3. Press DAY. The screen displays SUNSET and the days of the week.
 Loading...