Do you have a question about the Intermatic ET2805C and is the answer not in the manual?
Disconnect power before servicing, use proper wiring, and ensure secure connections.
Avoid touching circuit board components to prevent damage from static discharge.
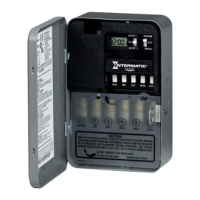
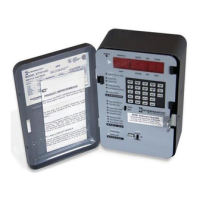
Follow step-by-step instructions for mounting and wiring the time switch.
Overview of programming steps including date, time, Astro, DST, and events.
Procedure to set the current date (month, day, year) on the time switch.
Instructions for setting the current hour, minute, and seconds.
Configure automatic DST adjustments using US, Mexico, or custom rules.
Select country, state/province, and geographical section for accurate sunup/sunset times.
Modify sunup and sunset times by a specific offset in minutes.
Configure automatic ON/OFF events based on sunset and sunup times.
Program specific ON and OFF times for circuits on selected days.
Set start and end dates for holidays to control circuit operation.
Choose between AUTO, ENERGY SAVER, or MANUAL operating modes.
Procedure to remove programmed Astro or fixed events from the time switch.
Steps to clear all programmed settings and restore factory defaults.
Transfer programmed settings from the time switch to a USB memory stick.
Load programmed settings from a USB memory stick to the time switch.
List and explanation of error codes encountered during USB operations.
Details on input voltage, power consumption, switch ratings, and enclosure types.
Details of the limited two-year warranty coverage and exclusions.
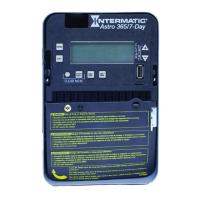
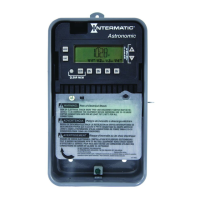
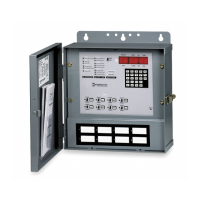
The Intermatic ET2805C, ET2805CR, and ET2805CP are 1-circuit electronic astronomic 7-day time switches designed for automatic load switching based on a weekly schedule. These devices offer a 100-hour backup, ensuring settings are retained during power outages.
The ET2805 series time switches automatically control electrical loads by switching them ON and OFF according to a programmed weekly schedule. They support up to 48 fixed ON and 48 fixed OFF events (96 total), which can be applied to any combination of days. Additionally, they feature two astronomic events (one ON at sunset and one OFF at sunup) that automatically adjust to the actual sunrise and sunset times based on the geographical location (Astro zone) set by the user. Users can also configure offset times for sunup and sunset events, allowing loads to switch before or after the actual astronomic times. The device includes holiday programming, with up to 50 holiday blocks, each with a start and end date, during which the relays remain OFF. The time switch can operate in three modes: AUTO (default, follows programmed events), ENERGY SAVER (similar to AUTO but with manual ON/OFF activations limited to a 2-hour period, extendable by 2 hours with additional presses), and MANUAL (does not follow programmed events, circuit activated only by the ON/OFF button).
The time switch features an LCD and panel-mounted control buttons for setup, review, and monitoring.
The device is covered by a limited two-year warranty, covering defects in material or workmanship, but excluding damage from accidents, abuse, unauthorized repair, or non-compliance with instructions. Warranty service can be obtained by returning the product to the dealer or by completing a warranty claim online.
| Brand | Intermatic |
|---|---|
| Model | ET2805C |
| Category | Switch |
| Language | English |