Do you have a question about the Intermatic FM1D14 Series and is the answer not in the manual?
Disconnect power prior to installation.
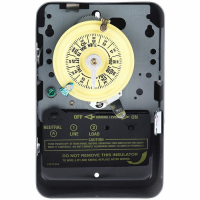
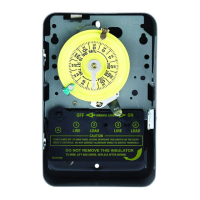
Connect wiring in accordance with applicable national and local electrical codes.
Step-by-step guide to reset, access 12:00 AM screen, and set time/day.
Procedure to set ON and OFF event pairs, including day selection.
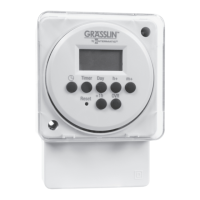
The Intermatic FM1D14 Series is a versatile 24-hour/7-day time switch designed for precise control of electrical loads. This device is ideal for applications requiring scheduled ON/OFF switching, offering both general-purpose and specialized load control capabilities. Its robust design and comprehensive programming options make it suitable for a wide range of residential, commercial, and industrial settings.
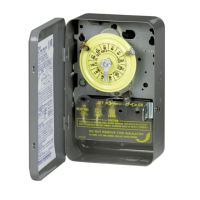
The core function of the FM1D14 series timer is to automate the switching of electrical circuits based on user-defined schedules. It operates as a time-based relay, opening or closing a circuit at specific times on specific days of the week. The timer supports both Normally Open (NO) and Normally Closed (NC) contact configurations, providing flexibility for various wiring requirements. This allows it to control a diverse array of loads, including lighting, motors, and other electrical equipment.
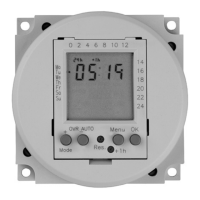
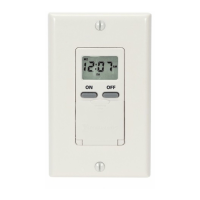
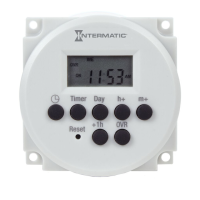
The timer features a clear digital display that shows the current time, day of the week, and operational mode. It can store up to seven ON/OFF event pairs, enabling complex and varied scheduling throughout the week. Each event pair consists of an ON time and an OFF time, which can be programmed for individual days, every day of the week, weekdays only, weekends only, or specific combinations of days (e.g., Monday through Saturday, Monday/Wednesday/Friday). This granular control ensures that electrical loads operate only when needed, contributing to energy efficiency and operational cost savings.
In addition to scheduled operations, the FM1D14 includes an override function. This allows users to temporarily change the current ON/OFF status of the relay without altering the programmed schedule. The override remains active until the next programmed event, at which point the timer reverts to its scheduled operation. This feature is particularly useful for temporary adjustments, such as extending lighting hours for an event or turning off equipment for maintenance.
The timer is designed with a carry-over function, ensuring that programmed schedules and the current time are maintained even during power outages. With a carry-over capacity of 2500 hours (fully charged), the device can continue to operate accurately for an extended period without external power, minimizing disruptions to automated processes. Upon power restoration, the relay will return to its current programmed state, ensuring seamless operation.
Setting up and operating the FM1D14 timer is designed to be intuitive, guided by a series of buttons and a digital display. The initial setup involves resetting the unit, which clears all previous settings and prepares it for new programming. The time of day and day of the week are easily set using dedicated "h+" (hour plus), "m+" (minute plus), and "Day" buttons, along with a "Timer" button for navigation. The timer also includes a "+1h" button specifically for adjusting to Daylight Saving Time, simplifying the process of seasonal time changes.
Programming events is a straightforward process. Users navigate through event slots using the "Timer" button and define ON and OFF times for each event pair. The "Day" button allows for flexible selection of days for each event, offering options from single days to various weekly patterns. The display provides clear feedback, showing dashed lines for unset events and confirming programmed times. The ability to program up to seven ON/OFF event pairs provides extensive scheduling flexibility for diverse applications.
The daily operation of the timer is indicated by various modes displayed on the screen, such as "Auto ON" and "Auto OFF," which show when a setpoint has been triggered. "OVR ON" and "OVR OFF" indicate when the relay has been manually overridden to an ON or OFF status, respectively. This visual feedback keeps users informed about the timer's current operational state.
Modifying existing events is as simple as accessing the desired event through the "Timer" button and then using the "h+", "m+", and "Day" buttons to make changes. The timer also supports the deletion of events, where dashed lines appear to confirm the event has been removed. Importantly, deleted events can be retrieved if needed, providing a safety net against accidental deletions, until a new event is programmed in their place.
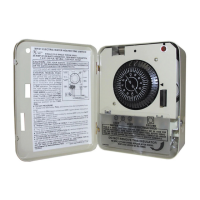
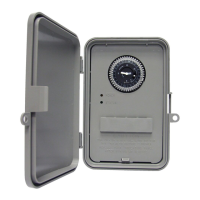
The FM1D14 timer can be mounted in two ways: surface-mounted inside a panel or flush-mounted, offering installation flexibility to suit different enclosure designs and aesthetic preferences. Its compact dimensions ensure it can fit into various spaces.
The FM1D14 series timer is designed for reliability and minimal maintenance. Its robust construction and high-quality components contribute to a long operational life. The primary maintenance-related feature is the reset function. In the event of a timer malfunction or to clear all previous settings, a blunt object can be used to press the "Reset" button. This action restores the unit to its factory default state, deleting all programmed settings and allowing for a fresh start. This simple reset mechanism helps in troubleshooting and reconfiguring the timer as needed.
The carry-over battery, which maintains time and program settings during power outages, is designed to be long-lasting. While not user-replaceable in the field, its extended capacity minimizes the need for intervention. The timer's ability to automatically resume its programmed state after a power loss also reduces the need for manual adjustments, contributing to its low-maintenance profile.
For installation, the manual emphasizes the importance of disconnecting power and adhering to national and local electrical code requirements, ensuring safe and proper wiring. This proactive approach to installation helps prevent issues that might otherwise require maintenance. The clear wiring diagrams provided in the manual further assist in correct setup, reducing the likelihood of wiring errors.
Overall, the FM1D14 series timer is engineered for dependable, set-and-forget operation, with user-friendly programming and a straightforward reset function being its main maintenance-related features. Its design prioritizes operational continuity and ease of use, making it a reliable solution for automated electrical control.
| Brand | Intermatic |
|---|---|
| Voltage | 120 VAC |
| Voltage Rating | 120 VAC |
| Frequency | 60 Hz |
| Programmable | Yes |