21
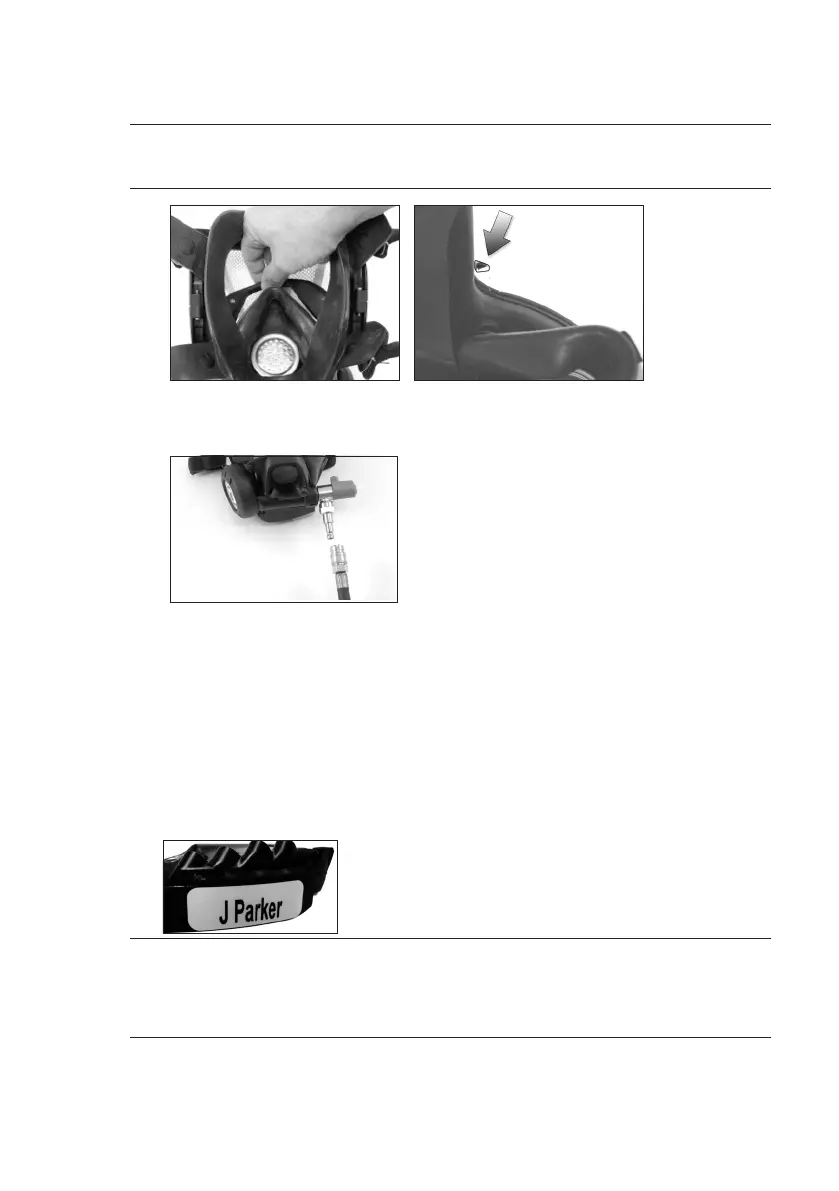
3. Install the HUD inside the face mask between the inside of the mask visor and the
nose cup with the LED’s facing upward.
NOTE! SMALL LUGS PROTRUDING ON THE INSIDE OF THE VISOR (ONE ON EACH SIDE) SECURE THE HUD INSIDE
THE MASK. THE HUD MUST BE FULLY PUSHED DOWN INSIDE THE MASK AND SECURED UNDER THE LUGS ON
BOTH SIDES FOR THE OPTIMAL FIELD OF VISION AND VIEWING OF THE LED DISPLAY.
Lug on
inside of
visor
4. Connect the breathing valve to the medium pressure supply hose and the by-pass
unit. The locking sleeve of the female quick coupling will automatically move
forward and snap into place, locking the breathing hose in place.
5. Pull lightly on the breathing hose to check that the quick connection is securely
locked.
2.7 LINKING THE HUD
The HUD must be linked together with the SCBA (BAC) before use. The linking only
needs to be performed once as long as the same SCBA (BAC) and HUD will be used
together. If a SCBA will be used with different HUDs it has to be linked before each
use.
Each HUD is labeled with an individual reghter’s “NAME”. The example below
shows reghter “J Parker” HUD.
IMPORTANT! THE HUD IS PROGRAMMED WITH AN INDIVIDUAL FIREFIGHTER’S “NAME” USING THE INMODE
DOWNLOAD KIT. AFTER THE HUD HAS BEEN PROGRAMMED, A LABEL WITH THE FIREFIGHTER’S “NAME” IS
PLACED ON THE HUD. PROGRAMMING THE HUD CAN ONLY BE DONE BY INTERSPIRO OR A PERSON THAT
HAS RECEIVED TRAINING BY INTERSPIRO USING THE INMODE PROGRAM. THE PROGRAMMING IS ONLY DONE
ONCE, PRIOR TO PUTTING THE SCBA INTO SERVICE.
The linking of the HUD can only be performed with the SCBA unpressurised. The HUD
must be near the BAC during linking.