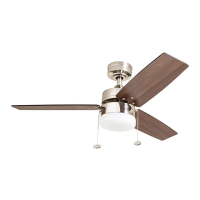
Motor Screw
Blade
Motor
Assembly
10
ASSEMBLY INSTRUCTIONS
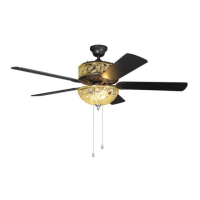
15. Install the bulbs into the sockets of the light kit.
Important: Make sure to allow the bulbs to cool before
you replace them.
16. Loosen the three thumbscrews near the bottom of
the light kit. Lift the glass bowl into the light kit and re-
tighten the previously loosened thumbscrews to secure.
17. Attach pull chain extensions to the pull chains.
Note: When facing the reverse switch, the fan pull chain
is on the left and the light pull chain is on the right.
Thumbscrew
Light Kit
Glass Bowl
Pull Chain Extension
Reverse
Switch
Light Kit
14
15
16
17
Bulb
14. Attach a blade assembly to the underside of motor
assembly using previously removed motor screws.
Completely secure each blade assembly before moving to
the next.
Turn ON the electrical power at the main fuse or circuit
breaker and the wall switch.
Installation is complete.