EasyManua.ls Logo

Intertek RSS52 - User Manual

Intertek RSS52
12 pages
Print Icon
To Next Page IconTo Next Page
Loading...
MODEL NO.:RSS52
Page
1
Professional Installation Recommended
Note: Approximate time of assembly is 30 min to 1 hour
PRINTED IN CHINA
READ AND SAVE THESE
INSTRUCTIONS
Installation Guide
MODEL NO.:
RSS52
Table of Contents:
Safety tips Pg.2
Unpacking your fan. Pg.3
Installation Preparation.Pg.4
Hanging Bracket Installation Pg.4
Tools and material required Pg.5
Electrical Outlet Box Pg.5
Bulb installation Pg.6
Fan Assembly Pg.7-8
Wiring Pg.8
Canopy Assembly Pg.9
Blade Assembly Pg.9
Light Kit Assembly Pg.10
Testing Your Fan Pg.10
Trouble Shooting Pg.11-12
Maintenance Pg.12
Question and Answer IconNeed help?

Do you have a question about the Intertek RSS52 and is the answer not in the manual?

Intertek RSS52 Specifications

General IconGeneral
BrandIntertek
ModelRSS52
CategoryFan
LanguageEnglish

Summary

Safety Tips

Electrical Connection Compliance

Ensure electrical connections comply with Local Codes, National Electrical Code, and ANSI/NFPA 70-1999.

Installation Clearance

Maintain 7ft clearance from floor and 30in from walls. Fan suitable for rooms up to 400 sq ft.

Outlet Box and Support

Use ETL listed boxes marked 'FOR FAN SUPPORT', securely mounted to support 50 lbs.

Wiring and Bulb Wattage

Use correct wire connectors for fan lead wires. Do not exceed indicated bulb wattage.

Fan Assembly and Installation

Unpacking and Parts Inventory

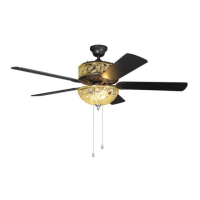
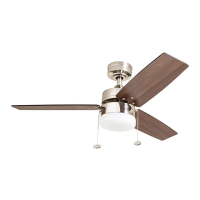
Carefully unpack fan, check all parts against inventory. Handle motor housing gently.

Installation Preparation

Ensure proper blade clearance and select a suitable mounting location.

Hanging Bracket Installation

Securely attach hanging bracket to outlet box, ensuring it supports fan weight.

Electrical Outlet Box Requirements

Use outlet box marked 'Suitable for Fan Support', secured to building structure.

Bulb and Flush Mount Assembly

Install correct bulbs, do not exceed wattage. Assemble flush mount components.

Fan Assembly with Down Rod

Thread wires through down rod, attach to motor housing yoke with pin and clip.

Wiring Instructions

Connect fan wires to ceiling wires, ensuring proper grounding and secure splices.

Canopy and Blade Assembly

Attach canopy to hanging bracket and assemble blades to motor housing.

Light Kit Assembly and Testing

Install light kit, attach shades, test fan speeds and light functions.

Troubleshooting and Maintenance

Troubleshooting Common Issues

Addresses fan not starting, noise, air movement, and wobbling.

Fan Wobble Solutions

Tips for reducing wobble, including checking screws and blade alignment.

Routine Maintenance

Check connections, clean fan periodically, and note that oiling is not required.

Related product manuals